
One of the big Android announcements at Google I/O 2019 was the introduction of gesture navigation on Android Q. Initially it may feel like this is purely a system-level change and does not affect apps directly, but closer inspection reveals that apps may need to change to properly accommodate this. The touch areas that the system now uses to detect these user gestures will overlap with the app UI, so apps which also have touch handling active near the edges of the display may need to accommodate the system gesture handling. In this series we’ll take a look at how this new behaviour affects apps, and provide some guidance for migrating various common app behaviours to play nicely with the navigation gestures.

Previously we looked at the gesture regions and how to ensure that we play nicely with them, but the other aspect of the new guidelines is expanding our layouts to draw behind the system status and navigation bars to create a more immersive UI. While this seems easy enough in principle there are some pitfalls that we need to be aware of, and getting this right can actually be quite tricky.
Fortunately Chris Banes has written a really nice article on this, and also gave a comprehensive talk about it. I strongly advise you to check out Chris’ material because he really covers the subject matter in a lot of depth. Rather than simply duplicate the areas that Chris has covered, I’ll cover the basics, but then try to cover some cases that Chris doesn’t, and directly address on real pain point.
The first thing that I have done in our layouts is to add an ImageView containing a cross to fill the layout. This will help us to see the view bounds later on:
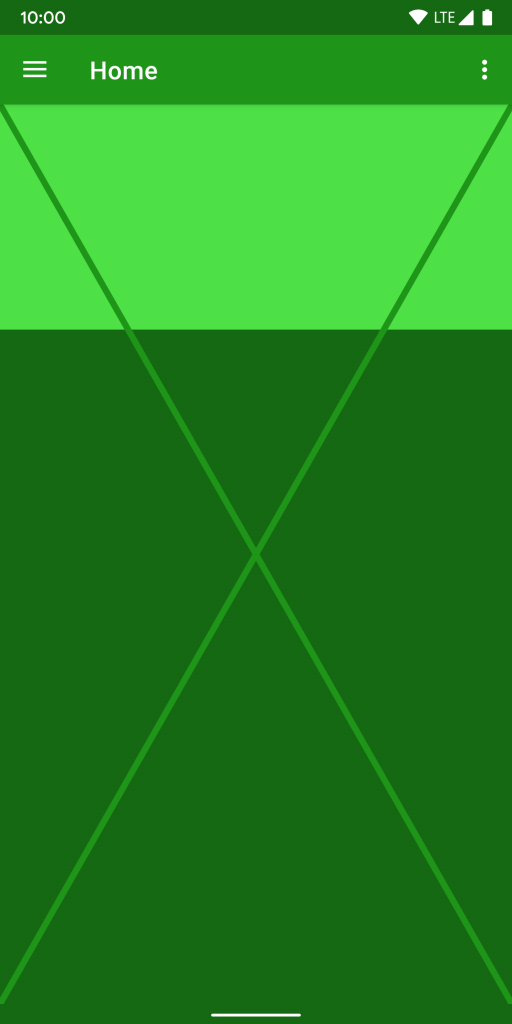
We can see from the cross that our main content layout extends from below the AppBar, but is not drawn behind the system navigation bar at the bottom – it stops 56 pixels above the bottom of the screen on a Pixel 2 XML which is the height of the system navigation bar.
Let’s now see how we can expand our UI to draw behind the system components. In our Activity we need to set some flags to control the system UI visibility:
class MainActivity : AppCompatActivity() {

    private lateinit var appBarConfiguration: AppBarConfiguration

    override fun onCreate(savedInstanceState: Bundle?) {
        window.decorView.systemUiVisibility =
            View.SYSTEM_UI_FLAG_LAYOUT_STABLE or
                    View.SYSTEM_UI_FLAG_LAYOUT_HIDE_NAVIGATION

        super.onCreate(savedInstanceState)
        setContentView(R.layout.activity_main)

        setupToolbar()
        setupNavigation()
    }
    .
    .
    .
}
The important thing here is that we need to set these flags before we perform the view inflation, so it’s a good rule of thumb to do this before we do anything else. The next thing that we can do is alter our app theme slightly:
. . .
I have given a navigationBarColor of transparent white. This certainly will not be the correct thing in all cases – we’ll look at this in a little more depth later on. I also set a windowBackground to our primary dark colour. This will give our UI a dark green background so that we can see it drawing behind the system controls. I am leaving the status bar the default colour (which will be take from the app theme) and will be opaque. We could apply a different and / or transparent colour if required by overriding navigationBarColor in the theme.
If we run this, we get the following:
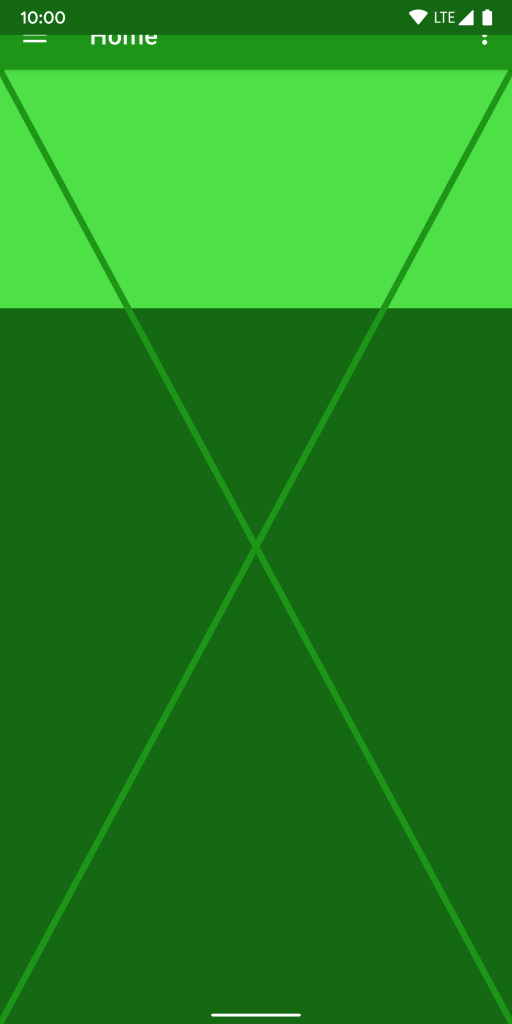
We can see from the cross that the main content area of our layout is drawing behind the navigation bar, and extends to the bottom of the screen. However, we have a problem because the AppBar is also being drawn behind the system status bar, and is being obscured as a result.
This begins to demonstrate what I said earlier that this can get complicated because we have some components that need to be drawn behind the system components, but others which don’t.
There is actually a really quick fix that we can use to ensure that the AppBar gets drawn in the correct position:
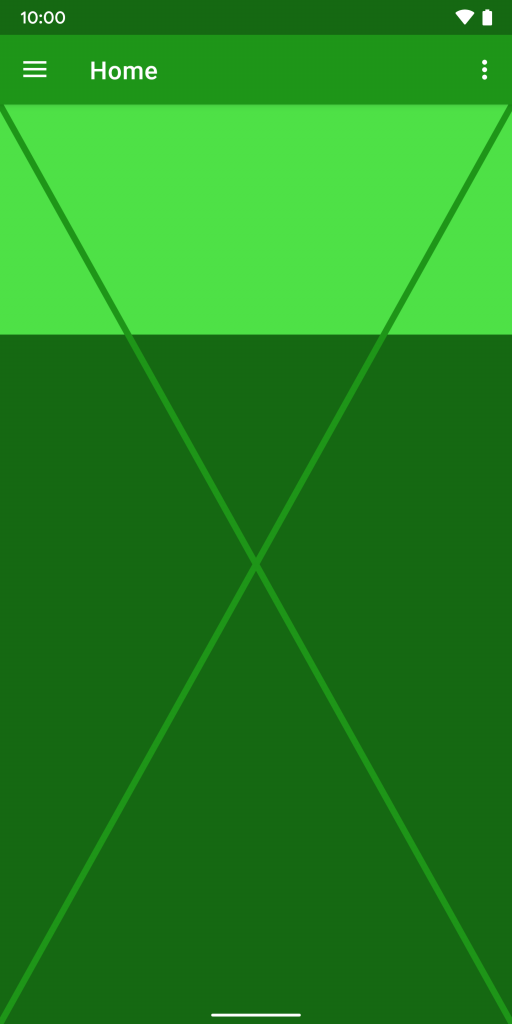
Adding android:fitsSystemWindows="true" causes this to be positioned inside the system windows, and we get the following:
This may seem like we’ve solved the problem and everything is good, but this doesn’t cover all of the use cases. There are times where we actually want to have different behaviours for the main content view because it has different UI.
For the remainder of this article, I am using a rather contrived example in order to show complexity. I really wouldn’t advise using both a Navigation Drawer and a BottomNavigationView wired up to the same navigation, and I probably wouldn’t advise having a BottomNavigationView within a Fragment – it would usually be better in the Activity layout where it will be consistent across all Fragments. However, doing this helps to demonstrate a particularly complex use case, which can be a little painful to resolve, so please bear with me!
If we add a BottomNavigationView to one of our Fragments we see a problem:
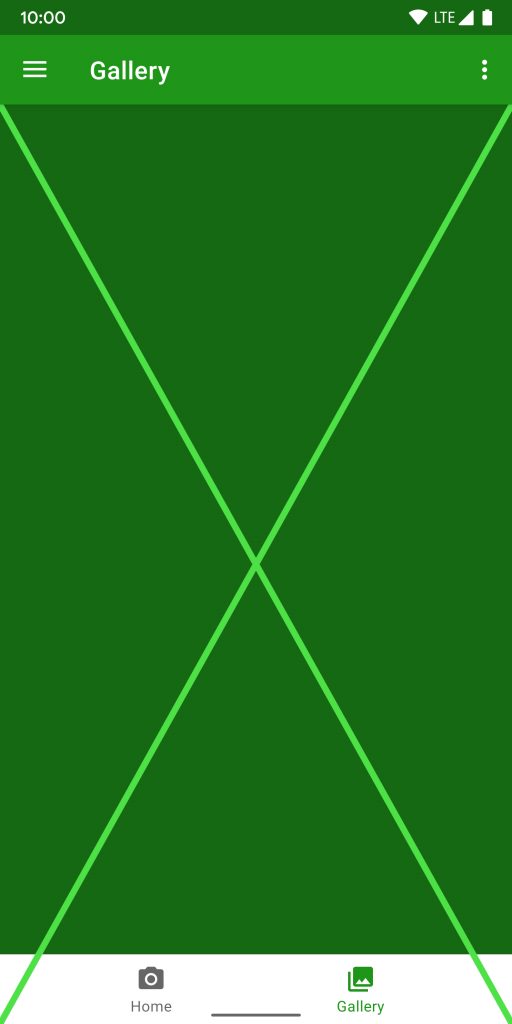
The BottomNavigationView is actually being drawn behind the system navigation bar, so we’re going to get some conflicts in touch areas. This will actually be even more of an issue if we have more navigation items, or if the user is using the older 2 or 3 button navigation which will have an even larger height:
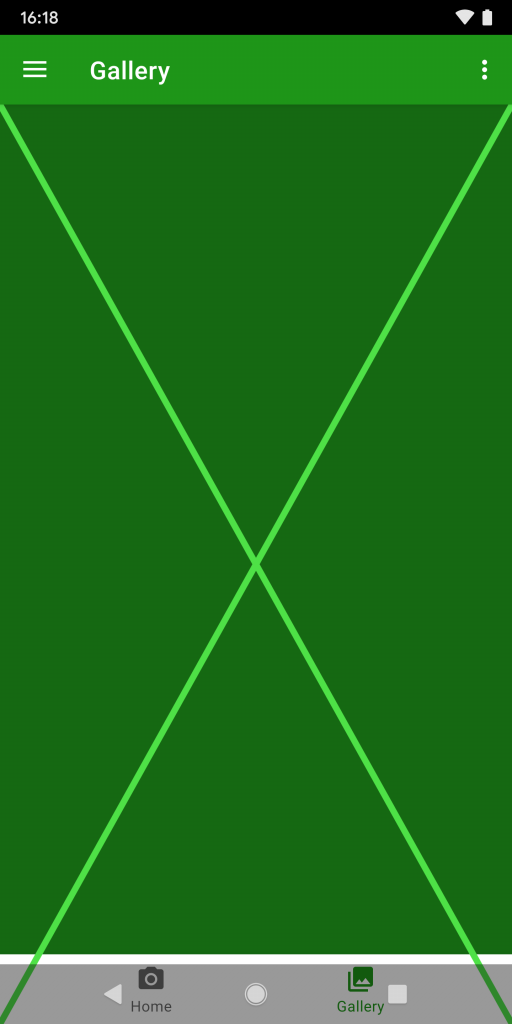
I have tinted the system navigation bar to demonstrate how much the two now overlap. The system navigation bar will get priority over the BottomNavigationView and it will be very difficult for the user to actually click on the BottomNavigationView items.
If using a BottomNavigationView was consistent throughout the app, then we can use fitSystemWindows as we did with the AppBar. However, the fake complexity that I have introduced here is because we have different behaviours within different Fragments, and therefore we have to selectively decide where and when we need to fit inside the system windows.
When we wish to do things selectively, we can add an OnApplyWindowInsetsListener to a view. At some point during the layout this will be called with a WindowInsets object which will give us the necessary information to offset our views from the system windows. In this case we can get windowInsets.systemWindowInsetBottom and we can apply a padding to position our BottomNavigationView above the system navigation bar.
That works fine if we do it in an Activity but inside a Fragment is a different matter. The OnApplyWindowInsetsListener callback will not happen on a Fragment unless the parent layout containing the Fragment undergoes a layout pass, and typically this does not happen if we switch between Fragments.
The simplest way to overcome this is to add the OnApplyWindowInsetsListener to the Activity and then pass any offsets to the Fragments:
class MainActivity : AppCompatActivity() {

    private lateinit var appBarConfiguration: AppBarConfiguration

    override fun onCreate(savedInstanceState: Bundle?) {
        window.decorView.systemUiVisibility =
            View.SYSTEM_UI_FLAG_LAYOUT_STABLE or
                    View.SYSTEM_UI_FLAG_LAYOUT_HIDE_NAVIGATION

        super.onCreate(savedInstanceState)
        setContentView(R.layout.activity_main)

        setupToolbar()
        setupNavigation()
    }

    private fun setupNavigation() {
        val drawerLayout: DrawerLayout = findViewById(R.id.drawer_layout)

        val navView: NavigationView = findViewById(R.id.nav_view)
        val navController = findNavController(R.id.nav_host_fragment)
        // Passing each menu ID as a set of Ids because each
        // menu should be considered as top level destinations.
        appBarConfiguration =
            AppBarConfiguration(setOf(R.id.nav_home, R.id.nav_gallery), drawerLayout)
        setupActionBarWithNavController(navController, appBarConfiguration)
        navView.setupWithNavController(navController)
        drawerLayout.setOnApplyWindowInsetsListener { _, windowInsets ->
            navController.graph.findNode(R.id.nav_gallery)?.addArgument(
                "BottomPadding",
                NavArgument.Builder()
                    .setType(NavType.IntType)
                    .setDefaultValue(windowInsets.systemWindowInsetBottom)
                    .build()
            )
            windowInsets
        }
    }
    .
    .
    .
}
In this case, because I’m using the Navigation library, I am adding an argument to the NavDestination R.id.nav_gallery named BottomPadding which contains the bottom inset.
Although I am not doing so here, it is possible to alter the insets and return updated values. This can be useful if you wish to effectively ‘consume’ an inset so that it does not get applied to other components.
Within the Fragment itself we extract this argument value and apply a padding to the overall layout:
class GalleryFragment : Fragment() {

    override fun onCreateView(
        inflater: LayoutInflater,
        container: ViewGroup?,
        savedInstanceState: Bundle?
    ): View? = inflater.inflate(R.layout.fragment_gallery, container, false).also {
        arguments?.getInt("BottomPadding", 0)?.also { bottomPadding ->
            it.updatePadding(bottom = bottomPadding)
        }
        it.navigation_view.setupWithNavController(findNavController())
    }
}
If we now run this we can see that we get the correct inset from the system navigation bar:
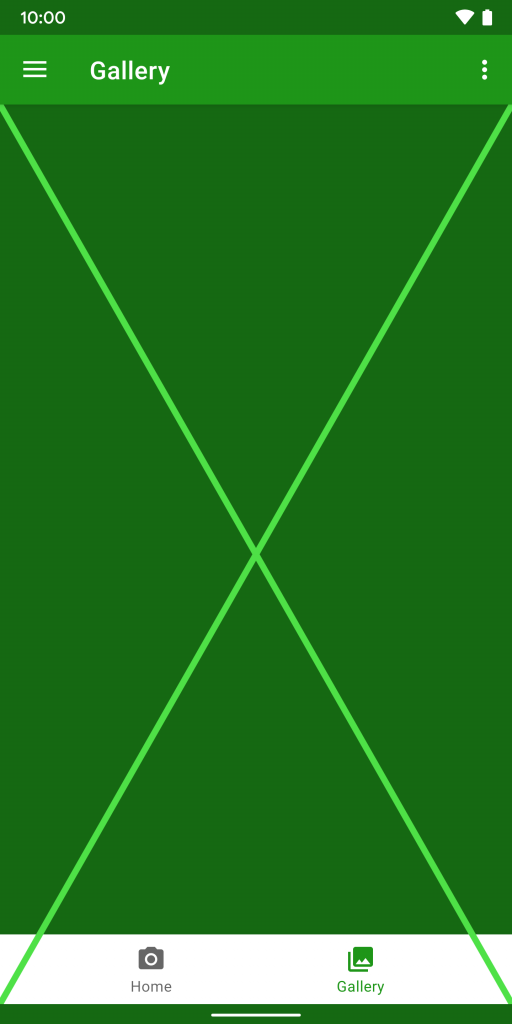
A nice side-effect that we can see here is how the system detects the background colour and alters the colour of the navigation indicator to contrast.
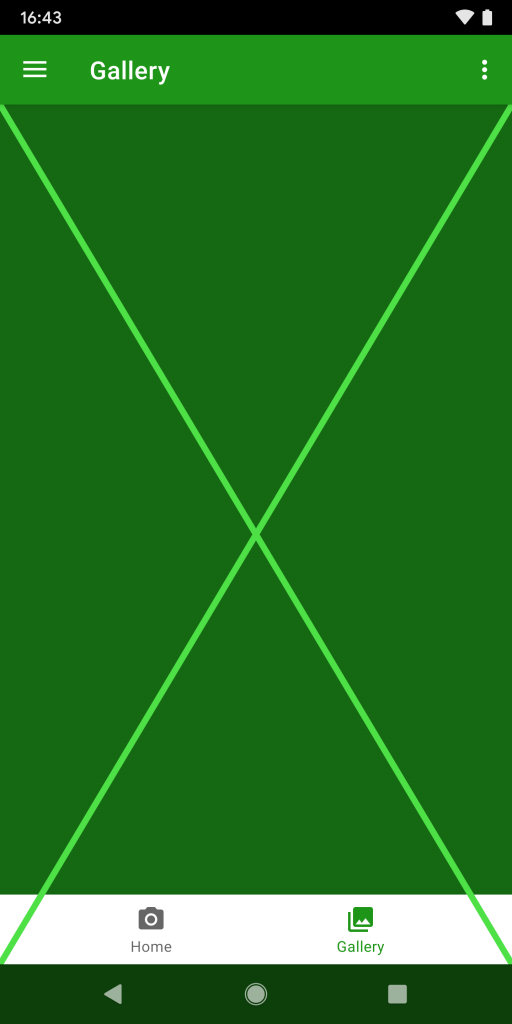
One thing that Chris mentions in his posts is how using padding values defied in your app is a bad idea, and this is perfectly demonstrated by comparing the gesture navigation bar (which is 56 pixels high) to the 3-button navigation bar (which is 168 pixels high). If we were to use static padding one of these would look horrible. But by using WindowInsets we get the correct behaviour:
While we’ve covered some of the trickier use cases here, it is usually a little easier than this. In many cases, simply applying fitSystemWindows appropriately can do the majority of the work.
That concludes our look at the new gesture navigation and how we can make our apps play nicely with it, while also offering a more immersive UI.
The source code for this article is available here.
© 2019, Mark Allison. All rights reserved.
Copyright © 2019 Styling Android. All Rights Reserved.
Information about how to reuse or republish this work may be available at http://blog.stylingandroid.com/license-information.
