
Sometimes we have designs which are not possible using the Framework or Material Components widgets as-is. While we can subclass those widgets to adapt them, there can sometimes be some hidden pitfalls along the way. In this article, we’ll examine such a case and see how careful use of the available tools can simplify our task.
I once faced such a challenge. The requirement was to position a dot at the top edge of a BottomNavView indicating the selected navigation item. The requirement also was for a cradle around the dot matching the background colour of the BottomNavView.
Initially this seemed fairly straightforward to me, but I soon ran in to some issues, as we’ll see.
The Dot
Drawing the dot itself was actually pretty easy. I subclassed the Material Components BottomNavigationView, added a handler to detect selection changes and overrode onDraw() to draw the dot at the selected position:
class ShapedBottomNavigationView @JvmOverloads constructor(
    context: Context,
    attrs: AttributeSet? = null,
    defStyleAttr: Int = R.attr.dottedBottomNavigationViewStyle
) : BottomNavigationView(context, attrs, defStyleAttr) {

    private val dotPaint = Paint().apply {
        style = Paint.Style.FILL
        isAntiAlias = true
    }

    private var dotAnimator: Animator? = null

    private var onItemSelectedListener: OnNavigationItemSelectedListener? = null

    var dotDiameter: Float = 0f
        set(value) {
            field = value
            invalidate()
        }

    var dotPadding: Float = 0f
        set(value) {
            field = value
            invalidate()
        }

    var dotColor: Int = Color.BLACK
        set(value) {
            field = value
            dotPaint.color = value
            invalidate()
        }

    private var dotPosition: Float = 0f
        set(value) {
            field = value
            invalidate()
        }

    var dotAnimationDuration: Long = 0L

    init {
        attrs?.also {
            context.withStyledAttributes(it, R.styleable.DottedBottomNavigationView, defStyleAttr) {
                dotDiameter = getDimension(R.styleable.DottedBottomNavigationView_dotDiameter, 0f)
                dotPadding = getDimension(R.styleable.DottedBottomNavigationView_dotPadding, 0f)
                dotColor = getColor(
                    R.styleable.DottedBottomNavigationView_dotColour,
                    getThemeColor(R.attr.colorPrimary)
                )
                dotAnimationDuration =
                    getInt(R.styleable.DottedBottomNavigationView_dotAnimationDuration, 0).toLong()
            }
        }
        super.setOnNavigationItemSelectedListener { menuItem ->
            updateDotPosition(menuItem.itemId, true)
            onItemSelectedListener?.onNavigationItemSelected(menuItem) ?: false
        }
    }

    override fun onAttachedToWindow() {
        super.onAttachedToWindow()
        doOnPreDraw {
            updateDotPosition(selectedItemId)
        }
    }

    override fun setSelectedItemId(itemId: Int) {
        super.setSelectedItemId(itemId)
        updateDotPosition(itemId, true)
    }

    override fun setOnNavigationItemSelectedListener(listener: OnNavigationItemSelectedListener?) {
        onItemSelectedListener = listener
    }


    private fun getThemeColor(@AttrRes attrId: Int) =
        TypedValue().let { typedValue ->
            context.theme.resolveAttribute(attrId, typedValue, true)
            typedValue.data
        }
    .
    .
    .
}
Much of this code is implementing some custom attributes which control the appearance of the dot. These attributes allow the appearance to be controlled from the layout or a Style. There are also getters and setters which allow these attributes to be controlled programmatically. These will become important later on.
Things that are worthy of mention are that we internally set an OnNavigationItemSelectedListener in the init block. We still allow an external agent to set its own, and we pass control to that after obtaining the current selection ID.
We calculate the position of the dot in updateDotPosition():
    private fun updateDotPosition(itemId: Int, animate: Boolean = false) {
        val selectedView = findViewById(itemId)
        val internalOffset = children.firstOrNull { it is BottomNavigationMenuView }?.x ?: 0f
        val newPosition = internalOffset + selectedView.x + (selectedView.width / 2)
        dotAnimator?.takeIf { it.isRunning }?.cancel()
        if (animate) {
            dotAnimator =
                ObjectAnimator.ofFloat(this, "dotPosition", dotPosition, newPosition).apply {
                    duration = dotAnimationDuration
                    interpolator = AccelerateDecelerateInterpolator()
                }.also { it.start() }
        } else {
            dotPosition = newPosition
        }
    }
The internalOffset value holds an internal offset to the start of the navigation items. If we look at a BottomNavigationView in Android Studio’s Layout Inspector, we can see that in Landscape orientation the menu items are centred inside a child layout within the BottomNavigationView:
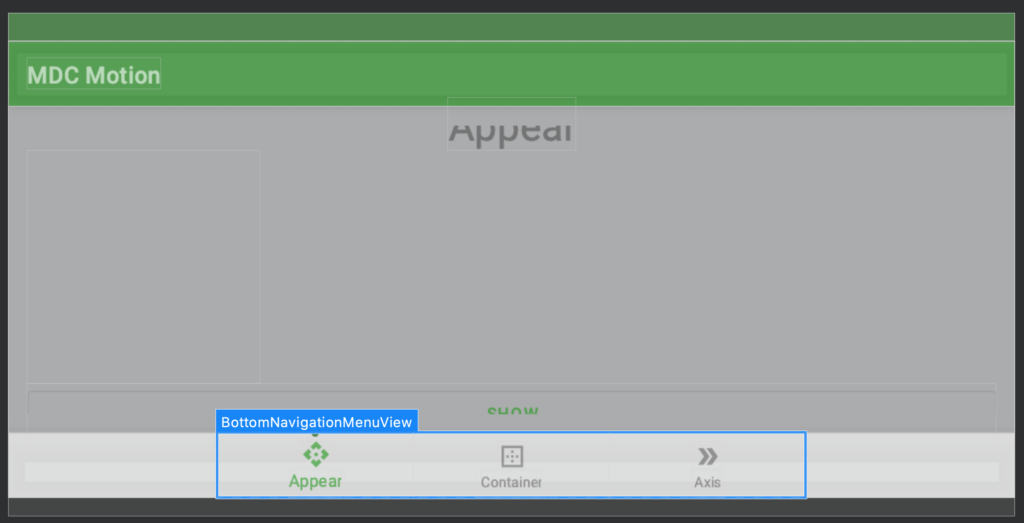
So we must determine the offset of this child view inside the BottomNavigationView:
We also animate the dot between selection points. We create an ObjectAnimator to animate the dotPosition field of this widget. The setter that we saw earlier facilitates this.
The final thing we need to do is draw the dot:
    override fun onDraw(canvas: Canvas) {
        super.onDraw(canvas)
        canvas.drawCircle(dotPosition, 0f, dotDiameter / 2f, dotPaint)
    }
}
One vital thing that we need to do is set android:clipChildren="false" on the parent layout containing our BottomNavigationView. The reason for this is that onDraw() is drawing outside of the view bounds and will normally be clipped. By adding this attribute to the parent layout we prevent this clipping, which permits the view to draw outside of its bounds.
Although it is not clear from the GIF, the dot animates smoothly between the different selections.
The Problem
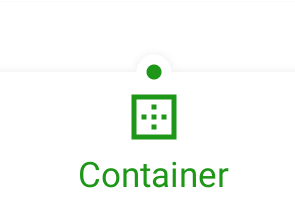
Getting to this point was fairly straightforward, but things began to get a little more tricky. The drawing of the cradle introduced some subtle problems. My initial approach was just to add a slightly larger circle matching the background colour behind the dot:
    override fun onDraw(canvas: Canvas) {
        super.onDraw(canvas)
        canvas.drawCircle(dotPosition, 0f, (dotDiameter / 2f) + dotPadding, backgroundPaint)
        canvas.drawCircle(dotPosition, 0f, dotDiameter / 2f, dotPaint)
    }
}
Initially this didn’t appear to have done anything:
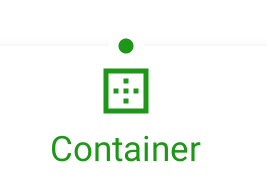
However, if I highlighted the view above the BottomNavigationBar it looked as though all was good:

But when I tapped on one of the navigation items there was a clear problem:

So there were actually two issues here. Firstly the cradle was difficult to see when both the BottomNavigationView and the view above it had the same background colour. Secondly, the ripple was being overdrawn by the cradle.
In the concluding article we’ll look at what causes both of these issues, and quite a neat solution for overcoming both of them.
While I like to publish accompanying source code for each article, in this case there is not fully working code. Therefore I’ll wait until the next article to publish the code.
© 2020, Mark Allison. All rights reserved.
Copyright © 2020 Styling Android. All Rights Reserved.
Information about how to reuse or republish this work may be available at http://blog.stylingandroid.com/license-information.
