
In this series we’re going to build an app to view the Mandelbrot set. While this is not necessarily something that is likely to be of direct use to the majority of app developers (except for those that have a desire to develop their own Mandelbrot set viewing apps), there are some techniques that we’ll explore along the way that most certainly will be of relevance to many.
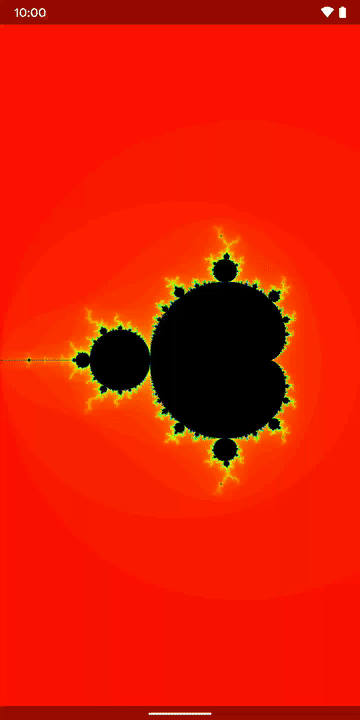
Previously we started adding gesture support to our app to permit the user to explore the Mandelbrot set. The feature image to the left loos very different to the basic Mandelbrot set that we have rendered thus far, but is actually a subset within that which is captured after zooming in using the techniques that we’re looking at in the previous article, and this one. By the end of this article we’ll have the functionality in place to do that.
The next thing that we need to add is the ability to scroll around without zooming. Having both of these mechanisms will allow the user to fully explore the Mandelbrot set. When we implemented zooming, we altered the size of a virtual view port, and scrolling is a case of adjusting the position of this view port. To do this we need to override the onScroll() callback of the SimpleOnGestureListener that we implemented in ViewportDelegate:
    override fun onScroll(
        e1: MotionEvent?,
        e2: MotionEvent?,
        distanceX: Float,
        distanceY: Float
    ): Boolean {
        updateViewport(
            viewPort.left + distanceX.toDouble() * viewPort.width / imageView.width.toDouble(),
            viewPort.top + distanceY.toDouble() * viewPort.height / imageView.height.toDouble(),
            viewPort.width,
            viewPort.height
        )
        renderImage()
        return true
    }
The onScroll() method handles the panning. Whenever a scroll event is received, we adjust the left and top offsets of the view port without altering the width and height. Once again we have to map the distance of the scroll from being relative to the ImageView (the distanceX and distanceY values are relative to the ImageView which is receiving the touch event) and apply the offset deltas to the view port by calculating the fractions (as we did in the scale() method, but this time we’re doing it all inline.
Finally we have the two methods that we’ve seen called throughout:
        val newLeft = min(max(left, 0.0), imageView.width.toDouble() - width)
        val newTop = min(max(top, 0.0), imageView.height.toDouble() - height)
        viewPort.set(newLeft, newTop, newLeft + width, newTop + height)
    }

    private fun renderImage() {
        if (currentJob?.isActive == true) {
            queuedRender = true
        } else {
            currentJob = launch(Dispatchers.Default) {
                val bitmap = renderer.render(
                    viewPort.width / imageView.width.toDouble(),
                    viewPort.left / imageView.width.toDouble(),
                    viewPort.top / imageView.height.toDouble()
                )
                withContext(Dispatchers.Main) {
                    imageView.setImageBitmap(bitmap)
                }
            }.apply {
                invokeOnCompletion(object : CompletionHandler {
                    override fun invoke(cause: Throwable?) {
                        if (queuedRender) {
                            queuedRender = false
                            currentJob = null
                            renderImage()
                        }
                    }
                })
            }
        }
    }
The updateViewport() method is pretty simple. It’s just a convenience method that recalculates the RectD named viewport using left, top, width, and height and maps these to the required left, top, right, bottom, values. I know that we could change RectD to do this, but I preferred to mimic how RectF works.
The renderImage() method requires a bit more analysis, and relies upon those state objects that we saw earlier. The problem that we have is that the image rendering can be fairly slow – particularly when we zoom in areas which require heavier computation. As a result, we could start kicking off lots of render requests as touch events may trigger rendering faster than we can actually render. The currentJob field holds a reference to the current rendering operation – Job is part of the Kotlin coroutines framework. We can interrogate currentJob to determine if is is active (i.e. a render operation is currently in progress) and, if so, we don’t want to immediately trigger another render operation, instead we want to ensure that a new render is queued so that the current state of the view port will be rendered at some point. This ensures that we only ever have one render operation in progress at any time, but means that once the view port enters a quiescent state (because touch operations stop), the final render will always show the current state.
If there isn’t currently an active currentJob then a new render operation is triggered. This uses a launch block (which returns a new Job that is now stored in currentJob). In this block we perform the render on a Default dispatcher (i.e. on a background thread) and then update the ImageView with the resulting Bitmap on the main thread.
The apply block registers an CompletionHandler which will be invoked when the Job completes either with success or error state. The completion handler will call renderImage() again if the queuedRender semaphore has been set since the Job was started.
If we compile this as-is we’ll get an error because the render() method of MandelbrotRenderer currently takes no augments, and we now pass in the zoom factor and X and Y offets that we obtain from the view port. So we need to update MandelbrotRenderer:
class MandelbrotRenderer(
    context: Context,
    private val renderScript: RenderScript = RenderScript.create(context),
    private val script: ScriptC_Mandelbrot = ScriptC_Mandelbrot(renderScript)
) {

    private var allocation: Allocation? = null
    private var bitmap: Bitmap? = null
    private var imageRatio: Double = 1.0

    fun setSize(width: Int, height: Int): Bitmap {
        imageRatio = width.toDouble() / height.toDouble()
        return Bitmap.createBitmap(width, height, Bitmap.Config.ARGB_8888).also {
            bitmap?.recycle()
            bitmap = it
            allocation?.destroy()
            allocation = Allocation.createFromBitmap(
                renderScript,
                bitmap,
                Allocation.MipmapControl.MIPMAP_NONE,
                Allocation.USAGE_SCRIPT
            )
        }
    }

    fun render(zoom: Double = 1.0, offsetX: Double = 0.0, offsetY: Double = 0.0): Bitmap? =
        bitmap?.run {
            val start = System.currentTimeMillis()
            script.invoke_mandelbrot(
                script,
                allocation,
                ITERATIONS,
                imageRatio,
                zoom,
                offsetX,
                offsetY
            )
            allocation?.copyTo(this)
            println("Generation complete in ${System.currentTimeMillis() - start}ms")
            bitmap
        }

    fun destroy() {
        allocation?.destroy()
        script.destroy()
        renderScript.destroy()
    }
}

private const val ITERATIONS = 180
The changes here are fairly minor. We first introduce an imageRatio variable which is calculated from the width and height of the ImageView. This will become important in the next article, so we’ll leave the explanation until then.
In the render() method we pass this ImageView along with the zoom, offsetX, and offsetY arguments on the the script:
void mandelbrot(
    rs_script script,
    rs_allocation allocation,
    int32_t iterations_value,
    double imageRatio,
    double zoom,
    double xOffset,
    double yOffset
) {
    width = rsAllocationGetDimX(allocation);
    height = rsAllocationGetDimY(allocation);
    double canvasWidth = (BASE_END_X - BASE_START_X);
    double zoomedCanvasWidth = canvasWidth * zoom;
    double canvasHeight = (BASE_END_Y - BASE_START_Y);
    double zoomedCanvasHeight = canvasHeight * zoom;
    double canvasRatio =  canvasWidth / canvasHeight;
    if (canvasRatio > imageRatio) {
        double scaleFactor = canvasRatio / imageRatio;
        startX = BASE_START_X + (canvasWidth * xOffset);
        endX = startX + zoomedCanvasWidth;
        startY = (BASE_START_Y * scaleFactor) + (canvasHeight * yOffset * scaleFactor);
        endY = startY + (zoomedCanvasHeight * scaleFactor);
    } else {
        double scaleFactor = imageRatio / canvasRatio;
        startX = (BASE_START_X * scaleFactor) + (canvasWidth * xOffset * scaleFactor);
        endX = startX + (zoomedCanvasWidth * scaleFactor);
        startY = BASE_START_Y + (canvasHeight * yOffset);
        endY = startY + zoomedCanvasHeight;
    }
    iterations = iterations_value;
    rsForEach(script, allocation, allocation);
}
We only need to update the calculated startX, startY, endX, and endY values for the existing root kernel to render the specified view port. These are one-off calculations which are performed when the script is invoked, and do not alter the root kernel itself (which is executed for each individual pixel). I won’ go in to the specifics of these calculations other than to say that the BASE_* constants define the bounds on the set, and we calculate the area that we want to render based upon these with the imageRatio, zoom, xOffset, and yOffset applied. This will render the view port, and we now get this behaviour:
The user is now able to zoom in, and pan around the Mandelbrot set, but there’s a lot of jank because the rendering times (in the order of hundreds or even thousands of milliseconds) are far in excess of the 16ms we need to obtain 60 fps. However it is clear that it’s now possible to explore the Mandelbrot set with the app.
I cannot leave this without saying a big thank you to Sebastiano Poggi who has played with some early versions of the app as I have been developing it, and has given some excellent feedback and suggestions – more details of that in the next article. However, when playing with it, Seb had an unstoppable urge to create the following:
Please don’t be too critical of Seb – he doesn’t get out much.
The more observant may have noticed that the version of the app that Seb is using is also a lot smoother that the Gif we just looked at. In the final article in this series we’ll look at how we can improve the responsiveness.
The source code for this article is available here.
© 2019, Mark Allison. All rights reserved.
Copyright © 2019 Styling Android. All Rights Reserved.
Information about how to reuse or republish this work may be available at http://blog.stylingandroid.com/license-information.
