
Layout transitions are an important aspect of Material design as they help to indicate the user flow through an app, and help to tie visual components together as the user navigates. Two important tools for achieving this are Activity Transitions (which we’ll cover in the future) and Layout Transitions which we have covered on Styling Android before. However Layout Transitions are only supported in API 19 and later. Previously we looked at how the animations in Dirty Phrasebook were achieved, and in this article we’ll take a further step and look to automatically generate animations between two distinct layout states.
The Transitions framework introduces the concept of Scenes to represent specific layout states. We’ll mimic this by defining two separate layouts, one which represents the default view and a second which represents the layout when we’re in input mode. Let’s begin by creating these two layouts – we’ll base them on the Dirty Phrasebook layouts, but we’ll simplify them a little to make them easier to understand.
First here’s the default layout
<?xml version="1.0" encoding="utf-8"?>
<LinearLayout xmlns:android="http://schemas.android.com/apk/res/android"
  android:layout_width="match_parent"
  android:layout_height="match_parent"
  android:orientation="vertical"
  android:clipChildren="false">

  <RelativeLayout
    android:layout_width="match_parent"
    android:layout_height="0dp"
    android:layout_weight="1">

    <View
      android:id="@+id/toolbar"
      android:layout_width="match_parent"
      android:layout_height="?attr/actionBarSize"
      android:background="?attr/colorPrimary" />

    <View
      android:id="@+id/focus_holder"
      android:layout_width="0dp"
      android:layout_height="0dp"
      android:focusableInTouchMode="true">

      <requestFocus />
    </View>

    <android.support.v7.widget.CardView
      android:id="@+id/input_view"
      android:layout_width="match_parent"
      android:layout_height="match_parent"
      android:layout_alignParentBottom="true"
      android:layout_below="@id/toolbar">

      <EditText
        android:id="@+id/input"
        android:layout_width="match_parent"
        android:layout_height="match_parent"
        android:inputType="textMultiLine" />

      <ImageView
        android:id="@+id/input_done"
        android:layout_width="32dip"
        android:layout_height="32dip"
        android:layout_alignBottom="@id/input"
        android:layout_alignEnd="@id/input"
        android:layout_alignRight="@id/input"
        android:layout_gravity="bottom|end"
        android:layout_margin="8dp"
        android:background="@drawable/done_background"
        android:contentDescription="@string/done"
        android:padding="2dp"
        android:src="@drawable/ic_arrow_forward"
        android:visibility="invisible" />

    </android.support.v7.widget.CardView>

  </RelativeLayout>

  <FrameLayout
    android:layout_width="match_parent"
    android:layout_height="0dp"
    android:layout_weight="1">

    <android.support.v7.widget.CardView
      android:id="@+id/translation"
      android:layout_width="match_parent"
      android:layout_height="wrap_content"
      android:layout_margin="8dp">

      <View
        android:layout_width="match_parent"
        android:layout_height="100dp"
        android:background="?attr/colorPrimary" />
    </android.support.v7.widget.CardView>
  </FrameLayout>

</LinearLayout>
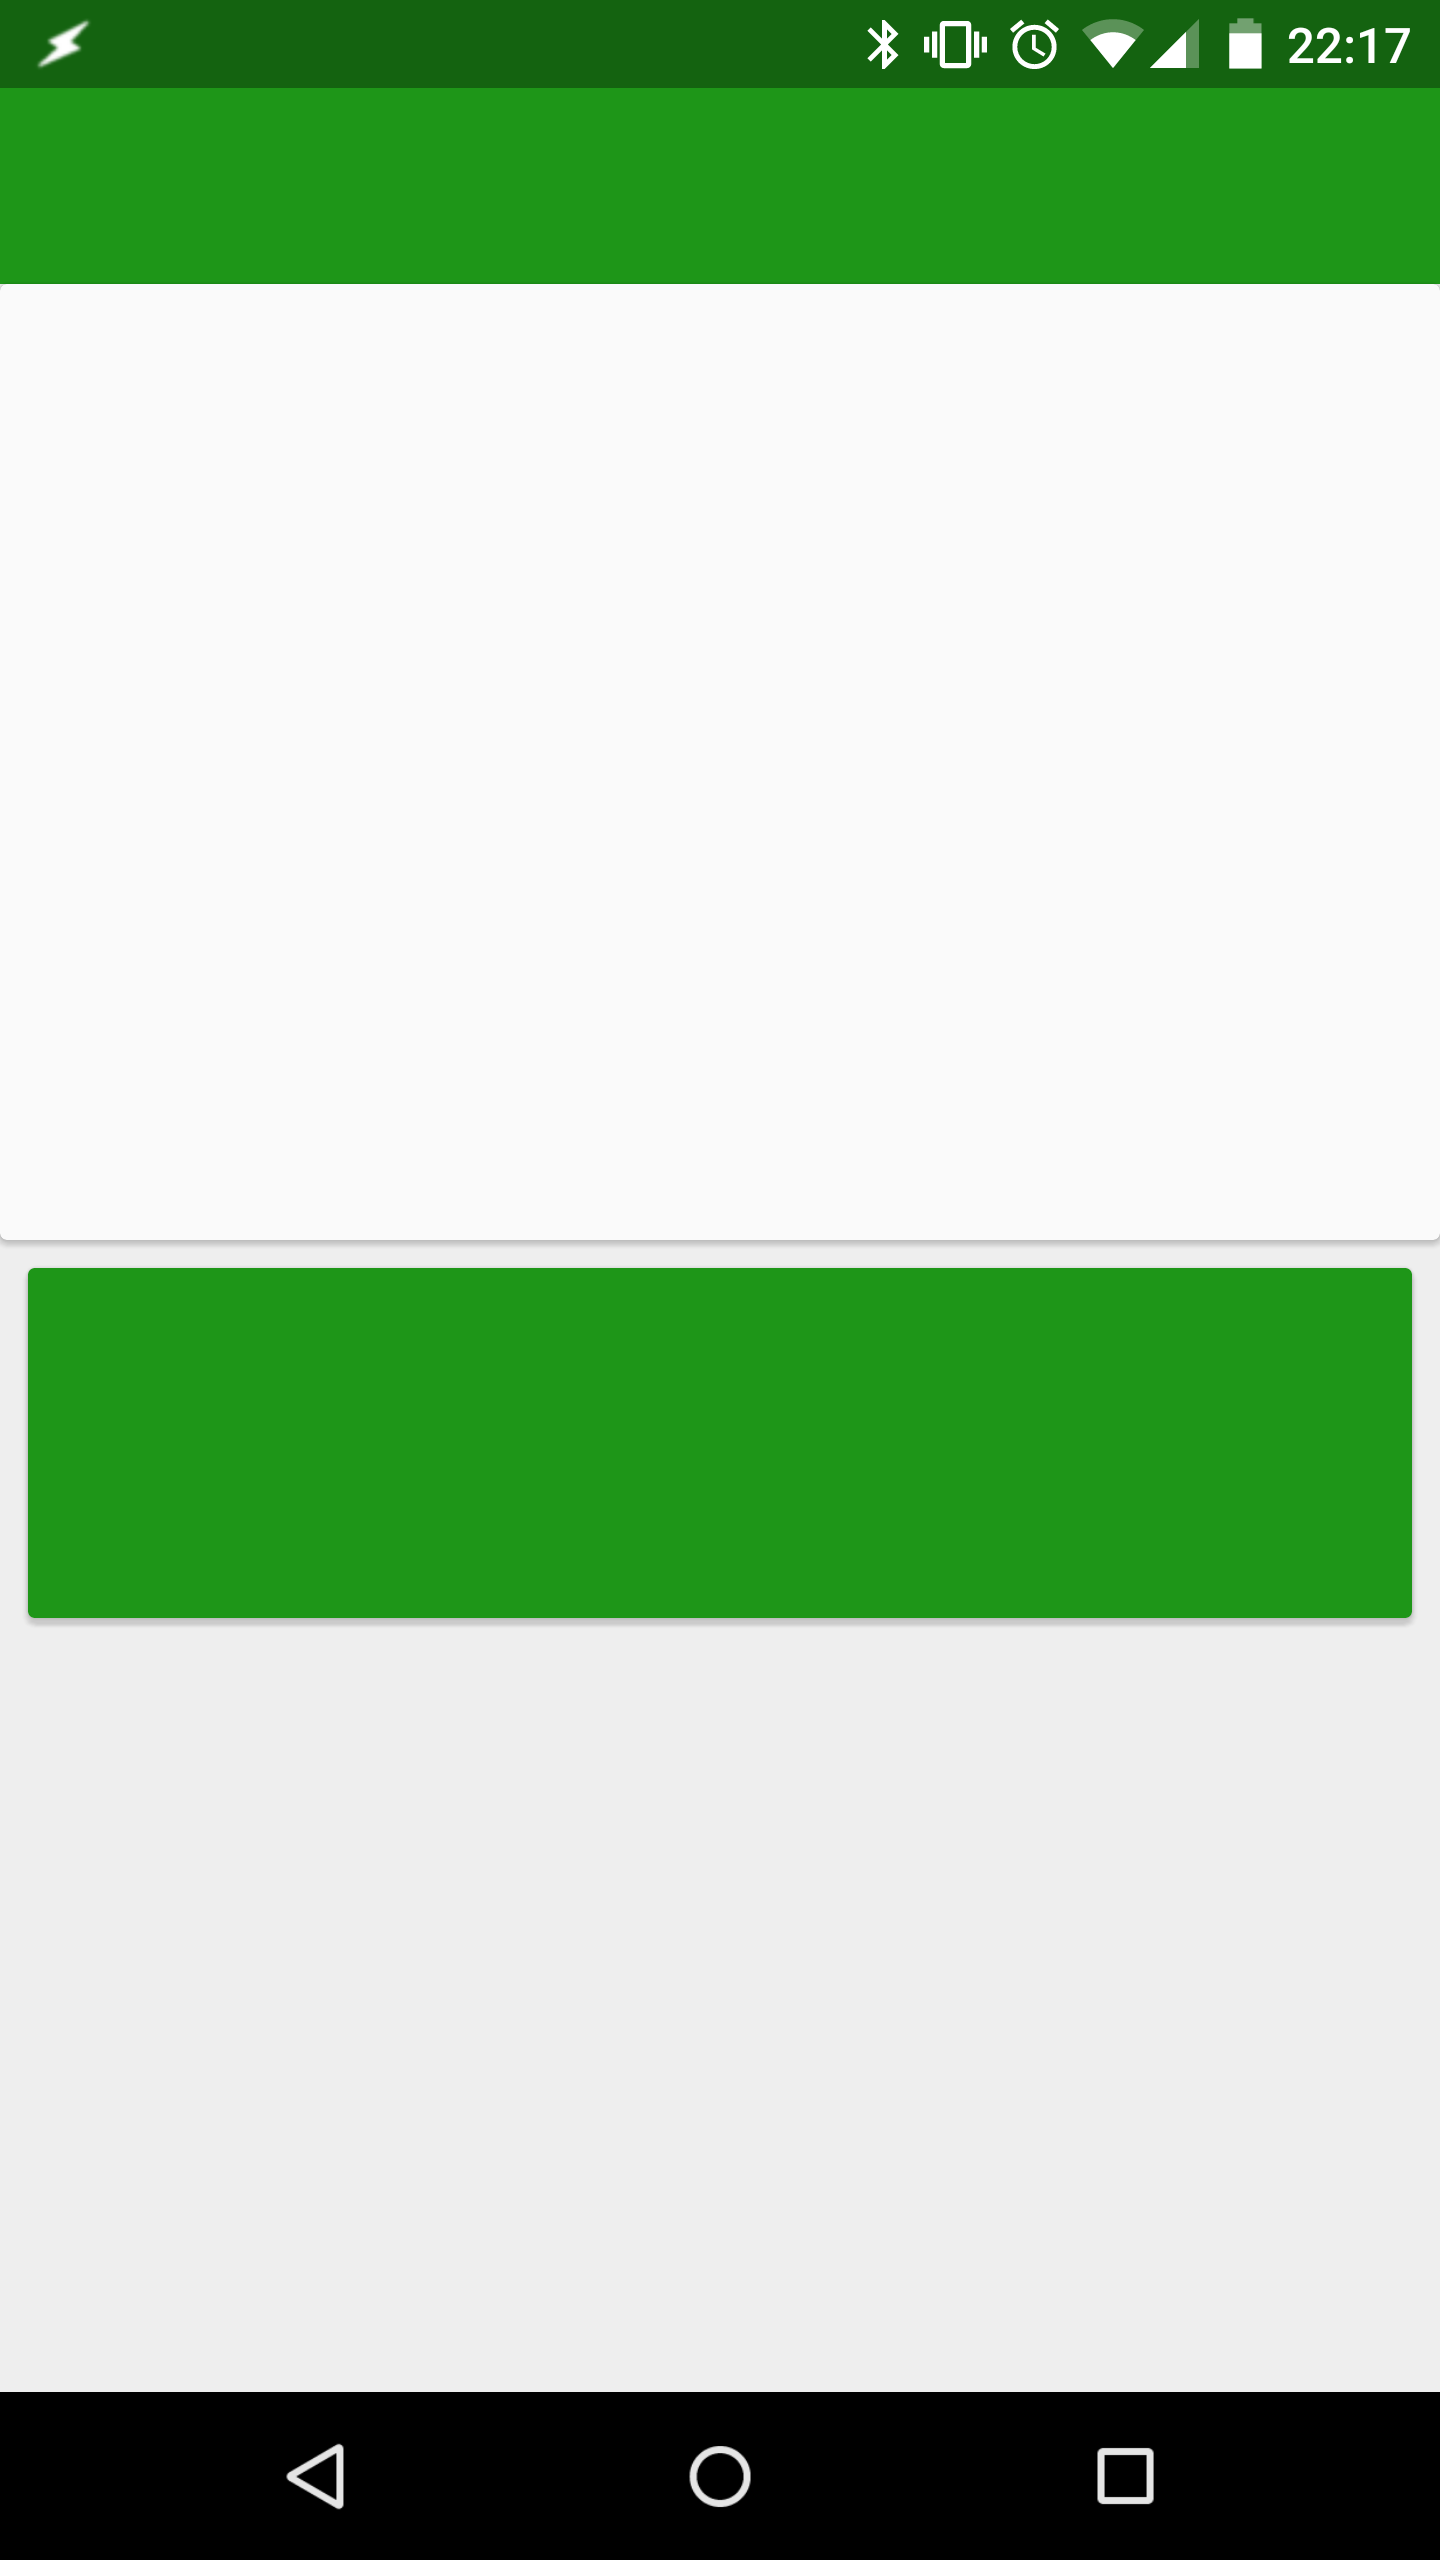
This is the same basic layout as we used previously, but it has been simplified a little. The controls that we’re interested in are those with the IDs toolbar, focus_holder, input, input_view, input_done, and translation.
It looks like this:
The layout for when we’re in input mode is:
<?xml version="1.0" encoding="utf-8"?>
<LinearLayout xmlns:android="http://schemas.android.com/apk/res/android"
  android:layout_width="match_parent"
  android:layout_height="match_parent"
  android:orientation="vertical"
  android:clipChildren="false">

  <RelativeLayout
    android:layout_width="match_parent"
    android:layout_height="0dp"
    android:layout_weight="1">

    <View
      android:id="@+id/toolbar"
      android:layout_width="match_parent"
      android:layout_height="?attr/actionBarSize"
      android:background="?attr/colorPrimary" />

    <View
      android:id="@+id/focus_holder"
      android:layout_width="0dp"
      android:layout_height="0dp"
      android:focusableInTouchMode="true" />

    <android.support.v7.widget.CardView
      android:id="@+id/input_view"
      android:layout_width="match_parent"
      android:layout_height="match_parent"
      android:layout_alignParentBottom="true"
      android:layout_alignParentTop="true"
      android:layout_marginBottom="?attr/actionBarSize">

      <EditText
        android:id="@+id/input"
        android:layout_width="match_parent"
        android:layout_height="match_parent"
        android:inputType="textMultiLine">

        <requestFocus />
      </EditText>

      <ImageView
        android:id="@+id/input_done"
        android:layout_width="32dip"
        android:layout_height="32dip"
        android:layout_alignBottom="@id/input"
        android:layout_alignEnd="@id/input"
        android:layout_alignRight="@id/input"
        android:layout_gravity="bottom|end"
        android:layout_margin="8dp"
        android:background="@drawable/done_background"
        android:contentDescription="@string/done"
        android:padding="2dp"
        android:src="@drawable/ic_arrow_forward"
        android:visibility="visible" />
    </android.support.v7.widget.CardView>

  </RelativeLayout>

  <FrameLayout
        android:layout_width="match_parent"
    android:layout_width="match_parent"
    android:layout_height="0dp"
    android:layout_weight="1">

    <android.support.v7.widget.CardView
      android:id="@+id/translation"
      android:layout_width="match_parent"
      android:layout_height="wrap_content"
      android:layout_margin="8dp"
      android:visibility="invisible">

      <View
        android:layout_width="match_parent"
        android:layout_height="100dp"
        android:background="?attr/colorPrimary" />
    </android.support.v7.widget.CardView>
  </FrameLayout>

</LinearLayout>
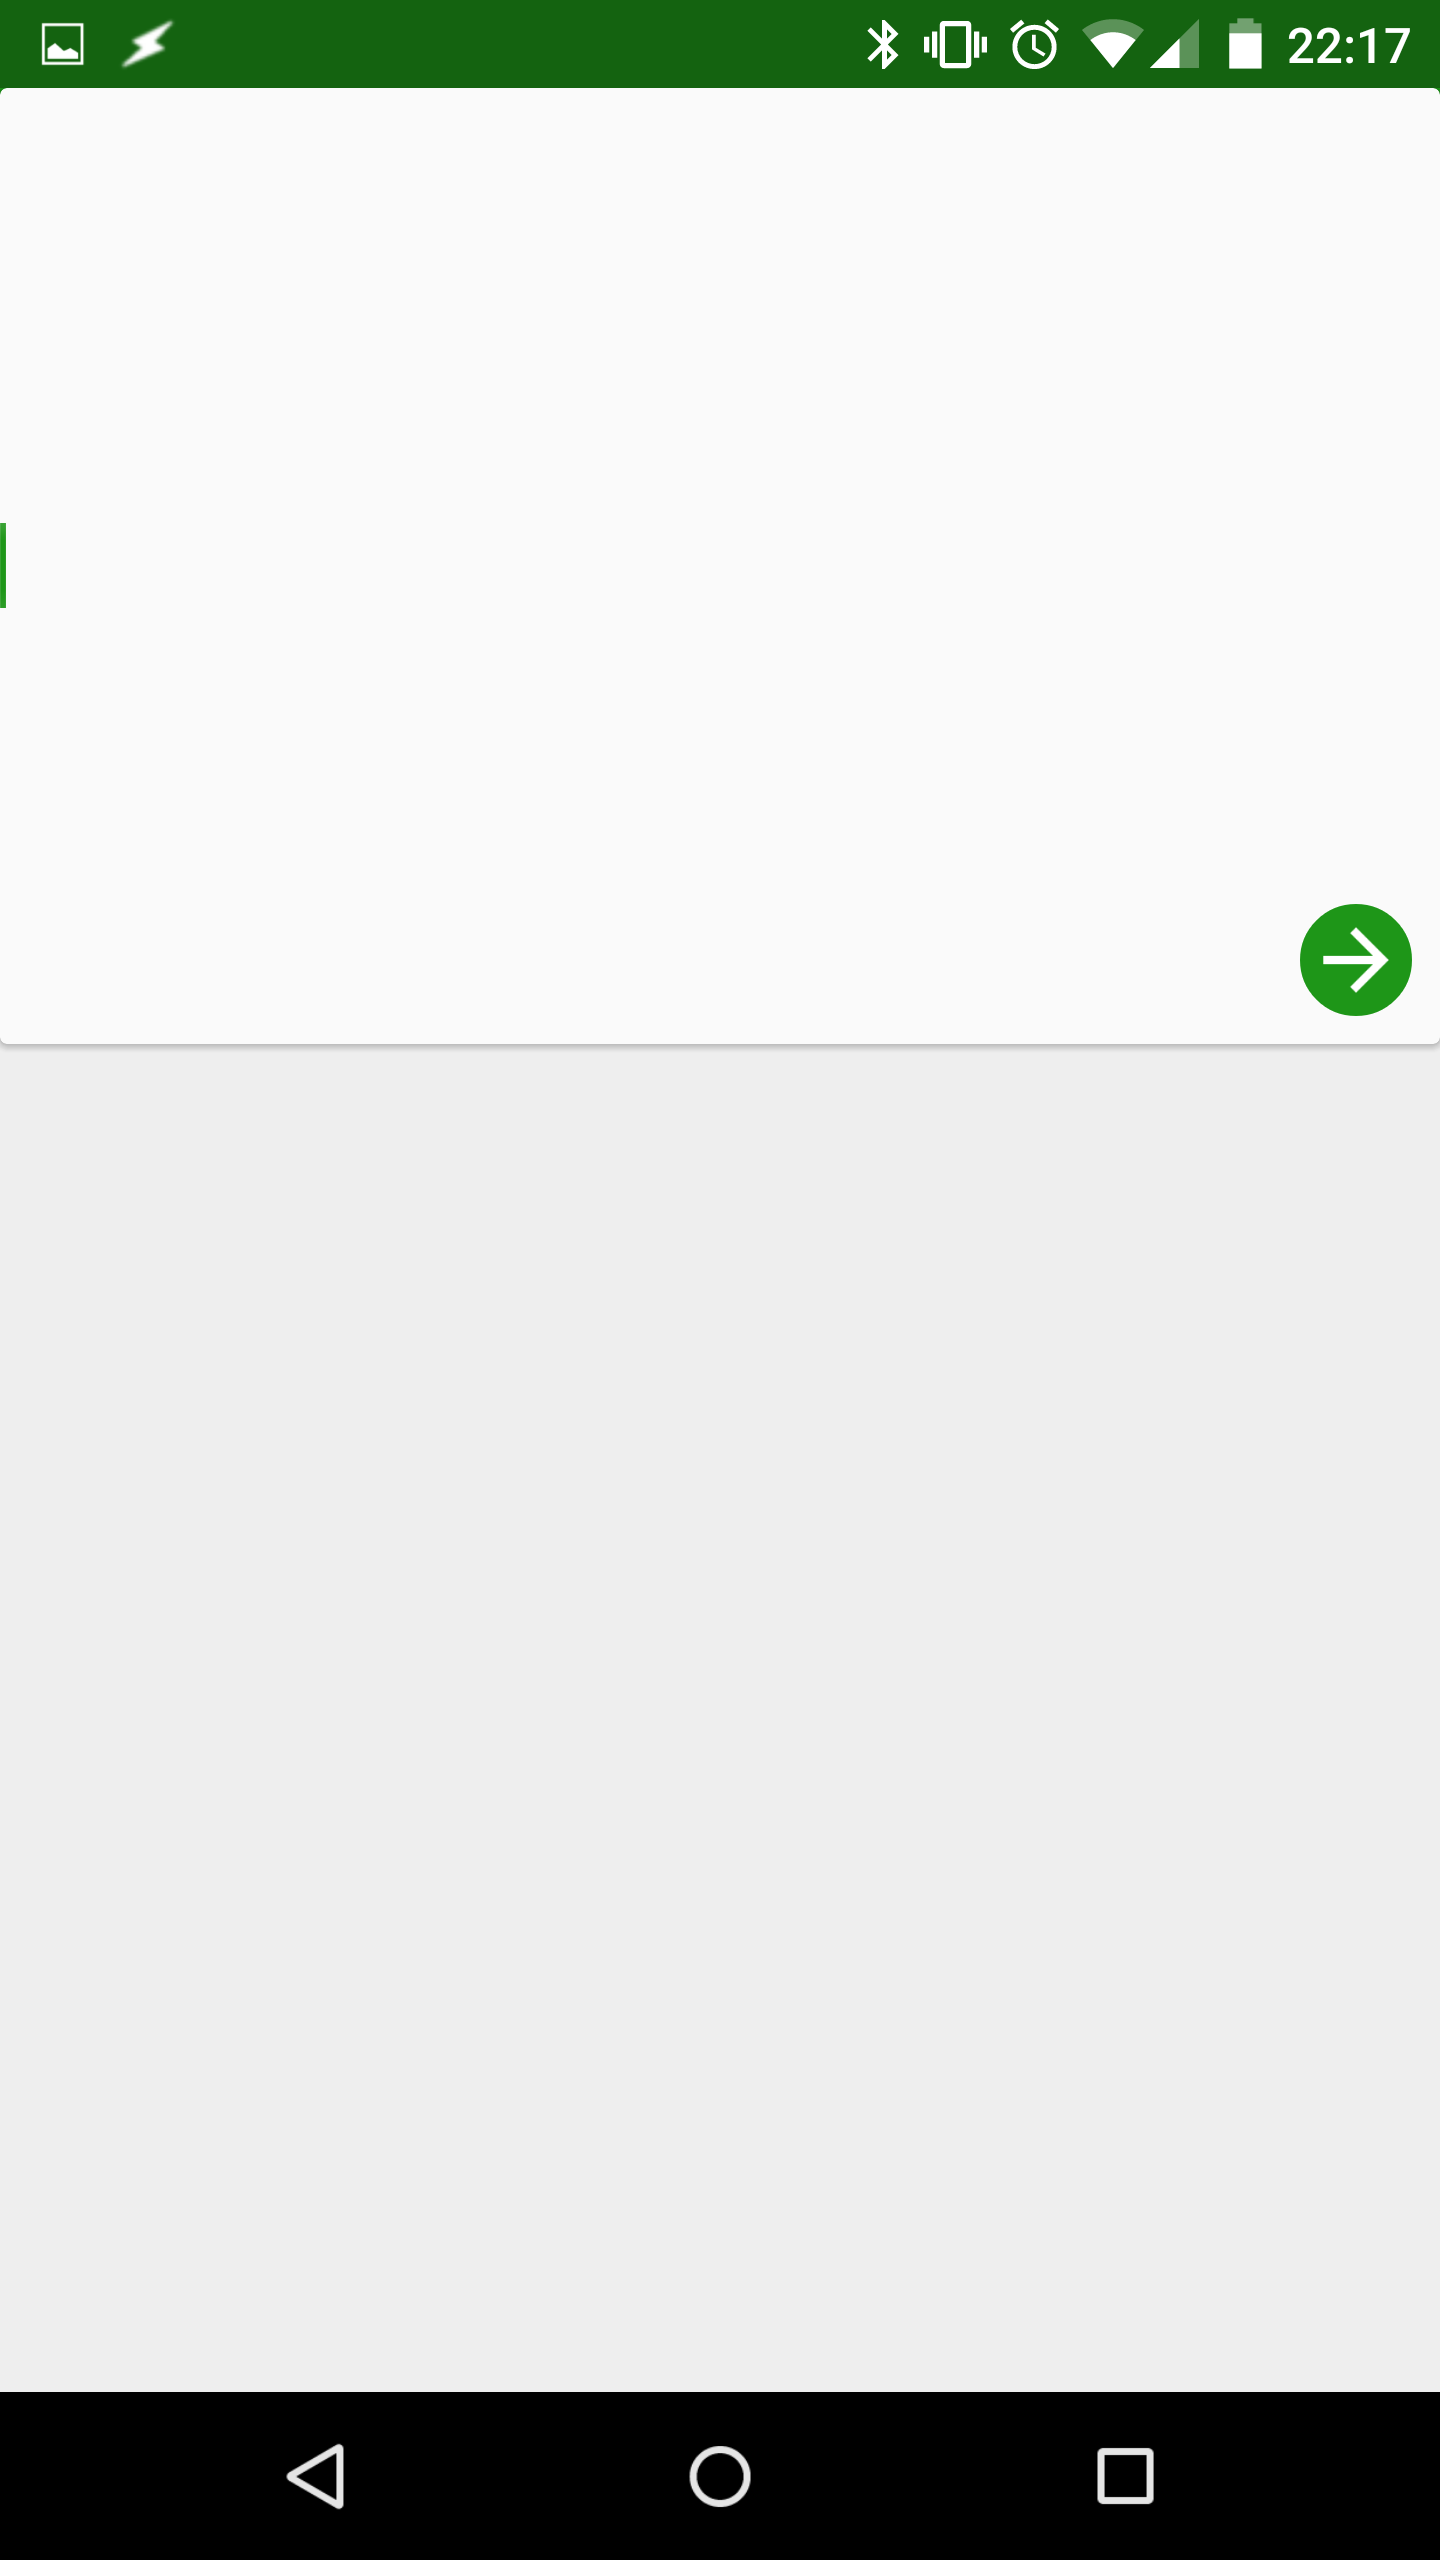
This is almost identical the the previous layout, the differences are:
input_viewis now aligned to the top of its parent rather than below thetoolbar. Essentially it now covers thetoolbar.input_doneis now visible – previously it was invisible.translationis now invisible – previously it was visible.
It looks like this:
These two layouts represent the two states of the UI – they would be our Scenes if we were using the Transitions API.
What we’re going to do this time is to switch between the two layouts as we toggle in and out of input mode and as, before, we detect the focus change in our MainActivity:
public class MainActivity extends AppCompatActivity {

    private View input;
    private TransitionController focusChangeListener;
    private View.OnClickListener onClickListener;
    private View focusHolder;

    @Override
    protected void onCreate(Bundle savedInstanceState) {
        super.onCreate(savedInstanceState);
        focusChangeListener = Part2TransitionController.newInstance(this);
        onClickListener = new View.OnClickListener() {
            @Override
            public void onClick(@NonNull View v) {
                focusHolder.requestFocus();
            }
        };

        setContentView(R.layout.activity_part2);
    }

    @Override
    public void setContentView(int layoutResID) {
        if (input != null) {
            input.setOnFocusChangeListener(null);
        }
        super.setContentView(layoutResID);
        input = findViewById(R.id.input);
        View inputDone = findViewById(R.id.input_done);
        focusHolder = findViewById(R.id.focus_holder);
        input.setOnFocusChangeListener(focusChangeListener);
        inputDone.setOnClickListener(onClickListener);
    }
}
As well as detecting the focus change we also add some logic to the setContentView() method. We’ll be switching between the layouts by calling setContentView() and it’s important to remember that the view hierarchy will change, so we need to find the Views within the layout each time the layout changes. Also we need to remove the focus listener and re-attach it to the new input View.
As before, we have a TransitionController which handles the focus change:
public class Part2TransitionController extends TransitionController {

    Part2TransitionController(WeakReference<Activity> activityWeakReference, AnimatorBuilder animatorBuilder) {
        super(activityWeakReference, animatorBuilder);
    }

    public static TransitionController newInstance(Activity activity) {
        WeakReference<Activity> activityWeakReference = new WeakReference<>(activity);
        AnimatorBuilder animatorBuilder = AnimatorBuilder.newInstance(activity);
        return new Part2TransitionController(activityWeakReference, animatorBuilder);
    }

    @Override
    protected void enterInputMode(Activity activity) {
        activity.setContentView(R.layout.activity_part2_input);
    }

    @Override
    protected void exitInputMode(Activity activity) {
        activity.setContentView(R.layout.activity_part2);
    }
}
Currently all this does is call setContentView() on the Activity to switch between the two layouts.
If we now try this, we can see that we jump between the two states, but lack the animations. In the next article in this series we’ll look at how to get things animating.
The source code for this article is available here.
© 2015, Mark Allison. All rights reserved.
Copyright © 2015 Styling Android. All Rights Reserved.
Information about how to reuse or republish this work may be available at http://blog.stylingandroid.com/license-information.
