Musical Instrument Digital Interface (MIDI) has been around since the early 1980’s and the basic specification has changed little since. It is a standard by which electronic musical instruments and other devices can communicate with each other. In Marshmallow (V6.0 – API 23) Android actually got some good MIDI support, and in this series of articles we’ll take a look at how we can create a MIDI controller app. For the non-musicians and those who have no interest in MIDI, do not despair there will be some custom controls we create along the way which may still be of interest. In this first article we’ll take a look at the overall concept.
 For those unfamiliar with MIDI it is worth a brief overview of what it is and what it does. Often it can be useful to connect electronic musical instruments and devices together. Many people think of a music synthesiser as a keyboard, but there are essentially two separate components: The keyboard itself which takes user input; and the sound module which generates the sound. To be technically accurate, it is the sound module which is actually the “synthesiser” as it is the component responsible for synthesising sound; and the keyboard (i.e. the component that the user directly interacts with) is often referred to as the controller.
While many keyboards also contain a sound module, sometimes they do not and some musicians will assemble a keyboard of their choice, and add their own choice of sound modules. In such cases MIDI is the industry standard protocol which is used to provide this communication. To look at it in its most basic form, it is a method of transmitting the user input events occurring on the keyboard (which are not totally dissimilar to handling key events on Android) to the sound module to play a sound. There is actually an awful lot more to it than that, but that’s enough to understand the basic concepts that we need.
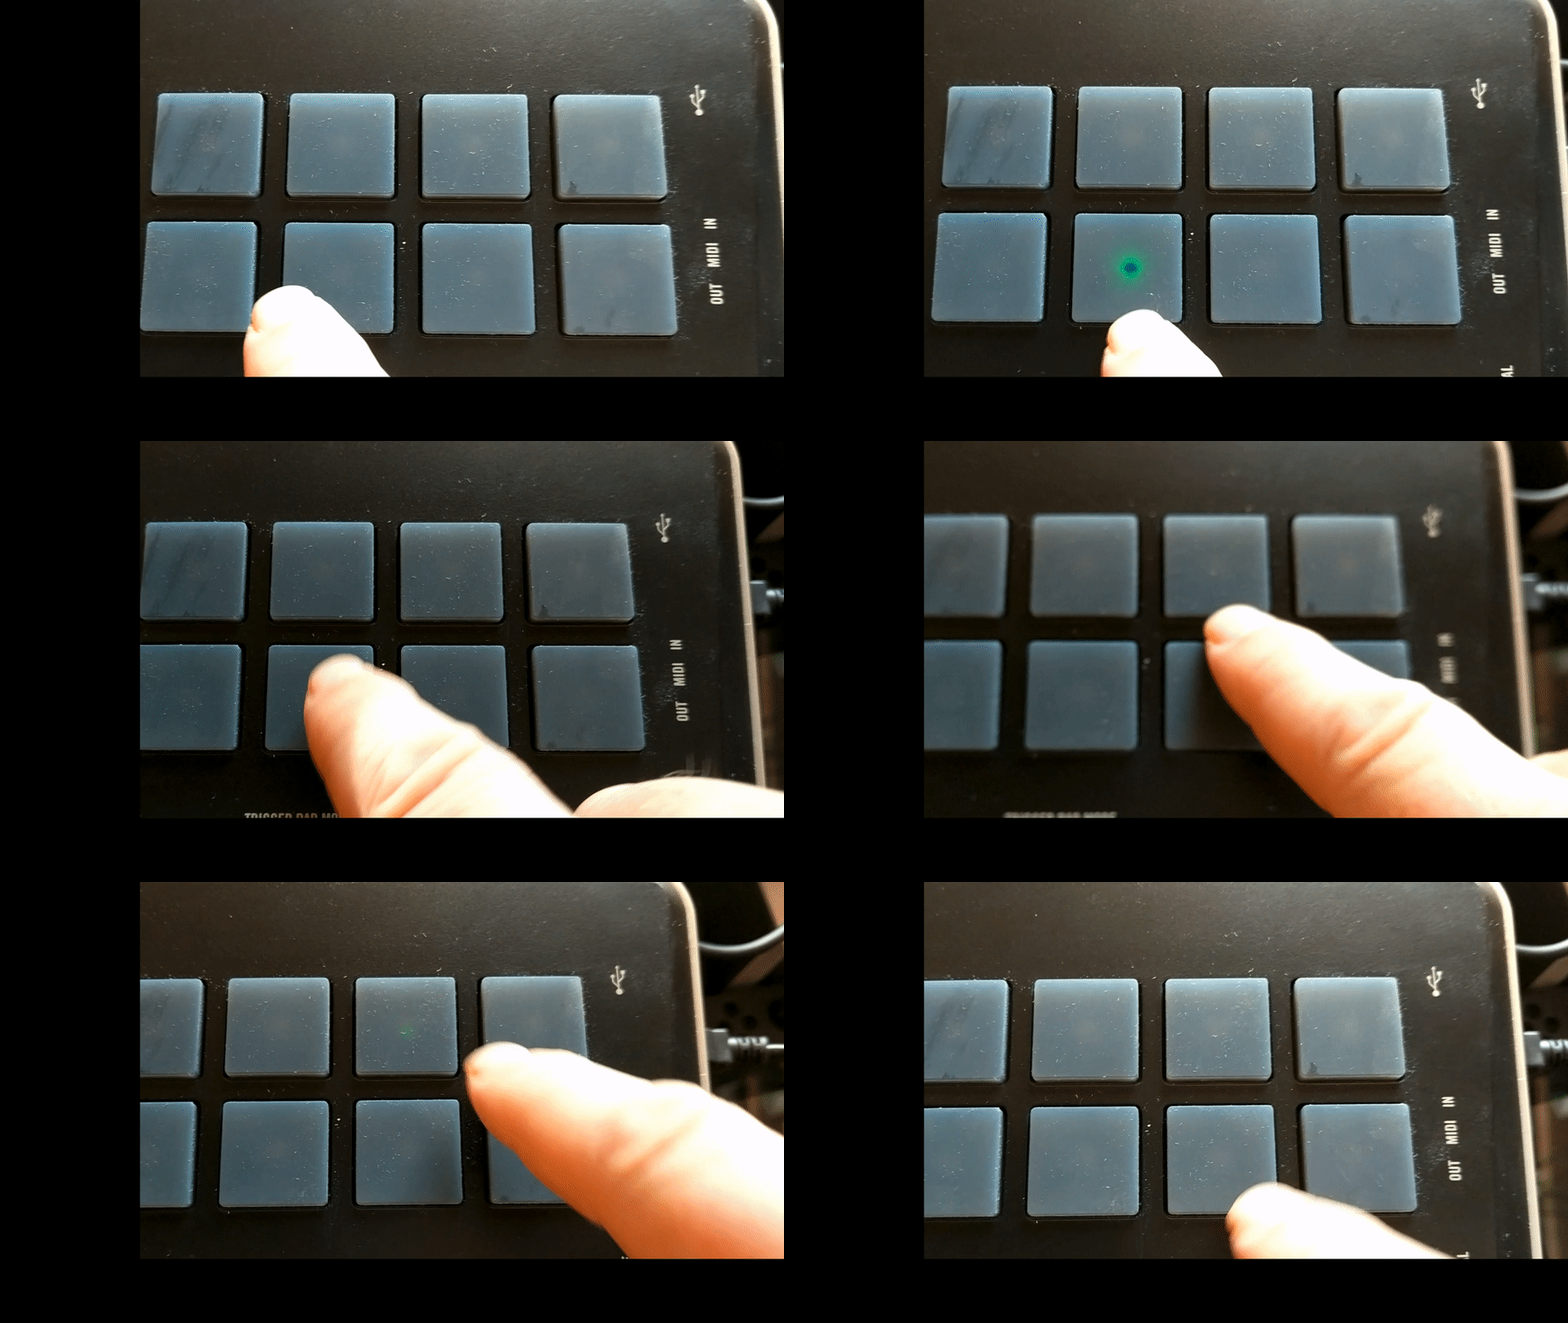
Since Marshmallow Android has a new set of MIDI APIs. While it was possible to create MIDI software prior to Marshmallow, it required much lower level USB port development so we’ll stick to the Marshmallow APIs. There is a Google sample project which shows the principles behind creating a synthesiser / sound module, so it seemed to me that it would be useful to augment this with a keyboard or other user input device. While a full-blown keyboard seems like the obvious choice, I felt that using one on a touch screen which does not provide any touch feedback would be quite difficult to play. However, an often used input mechanism on MIDI controllers is the concept of a pad – often used for drums and percussive sounds. I have a Korg Taktile 25 keyboard which has these:
The camera didn’t accurately pick up the colour of the pad lights – they are actually pure green, but the principle of how they work should be obvious. This seemed like a better fit for a touch screen, and so Midi Pad was born:
As you can see from the AppBar selection this is using the OPL3 Synth by Volcano Mobile as the sound / synthesiser module, and I have 12 pads configured to cover an octave. By tapping the relevant pads it is possible to play a basic melody as shown in the video clip – in this case the opening phrase of Bach’s Toccata and Fugue in D minor, BWV 565.
Midi Pad responds to user tap events on each of the pads and translate those in to MIDI events which are sent to the sound module. As well as handling the Note On and Note Off events (which control the start and end of note playback) it also sends velocity information which dictates how hard the pad was tapped which can control the volume (and sometimes other dynamics) of the note played. This is obtained from the pressure of the touchscreen touch event which is a function of how big the touch area is, which is a reasonable indicator of how hard the user tapped. A harder tap results in the tip of the user’s finger pressing much flatter against the screen, so the size of the tap area is larger.
This can be seen and heard here:
As well as the details of how we use the Midi APIs, we’ll also look at the UI which is mimicking the look of the physical pads on the Korg controller albeit with a little bit of poetic license – I show the idle pads with a slight glow to indicate that they are active. The video shows that the pads actually animate the brightness of the pad as it is struck which is designed to mimic how an analogue light source fades in an out as it is turned on and off. We’ll also be looking at how this is achieved.
Apologies to those expecting to dive in to the code early but understanding the basic principles of what the app does and how it is designed to work will (hopefully!) make the remaining articles in this series much easier to follow. We get stuck in to the code in the next article, I promise!
For those wondering what the icon for Midi Pad (as shown at the beginning of this article) represents: it is my attempt at a material icon based upon a standard MIDI 5-pin DIN connector using Styling Android colours, of course!
© 2017, Mark Allison. All rights reserved.
Copyright © 2017 Styling Android. All Rights Reserved.
Information about how to reuse or republish this work may be available at http://blog.stylingandroid.com/license-information.


Thank you for the article – the project looks and sounds great! Can you elaborate on how the OPL3 synthesizer is Incorporated here? Is it simply running in the background and receiving the Midi messages sent by MidiPad? Thanks!
Essentially yes. We’ll get to that later in the series.