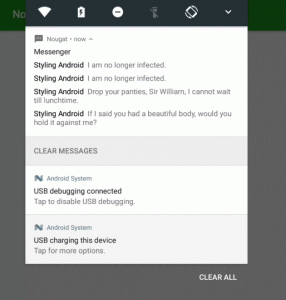
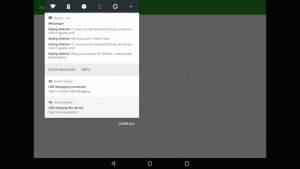
Nougat has now been released in to the wild and there are a number of new features which developers should be considering. In this loosely-related series of articles we’re going to be looking at various aspects of these new features to see how we can best make use of them. In this concluding article we’re going to look at another new Notification feature introduced in Nougat: Direct Reply.
 Direct Reply is a mechanism whereby users can post a simple reply to a message from the notification itself without having to launch the full app to do so. It is not just limited to messaging apps – it can be used to obtain user input directly from a Notification – but it is particularly well suited to messaging applications, so that’s what we’ll cover here. Direct Reply is actually just a specific action that we can add to our notification, so let’s begin by looking at a separate action to separate the Action logic from that which is specific to Direct Reply. We’ll start by adding a simple action to clear our message list (from the Messaging-Style Notification we got working in the previous article). Let’s begin by adding this action to our Notification:
final class NotificationBuilder {
    .
    .
    .
    private static final Intent CLEAR_MESSAGES_INTENT = new Intent(MessengerService.ACTION_CLEAR_MESSAGES);
    .
    .
    .
    private void updateMessagingStyleNotification(List<Message> messages) {
        NotificationCompat.MessagingStyle messagingStyle = buildMessageList(messages);
        NotificationCompat.Action clearMessagesAction = buildClearMessagesAction();
        Notification notification = new NotificationCompat.Builder(context)
                .setStyle(messagingStyle)
                .setSmallIcon(R.drawable.ic_message)
                .addAction(clearMessagesAction)
                .build();
        notificationManager.notify(SUMMARY_ID, notification);
    }
    .
    .
    .
    private NotificationCompat.Action buildClearMessagesAction() {
        PendingIntent clearPendingIntent = PendingIntent.getService(context, 0, CLEAR_MESSAGES_INTENT, PendingIntent.FLAG_CANCEL_CURRENT);
        return new NotificationCompat.Action.Builder(R.drawable.ic_clear, context.getString(R.string.clear), clearPendingIntent)
                .build();
    }
    .
    .
    .
    void clearMessages() {
        saveMessages(Collections.emptyList());
        notificationManager.cancel(SUMMARY_ID);
    }
    .
    .
    .
}
We’re actually building the Action in buildClearMessagesAction(). First we create a PendingIntent which will launch our MessengerService with an Intent action of MessengerService.ACTION_CLEAR_MESSAGES; then we build the Notification Action with an icon, string and the PendingIntent we just created. Then we add a clearMessages() method which will be called whenever the MessengerService is launched with the Intent action of MessengerService.ACTION_CLEAR_MESSAGES, and will clear the message list, and cancel any Notifications being displayed.
Next we need to add the necessary behaviour to MessengerService:
public class MessengerService extends GcmTaskService {
    public static final String ACTION_CLEAR_MESSAGES = "com.stylingandroid.nougat.ACTION_CLEAR_MESSAGES";

    private static final String TAG = "MessengerService";

    private Messenger messenger;
    private ServiceScheduler serviceScheduler;
    private NotificationBuilder notificationBuilder;

    public MessengerService() {
    }

    @Override
    public void onCreate() {
        super.onCreate();
        messenger = Messenger.newInstance(this);
        serviceScheduler = ServiceScheduler.newInstance(this);
        notificationBuilder = NotificationBuilder.newInstance(this);
    }

    @Override
    public int onStartCommand(Intent intent, int flags, int startId) {
        String action = intent.getAction();
        if (ACTION_CLEAR_MESSAGES.equals(action)) {
            notificationBuilder.clearMessages();
            return START_NOT_STICKY;
        }
        return super.onStartCommand(intent, flags, startId);
    }
    .
    .
    .
}
Whenever our MessengerService is launched with an Intent which has an action of ACTION_CLEAR_MESSAGES then we call the method we just added to NotificationBuilder which performs the clear. It is important to call super.onStartCommand() if we do not recognise the Action because GcmNetworkManager will also be trigging our MessengerService and we’ll interfere with that behaviour if we do not pass unrecognised Intents on to the base class for processing.
The final thing we need to do is add this new action to the intent-filter for MessengerService in our manifest:
<?xml version="1.0" encoding="utf-8"?>
<manifest xmlns:android="http://schemas.android.com/apk/res/android"
  xmlns:tools="http://schemas.android.com/tools"
  package="com.stylingandroid.nougat">

  <uses-permission android:name="android.permission.INTERNET" />
  <uses-permission android:name="android.permission.RECEIVE_BOOT_COMPLETED" />

  <application
    android:allowBackup="false"
    android:icon="@mipmap/ic_launcher"
    android:label="@string/app_name"
    android:supportsRtl="true"
    android:theme="@style/AppTheme"
    tools:ignore="GoogleAppIndexingWarning">

    <activity android:name=".MainActivity">
      <intent-filter>
        <action android:name="android.intent.action.MAIN" />
        <category android:name="android.intent.category.LAUNCHER" />
      </intent-filter>
    </activity>

    <service
      android:name=".messenger.MessengerService"
      android:directBootAware="true"
      android:permission="com.google.android.gms.permission.BIND_NETWORK_TASK_SERVICE"
      tools:ignore="UnusedAttribute">
      <intent-filter>
        <action android:name="com.google.android.gms.gcm.ACTION_TASK_READY" />
        <action android:name="com.stylingandroid.nougat.ACTION_CLEAR_MESSAGES" />
      </intent-filter>
    </service>
    .
    .
    .
}
If we run this we can see the action being applied, and the notifications cleared:
That’s the basics of adding a custom action to a Notification. When it comes to Direct Reply, much of this is the same. In MessengerService we add an additional Intent Action handler – remember to dd the action to the manifest, as well (I won’t bother to show that here as we’ve already covered it for the clear action):
public class MessengerService extends GcmTaskService {
    public static final String ACTION_CLEAR_MESSAGES = "com.stylingandroid.nougat.ACTION_CLEAR_MESSAGES";
    public static final String ACTION_REPLY = "com.stylingandroid.nougat.ACTION_REPLY";

    private static final String TAG = "MessengerService";

    private Messenger messenger;
    private ServiceScheduler serviceScheduler;
    private NotificationBuilder notificationBuilder;

    public MessengerService() {
    }

    @Override
    public void onCreate() {
        super.onCreate();
        messenger = Messenger.newInstance(this);
        serviceScheduler = ServiceScheduler.newInstance(this);
        notificationBuilder = NotificationBuilder.newInstance(this);
    }

    @Override
    public int onStartCommand(Intent intent, int flags, int startId) {
        String action = intent.getAction();
        if (ACTION_CLEAR_MESSAGES.equals(action)) {
            notificationBuilder.clearMessages();
            return START_NOT_STICKY;
        }
        if (ACTION_REPLY.equals(action)) {
            notificationBuilder.reply(intent);
            return START_NOT_STICKY;
        }
        return super.onStartCommand(intent, flags, startId);
    }
    .
    .
    .
}
Adding this action to the Notification is pretty similar too, however we need to build and add a RemoteInput to the Notification Action when we create it:
final class NotificationBuilder {
    private static final String GROUP_KEY = "Messenger";
    private static final String MESSAGES_KEY = "Messages";
    private static final String REPLY_KEY = "Reply";
    private static final String NOTIFICATION_ID = "com.stylingandroid.nougat.NOTIFICATION_ID";
    private static final int SUMMARY_ID = 0;
    private static final String EMPTY_MESSAGE_STRING = "[]";
    private static final Intent CLEAR_MESSAGES_INTENT = new Intent(MessengerService.ACTION_CLEAR_MESSAGES);
    private static final Intent REPLY_INTENT = new Intent(MessengerService.ACTION_REPLY);
    private static final String MY_DISPLAY_NAME = "Me";
    .
    .
    .
    private void updateMessagingStyleNotification(List<Message> messages) {
        NotificationCompat.MessagingStyle messagingStyle = buildMessageList(messages);
        NotificationCompat.Action clearMessagesAction = buildClearMessagesAction();
        NotificationCompat.Action replyAction = buildReplyAction(R.string.reply);
        Notification notification = new NotificationCompat.Builder(context)
                .setStyle(messagingStyle)
                .setSmallIcon(R.drawable.ic_message)
                .addAction(clearMessagesAction)
                .addAction(replyAction)
                .build();
        notificationManager.notify(SUMMARY_ID, notification);
    }
    .
    .
    .
    private NotificationCompat.Action buildReplyAction(@StringRes int replyLabelId) {
        String replyLabel = context.getString(replyLabelId);
        PendingIntent replyPendingIntent = PendingIntent.getService(context, 0, REPLY_INTENT, PendingIntent.FLAG_CANCEL_CURRENT);
        RemoteInput remoteInput = new RemoteInput.Builder(REPLY_KEY)
                .setLabel(replyLabel)
                .build();
        return new NotificationCompat.Action.Builder(R.drawable.ic_reply, replyLabel, replyPendingIntent)
                .addRemoteInput(remoteInput)
                .setAllowGeneratedReplies(true)
                .build();
    }
    .
    .
    .
    void reply(Intent intent) {
        Bundle bundle = RemoteInput.getResultsFromIntent(intent);
        if (remoteInput != null) {
            String messageText = bundle.getString(REPLY_KEY);
            Message message = Message.builder()
                    .message(messageText)
                    .sender(MY_DISPLAY_NAME)
                    .timestamp(System.currentTimeMillis())
                    .build();
            sendMessagingStyleNotification(message);
        }
    }
}
RemoteInput is a mechanism which, as the name suggest, enables us to accept user input remotely, and it is this which is the key to using Direct Reply. We can actually have multiple fields if we so desire by adding multiple RemoteInput instances to the Notification Action. However care should be taken not to overwhelm the user, so it’s probably best to keep the number of fields to the bare minimum. Each RemoteInput needs a unique key, so that we can correctly identify it later on, and a label which will be displayed to the user. In our case we are letting the user enter any text (s)he likes, but we could also provide a list of choices using setChoices(CharSequence[] choices) and limit the user to selecting one of these by using setAllowFreeFormInput(false) on the RemoteInput.Builder.
The RemoteInput gets added to the NotificationCompat.Action.Builder, and the Direct Reply Action will be aded to the Notification.
The reply(Intent intent) method handles the reply when the MessengerService is stared with the ACTION_REPLY Intent Action. The Intent that was used to launch the Service is passed on, and we can use RemoteInput.getResultsFromIntent() to retrieve the RemoteInput results from the Intent. We get a Bundle object which contains an entry for each of the RemoteInput objects we added to the Notification Action and we can retrieve these based upon the unique key that we used – in this case REPLY_KEY. So all that we need to do is construct this in to a new Message and send it as we did with the auto-generated messages.
We can now see this in action:
That’s about it for our exploration in to some of the new features and APIs in Nougat.
The source code for this article is available here.
© 2016, Mark Allison. All rights reserved.
Copyright © 2016 Styling Android. All Rights Reserved.
Information about how to reuse or republish this work may be available at http://blog.stylingandroid.com/license-information.


