
Android has supported fingerprint sensors since API 23 and we previously covered the APIs for handling user authentication on Styling Android. However the FingerprintManager class which those tutorials rely upon were deprecated in API 28 (Pie). In this series we’ll look at the new APIs which were introduced in Pie to replace this.

Let’s begin by understanding a little of why the old API has been deprecated. The primary reason is that it focuses on fingerprint only whereas thee landscape has changed a little and fingerprint is no longer the only option. There are other bio-metric detection schemes that are beginning to appear, such as more advanced facial recognition, and there are potentially others that may begin appearing soon. FingerprintManager is clearly geared towards fingerprint hardware, and so has been deprecated in favour of a new more flexible and potentially future-proof API which supports different kinds of bio-metric detection which may vary from device to device. BiometricPrompt has been introduced to provide a more abstract API.
The current implementation of BiometricPrompt is actually a wrapper around FingerprintManager but the advantage of using it is that the internals of BiometricPrompt are likely to expand as other biometric sensors begin to appear on devices, so we can remain agnostic of which sensors are available on any given device.
The API is actually quiet straightforward, and not dissimilar to the FingerPrintManager API. But we won’t assume any familiarity with that, instead we’ll cover the new API from scratch. The basic app that we’ll create will display an initial Fragment until the biometric authentication has successfully completed at which point the Fragment will be switched for one containing some more sensitive information. But for error states, we’ll switch to other Fragments instead. Our Activity is essentially a state machine which displays different Fragments depending on the current authentication state:
class MainActivity : AppCompatActivity() {

    private lateinit var authenticator: Authenticator

    override fun onCreate(savedInstanceState: Bundle?) {
        super.onCreate(savedInstanceState)
        setContentView(R.layout.activity_main)

        authenticator = Authenticator(this, ::handleResult)
        authenticate()
    }

    private fun handleResult(result: AuthenticationResult) {
        when (result) {
            is AuthenticationResult.Success -> {
                displayFragment(SuccessFragment::class.java) {
                    it.logout = ::authenticate
                }
            }
            is AuthenticationResult.RecoverableError -> {
                displaySnackbar(result.message)
            }
            is AuthenticationResult.UnrecoverableError -> displayErrorFragment(result.message)
            AuthenticationResult.Cancelled ->
                displayErrorFragment(getString(R.string.biometric_prompt_cancelled))
            AuthenticationResult.Failure -> {}
        }
    }

    private fun authenticate() {
        displayFragment(AuthenticatingFragment::class.java)
        authenticator.authenticate()
    }

    private fun displayErrorFragment(errorString: CharSequence) {
        displayFragment(ErrorFragment::class.java) {
            it.errorMessage = errorString
            it.retry = ::authenticate
        }
    }

    private fun  displayFragment(clazz: Class, initialiser: (T) -> Unit = {}): T? {
        return clazz.canonicalName?.let { className ->
            @Suppress("UNCHECKED_CAST")
            supportFragmentManager.fragmentFactory.instantiate(classLoader, className) as? T
        }?.also {
            initialiser(it)
            supportFragmentManager.beginTransaction().apply {
                replace(R.id.content_main, it)
                commit()
            }
        }
    }

    private fun displaySnackbar(text: CharSequence) {
        Snackbar.make(content_main, text, Snackbar.LENGTH_INDEFINITE)
            .setAction(R.string.biometric_prompt_retry) {
                authenticator.authenticate()
            }
            .show()
    }
}
All of the authentication logic lives in the Authenticator class:
internal class Authenticator(
private val context: Context,
private val callback: (AuthenticationResult) -> Unit
) {
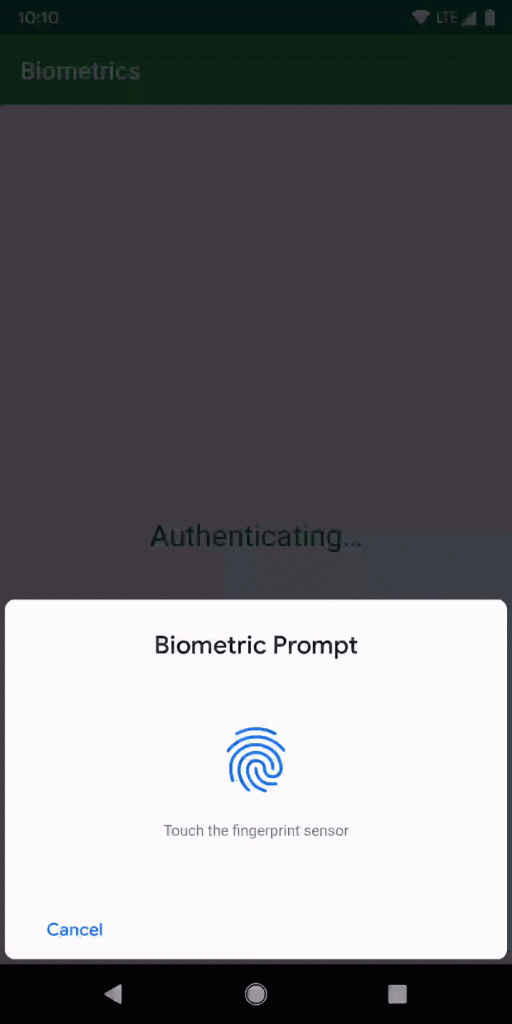
private val biometricPrompt: BiometricPrompt = BiometricPrompt.Builder(context)
.setTitle(context.getString(R.string.biometric_prompt_title))
.setNegativeButton(
context.getString(R.string.biometric_prompt_negative_text),
context.mainExecutor,
DialogInterface.OnClickListener { _, _ ->
Timber.d("Negative Button")
callback(AuthenticationResult.Cancelled)
}
)
.build()
fun authenticate() {
biometricPrompt.authenticate(cancellationSignal, context.mainExecutor, authCallback)
}
.
.
.
}
We have a val named biometricPrompt which we create using BiometricPrompt.Builder which takes a number of parameters that will be used for the biometric request dialog bottom sheet that will be displayed. Here we are specifying title text for the bottom sheet, and a negative button which will be used to cancel the request. This takes the text for the button, and Executor upon which the callback will be invoked. In this case we want it to run on the main thread so we specify the mainExecutor of the Activity, but we could specify something different here if we wanted to handle things off the main thread. Finally we specify a DialogInterface.OnClickListener instance which will be triggered on the Executor if the negative button is tapped, so for this example code, we just dump some output to the logs, and close the Activity.
The authenticate() method makes a call to the biometricPrompt instance to perform the authentication, and takes three parameters. The first is a cancellation signal which will be triggered if the authentication gets cancelled. The cancellation signal will not be triggered by the negative button, which has its own callback, but will handle such events as the user tapping away from the bottom sheet, or hitting the back button. The second parameter is an Exectutor upon which the authCallback will be invoked. The third parameter is the authCallback itself which will handle the actual authentication outcomes.
Let’s first look at cancellationSignal:
private val cancellationSignal = CancellationSignal()
    .apply {
        setOnCancelListener(cancelListener)
    }

private val cancelListener = CancellationSignal.OnCancelListener {
    Timber.d("Cancelled")
    callback(AuthenticationResult.Cancelled)
}
The CancellationSignal can be triggered by system events, and we use a CancellationSignal.OnCancelListener to handle this. Once again, we log the cancellation and finish the Activity.
Now we’ll look at the authCallback which gets triggered by the biometric authentication itself:
private val authCallback = object : BiometricPrompt.AuthenticationCallback() {

    override fun onAuthenticationError(errorCode: Int, errString: CharSequence) {
        super.onAuthenticationError(errorCode, errString)
        Timber.d("Error: $errorCode: $errString")
        callback(AuthenticationResult.UnrecoverableError(errorCode, errString))
    }

    override fun onAuthenticationFailed() {
        super.onAuthenticationFailed()
        Timber.d("Failed")
        callback(AuthenticationResult.Failure)
    }

    override fun onAuthenticationSucceeded(result: BiometricPrompt.AuthenticationResult) {
        super.onAuthenticationSucceeded(result)
        Timber.d("Success")
        callback(AuthenticationResult.Success(result.cryptoObject))
    }

    override fun onAuthenticationHelp(helpCode: Int, helpString: CharSequence) {
        super.onAuthenticationHelp(helpCode, helpString)
        Timber.d("Authentication help: $helpString")
    }
}
The first callback will be triggered for fatal error states such as no biometric sensor is available on the device, but may also be called for specific cancellation states. Fir finer handling of this we can use errorCode but I’ve opted to keep this simple.
The second callback handles a failed authentication. This will be called if a valid fingerprint is detected, but it is not one registered on the device. Of course this presumes a fingerprint sensor, but may apply to other sensors such as facial recognition, iris detection, etc.
The third callback handles successful authentication, and we can now display the sensitive information.
The fourth callback is quite interesting because that the naming isn’t great. One would assume that it means that the user requested help, but it is actually the underlying sensor detecting an issue with the sensor itself which may require the user to rectify. The docs give the example of the sensor may require cleaning, so this represents a state that the user may be able to rectify, and the helpString is a user-friendly string with details of what steps the user can take to rectify things. In this case we display a Snackbar containing this string, and repeat the authentication attempt. I haven’t been able to generate this callback using the fingerprint sensor despite it also being supported by FingerprintManager so perhaps this is something that is not supported by existing hardware. But it is certainly sensible to implement this callback for sensors which may have recoverable error states.
With all of this in place, we can see how we handle the negative button:

Then we also handle error states:
And finally we only display the sensitive information if the biometric authentication is successful:
This all works quite nicely, but there is one edge-case that, despite being handled by this implementation, I feel could be handled a little better. We’ll take a look at that in the next article.
The source code for this article is available here.
© 2019, Mark Allison. All rights reserved.
Copyright © 2019 Styling Android. All Rights Reserved.
Information about how to reuse or republish this work may be available at http://blog.stylingandroid.com/license-information.

if tap on outside of Biometric dialog it is closing. how to handle, it should not close until user tap on cancel button.
can you tell me please.
That’s the expected behaviour – if the user taps outside the Biometric dialog is handled as a cancel. That will be consistent with all other apps using this API so it would not be a good idea to try and override this behaviour.
Is there any way to customise the popup? Every manufacturer has a different layout it seems.
Not really. The whole point of this library is to abstract our apps from the different Biometric authentication mechanisms. It would make things far more complex if the API allowed customisation of these UIs because we would need to have different logic for different kinds of auth – fingerprint vs. face ID, for example.
Users will be familiar with the UI for biometric auth that is baked in to their device and consistency across all apps makes for a much nicer user experience. For that reason, even if it were possible to customise the popups, I would strongly advise against it because it would make things harder to comprehend for our users.