
Regular readers of Styling Android will know that I’m a big fan of ConstraintLayout. As I write (November 2016) ConstraintLayout is in beta status as beta 3 has just been released and the APIs for the full 1.0 release should now be stable. The previous series on ConstraintLayout covered many aspects of this most useful new Layout, but the has been an important addition to alpha 9 which fill in some important gaps: chains.
 In the previous article we looked at how we can create a chain, and then saw what we could do with basic spread chains. In this article we’ll turn our attention to another kinds of chain.
Firstly we’ll look at “inside spread chains”. We saw previously how a standard spread chain would divide the space up in to cells and centre each View within its ow cell. With inside spread chains the outer views (i.e. those on the ends of the chain, will be positioned to the edge of the parent, and the remaining space divided up between the remaining members of the chain and each of those positioned centrally within it’s own cell.
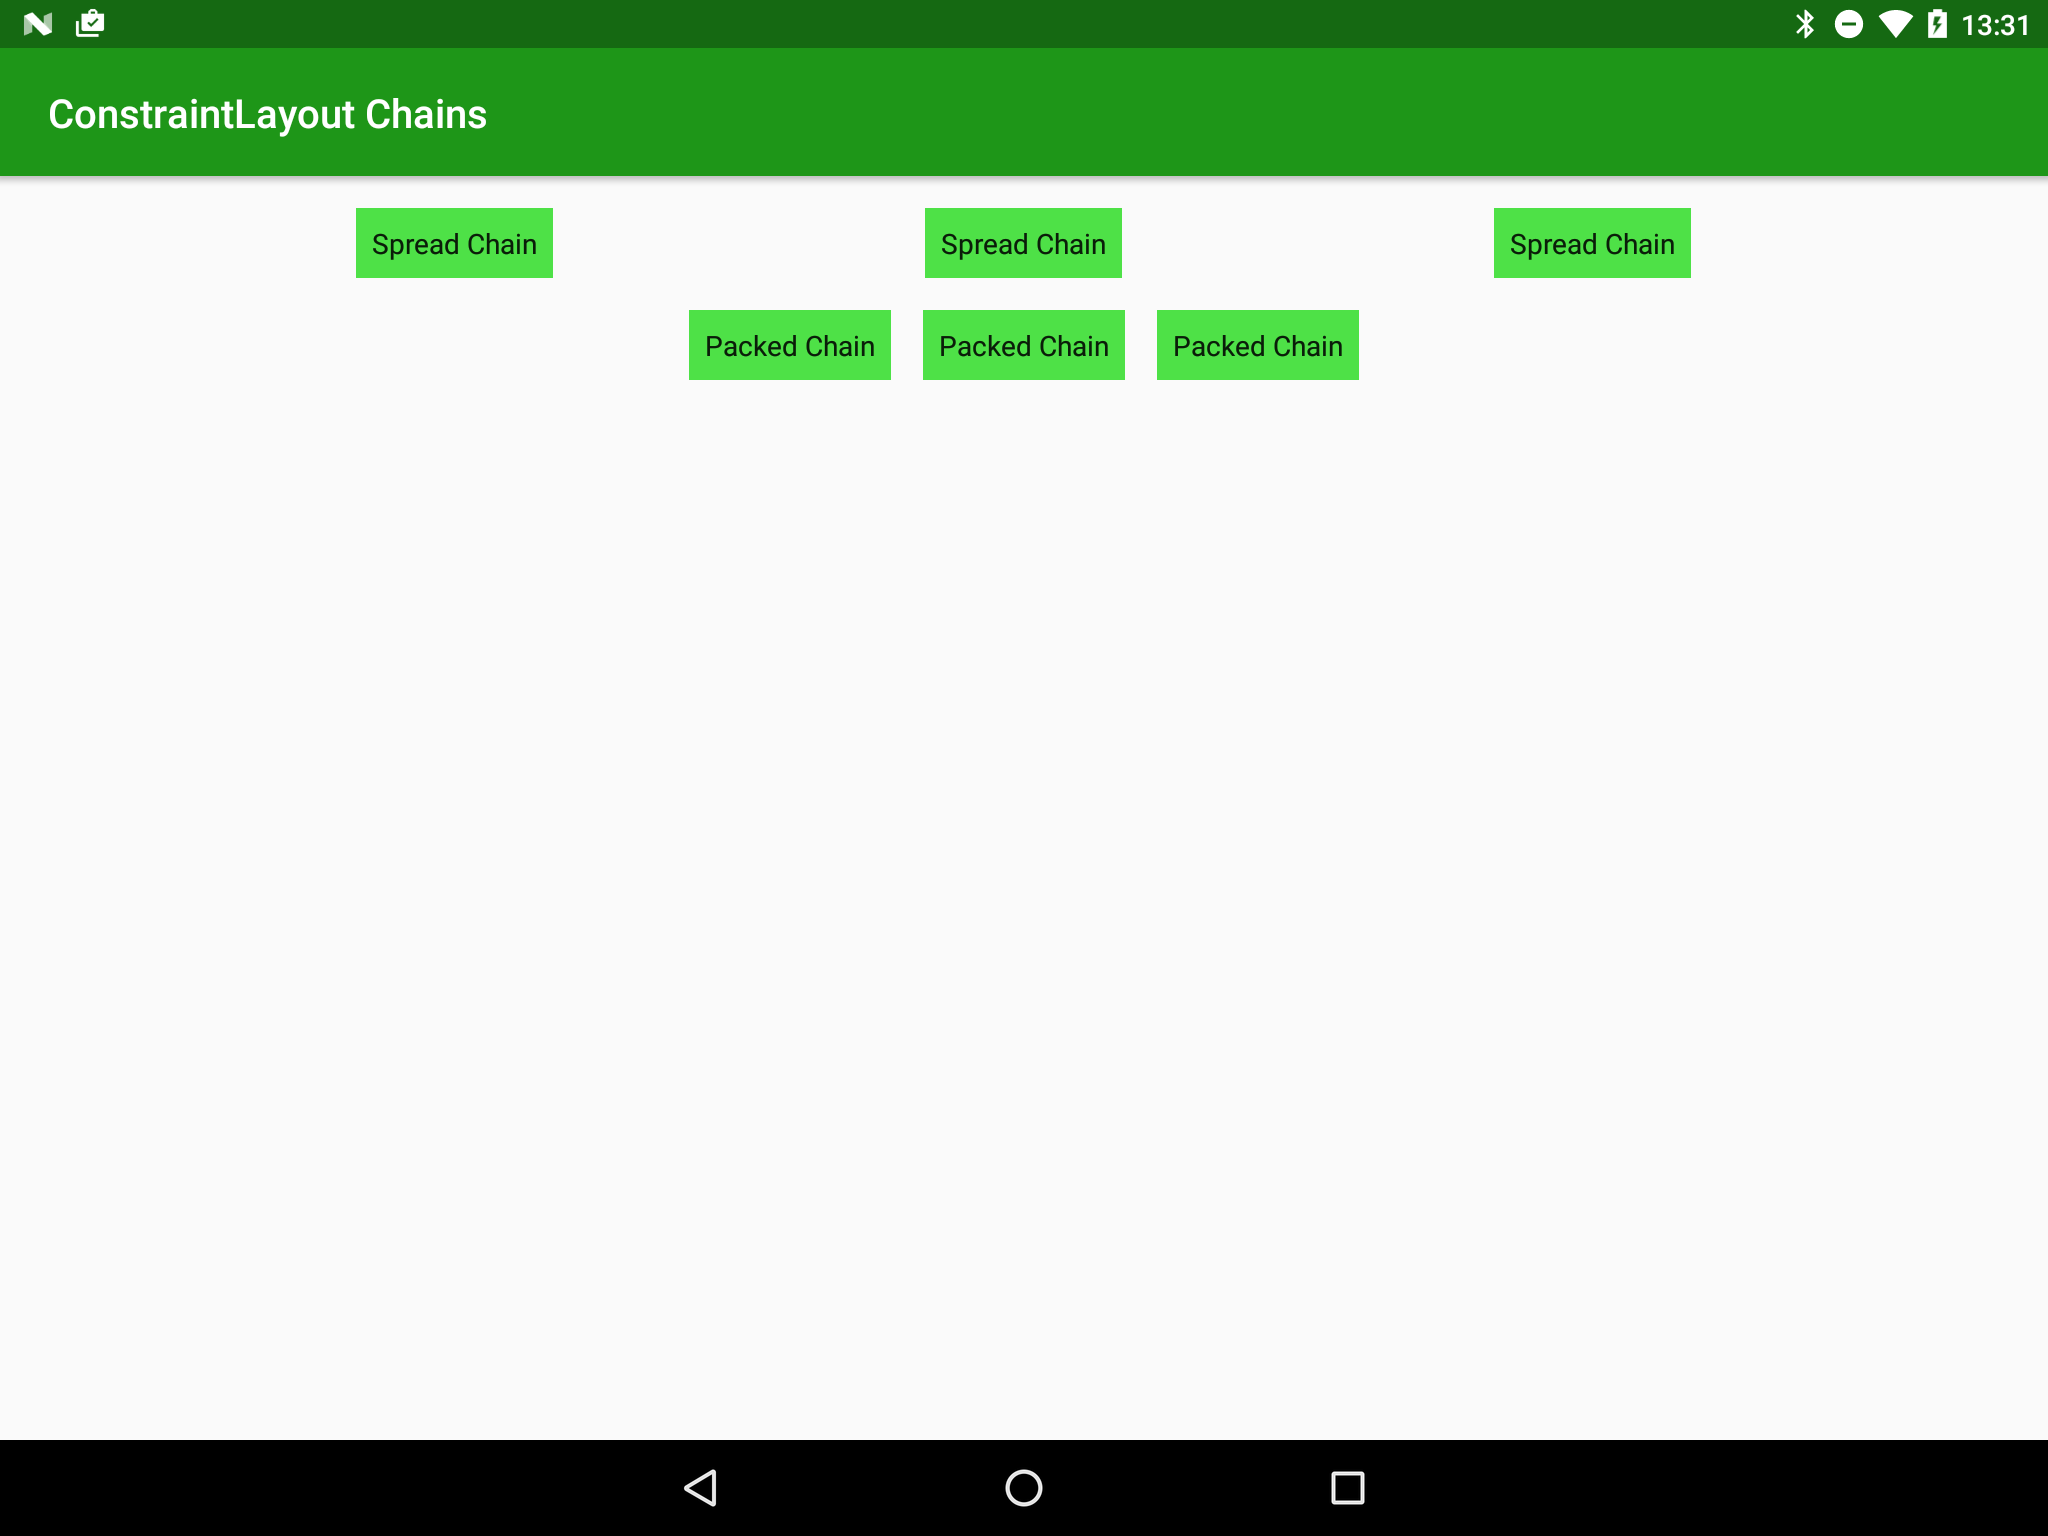
With this kind of stuff sometimes visualising the difference makes it much easier to understand, so here are the three types of spread chains – the difference between standard spread chains and inside spread chains is fairly clear:

So how do we specify an inside spread chain? First we need to create a standard spread chain either using the visual editor (as we saw in the previous article) or by manually creating a symmetrical pair of constraints in the XML layout. Next we need to add an additional attribute to the first View in the chain to specify the chainStyle to use:
<?xml version="1.0" encoding="utf-8"?>
<android.support.constraint.ConstraintLayout xmlns:android="http://schemas.android.com/apk/res/android"
  xmlns:app="http://schemas.android.com/apk/res-auto"
  android:layout_width="match_parent"
  android:layout_height="match_parent">

  <TextView
    android:id="@+id/textView1"
    style="@style/TextBox"
    android:layout_width="wrap_content"
    android:layout_height="wrap_content"
    android:text="Text"
    app:layout_constraintHorizontal_chainStyle="spread_inside"
    app:layout_constraintLeft_toLeftOf="parent"
    app:layout_constraintRight_toLeftOf="@+id/textView2"
    app:layout_constraintTop_toTopOf="parent" />

  <TextView
    android:id="@id/textView2"
    style="@style/TextBox"
    android:layout_width="wrap_content"
    android:layout_height="wrap_content"
    android:text="Text"
    app:layout_constraintLeft_toRightOf="@+id/textView1"
    app:layout_constraintRight_toLeftOf="@+id/textView3"
    app:layout_constraintTop_toTopOf="parent" />

</android.support.constraint.ConstraintLayout>
That’s it – just by adding this one attribute is sufficient to layout the chain according to the inside spread rules rather than the default spread rules. It is worth mentioning at this point that if we apply weights (as we saw previously) both a spread chain and an inside spread chain will behave the same because the weighting logic will grab all of the available space and divide it according to the weights. Essentially this will cause the chain to fill the available space and the differences between a basic spread chain and an inside spread chain are lost.
But that’s not the end – in addition to spread chains, we also have packed chains A Packed chain is created in exactly the same way as a spread chain – either in the editor or by creating a symmetrical pair of constraints in XML. We change it to a packed chain by adding an attribute to the first View in the chain:
<?xml version="1.0" encoding="utf-8"?>
<android.support.constraint.ConstraintLayout xmlns:android="http://schemas.android.com/apk/res/android"
  xmlns:app="http://schemas.android.com/apk/res-auto"
  xmlns:tools="http://schemas.android.com/tools"
  android:id="@+id/activity_main"
  android:layout_width="match_parent"
  android:layout_height="match_parent"
  tools:context="com.stylingandroid.moreconstraintlayout.MainActivity">

  <TextView
    android:id="@+id/textView1"
    style="@style/TextBox"
    android:layout_width="wrap_content"
    android:layout_height="wrap_content"
    android:text="Text"
    app:layout_constraintHorizontal_chainStyle="packed"
    app:layout_constraintLeft_toLeftOf="parent"
    app:layout_constraintRight_toLeftOf="@+id/textView2"
    app:layout_constraintTop_toTopOf="parent" />

  <TextView
    android:id="@+id/textView2"
    style="@style/TextBox"
    android:layout_width="wrap_content"
    android:layout_height="wrap_content"
    android:text="Text"
    app:layout_constraintRight_toRightOf="parent"
    app:layout_constraintLeft_toRightOf="@id/textView1"
    app:layout_constraintTop_toTopOf="parent" />
</android.support.constraint.ConstraintLayout>
By setting layout_constraintHorizontal_chainStyle to packed we define the chain as a packed chain which behaves a little differently to a spread chain: A packed chain centres all of the Views together within the space. That is to say the the group of Views within the chain are grouped together in the centre of the available space:
But that’s not all, we can also apply a bias which will control where the group is positioned within the available space:
<?xml version="1.0" encoding="utf-8"?>
<android.support.constraint.ConstraintLayout xmlns:android="http://schemas.android.com/apk/res/android"
  xmlns:app="http://schemas.android.com/apk/res-auto"
  xmlns:tools="http://schemas.android.com/tools"
  android:id="@+id/activity_main"
  android:layout_width="match_parent"
  android:layout_height="match_parent"
  tools:context="com.stylingandroid.moreconstraintlayout.MainActivity">

  <TextView
    android:id="@+id/textView1"
    style="@style/TextBox"
    android:layout_width="wrap_content"
    android:layout_height="wrap_content"
    android:text="Text"
    app:layout_constraintHorizontal_bias="0.25"
    app:layout_constraintHorizontal_chainStyle="packed"
    app:layout_constraintLeft_toLeftOf="parent"
    app:layout_constraintRight_toLeftOf="@+id/textView2"
    app:layout_constraintTop_toTopOf="parent" />

  <TextView
    android:id="@+id/textView2"
    style="@style/TextBox"
    android:layout_width="wrap_content"
    android:layout_height="wrap_content"
    android:text="Text"
    app:layout_constraintRight_toRightOf="parent"
    app:layout_constraintLeft_toRightOf="@id/textView1"
    app:layout_constraintTop_toTopOf="parent" />
</android.support.constraint.ConstraintLayout>
So this shifts everything to the left. If we don’t specify a bias then it will default to 0.5 and the packed group is centred within the available space. Applying a specific bias value will control how it is positioned: a value of 0.0 will position it on the left edge; a value of 1.0ConstraintLayout which should provide solutions to any of the remaining use-cases provided by RelativeLayout & LinearLayout. Moreover, ConstraintLayout now provides a much richer set of behaviours than LinearLayout, RelativeLayout, and PercentLayout combined. With ConstraintLayout now in beta, the time where we can properly use it is getting extremely close. Get ready folks: this is gonna be good!
The source code for this article is available here.
© 2016, Mark Allison. All rights reserved.
Copyright © 2016 Styling Android. All Rights Reserved.
Information about how to reuse or republish this work may be available at http://blog.stylingandroid.com/license-information.

Good article!
P.S. in first code sample you highlight incorrect line (next line should be highlighted instead)
Thanks for letting me know – it should now be fixed.
Thanks for sharing this