
At Google IO 2016 Google announced a new Android layout named ConstraintLayout. Despite the initial release being labelled as an Alpha release, it is actually pretty stable (with a few caveats). In this series of articles we’ll take a look at this new layout-kid on the block and try and get some insights in how best to use it.
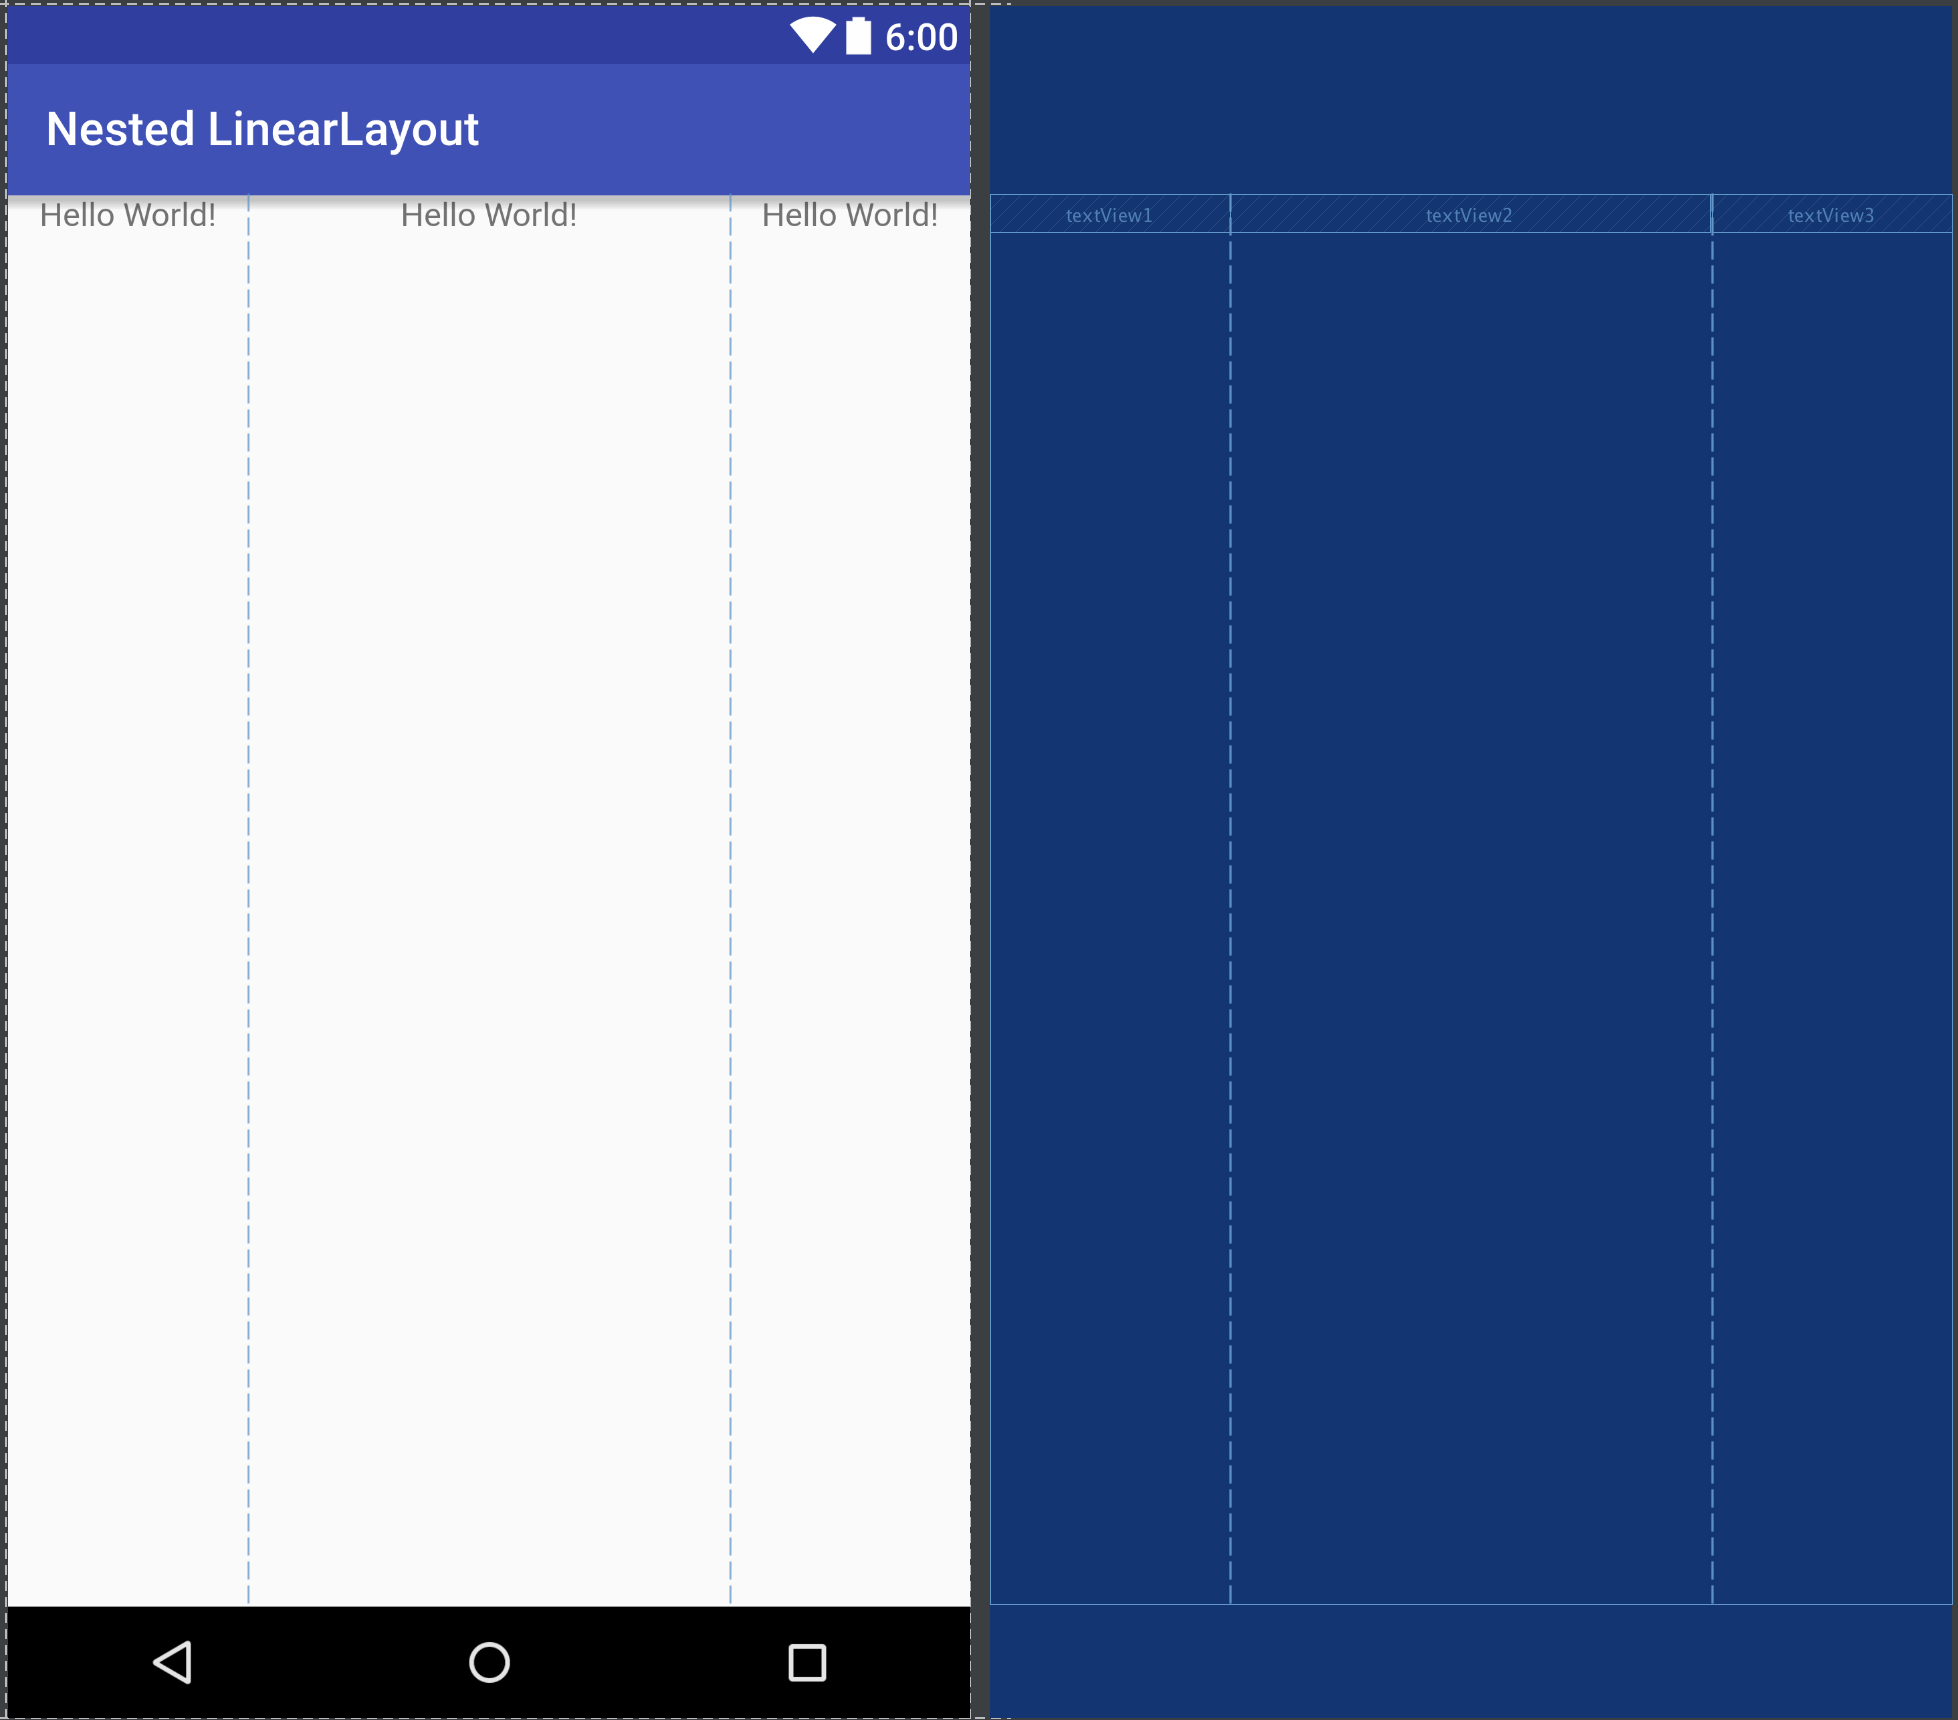
Now that we’ve learned the underlying principles of ConstraintLayout let’s take a look at how to apply it in practice. Let’s start where we touched on in the last article, with mimicking the behaviour of weighted LinearLayout. Anyone who has followed the series up to now should have a good idea of how this will work, but we’ll step in to it nonetheless. Suppose we have the following layout:
<?xml version="1.0" encoding="utf-8"?>
<LinearLayout xmlns:android="http://schemas.android.com/apk/res/android"
  android:layout_width="match_parent"
  android:layout_height="match_parent"
  android:orientation="horizontal">

  <TextView
    android:id="@+id/textView1"
    android:layout_width="0dp"
    android:layout_height="wrap_content"
    android:layout_weight="1"
    android:gravity="center"
    android:text="@string/hello_world" />

  <TextView
    android:id="@+id/textView2"
    android:layout_width="0dp"
    android:layout_height="wrap_content"
    android:layout_weight="2"
    android:gravity="center"
    android:text="@string/hello_world" />

  <TextView
    android:id="@+id/textView3"
    android:layout_width="0dp"
    android:layout_height="wrap_content"
    android:layout_weight="1"
    android:gravity="center"
    android:text="@string/hello_world" />
</LinearLayout>
if we preview this inside the visual editor we can see how this is supposed to look:
If we needed to add a second line we’d need another LinearLayout and we’d then need to add both to a horizontal LinearLayout parent. However we can do the same thing using ConstraintLayout with a couple of Guidelines:
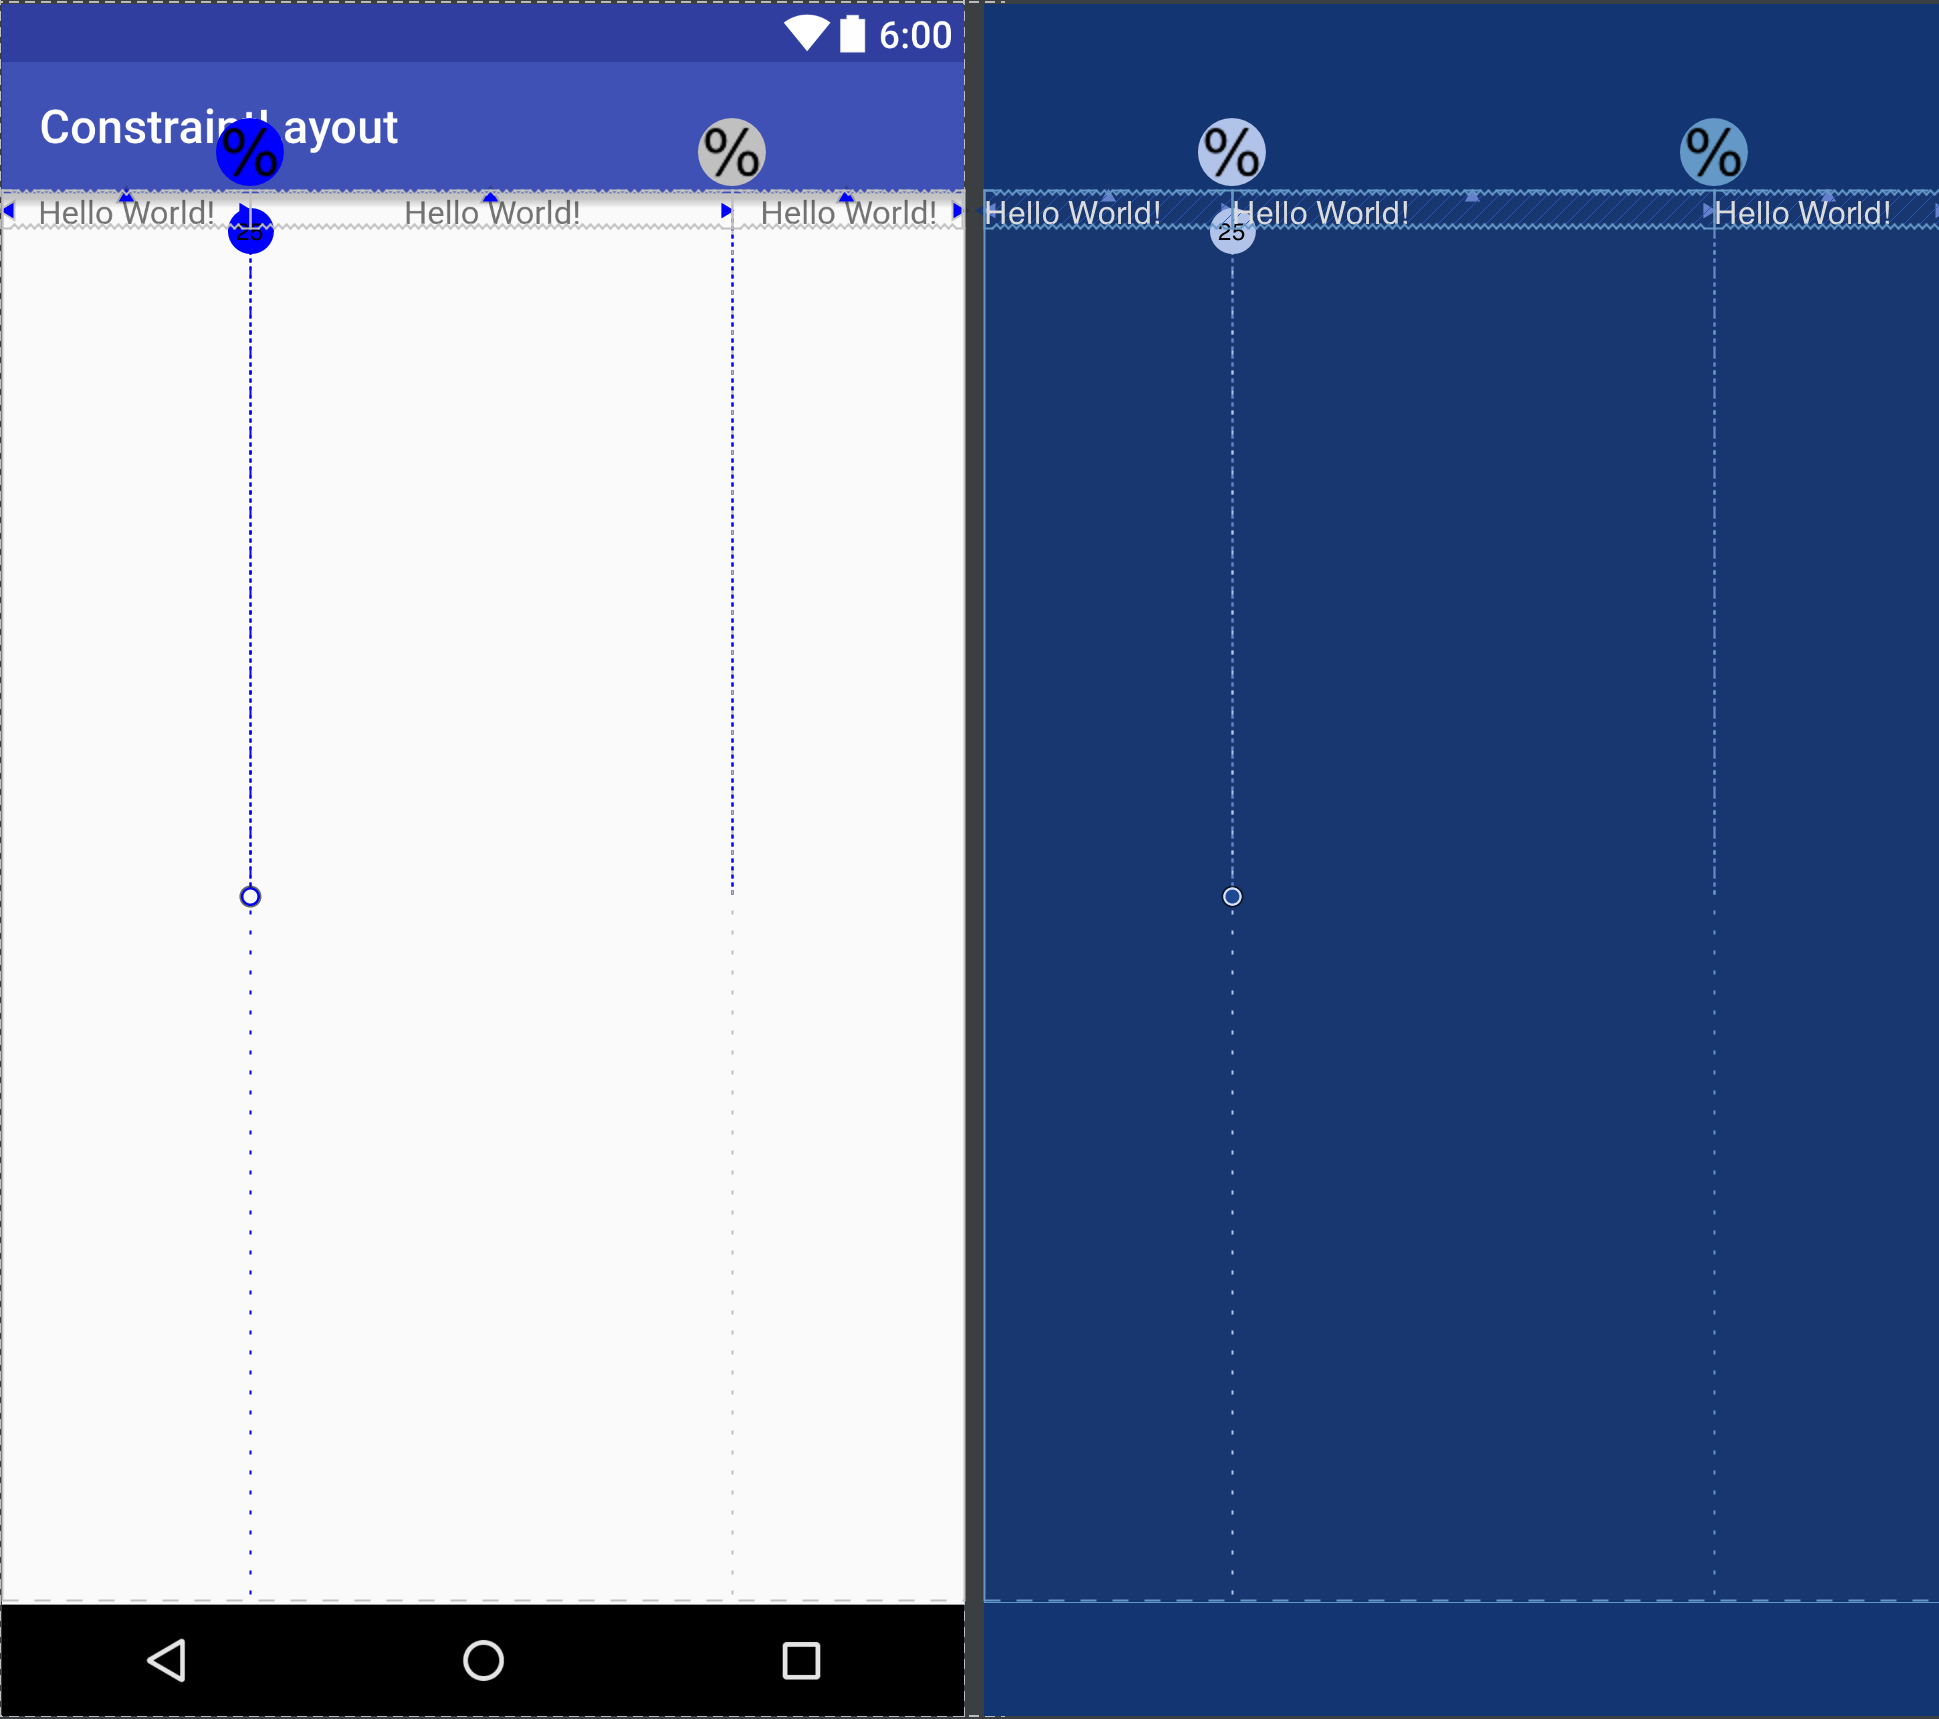
If we wanted to add a second line to this, we’d just need to add three more TextViews and add horizontal constraints to the Guidelines (exactly as the first line), and add a constraint to position them below the first line items.
Next let’s turn our attention to something which is a real-world pain point: in the material Design Guidelines there are multiple examples of how a FAB should be centred on the edge of a panel. Typically we might do this using a rather hacky technique of applying offsets from the top of the panel. In this layout @id/frame is the panel we need to align to, and we need to apply a top margin to the FAB to position it correctly. The value for this is actually a function of the panel height and the FAB height, and if we resize the panel then the FAB doesn’t move with it. Of course there may be other ways of doing this, but I’m merely providing an obvious solution which will no doubt be employed in many layouts! The layout looks like this:
<?xml version="1.0" encoding="utf-8"?>
<RelativeLayout xmlns:android="http://schemas.android.com/apk/res/android"
  xmlns:app="http://schemas.android.com/apk/res-auto"
  android:layout_width="match_parent"
  android:layout_height="match_parent">

  <FrameLayout
    android:id="@+id/frame"
    android:layout_width="match_parent"
    android:layout_height="96dp"
    android:layout_alignParentTop="true"
    android:background="@color/colorPrimaryDark" />

  <android.support.design.widget.FloatingActionButton
    android:id="@+id/floatingActionButton"
    android:layout_width="wrap_content"
    android:layout_height="wrap_content"
    android:layout_alignEnd="@+id/frame"
    android:layout_alignTop="@+id/frame"
    android:layout_marginEnd="16dp"
    android:layout_marginTop="76dp"
    android:clickable="true"
    android:contentDescription="@null"
    android:src="@drawable/ic_grade_white"
    app:fabSize="mini" />

</RelativeLayout>
If we take a look at this in the preview we can see that it certainly does what we need, but hard-coding dp values which are actually calculated from the height of another View and the FABs intrinsic height (which may itself change if we alter the image, or the padding) is already a pretty bad code-smell and it going to result in a layout which will not be easy to maintain:

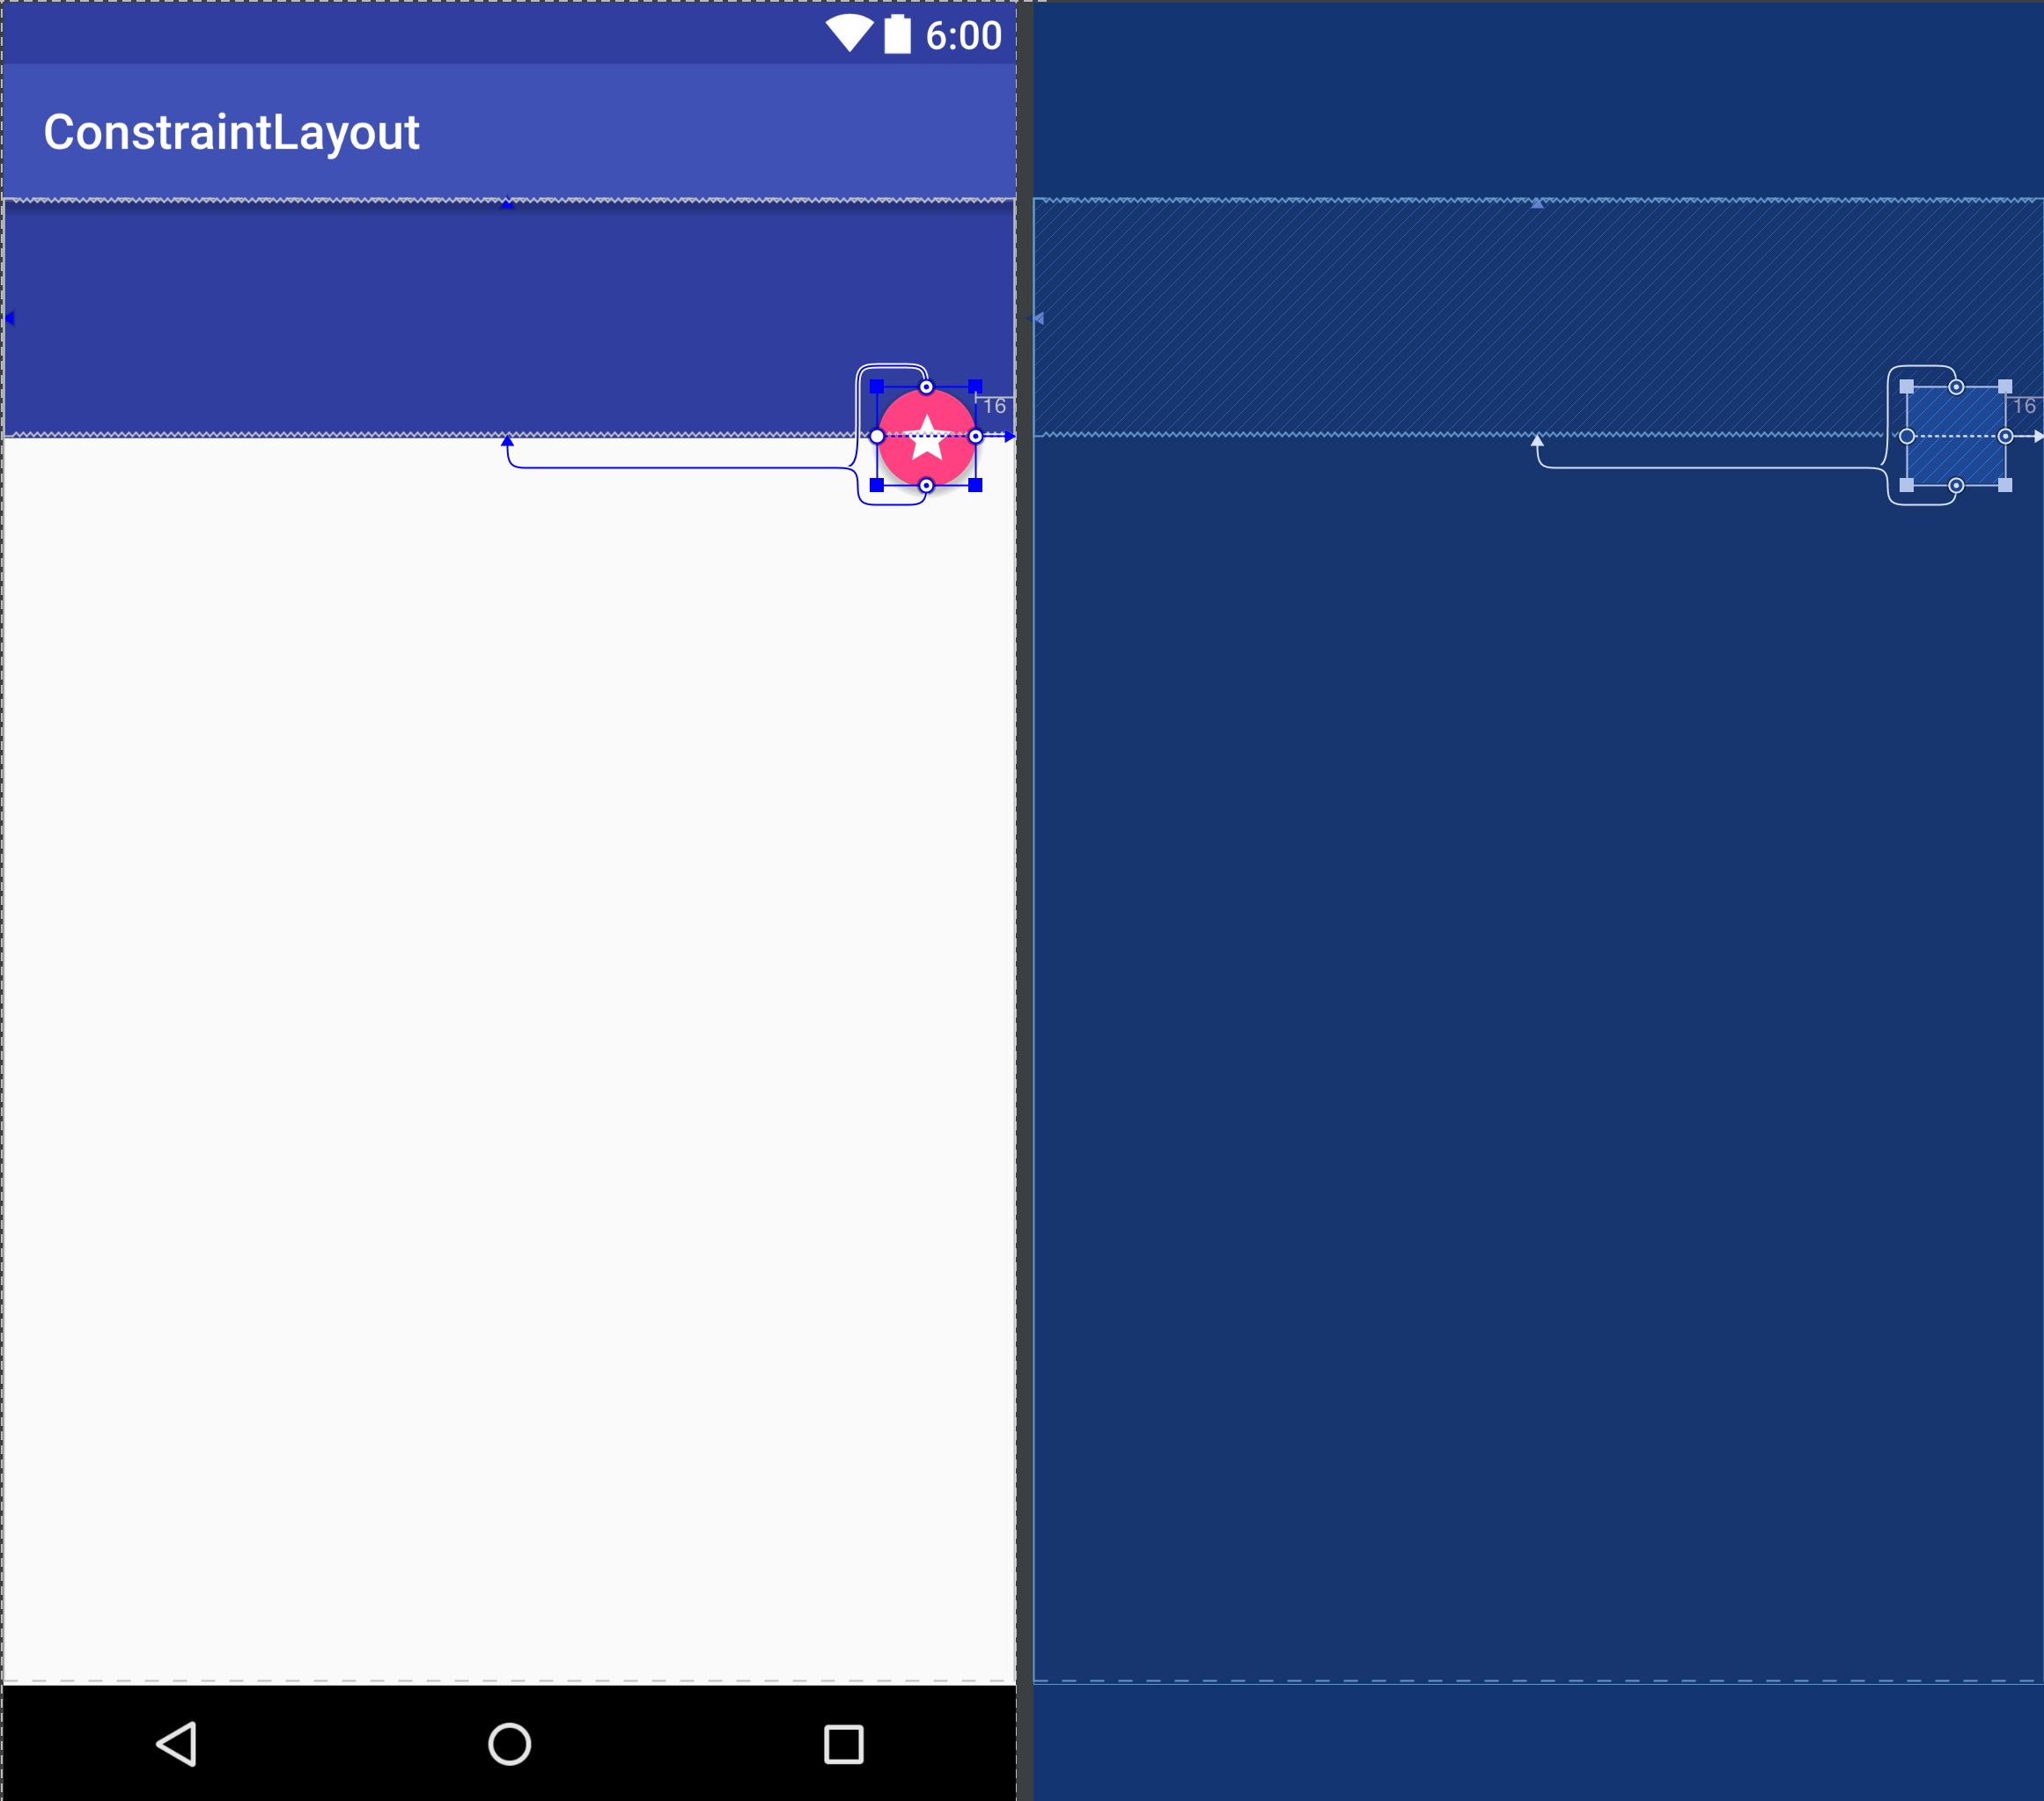
So can we do this any better in ConstraintLayout? Of course we can! We’ve already seen that we can centre a View within the parent by adding constraints relative to the parent, and that we can constrain a View to another View. But we can actually add multiple constraints to a single anchor point on another View and it is this which enables us to constrain the FAB to the bottom edge of the panel:
The thing to note here is that we have constraints from both top and bottom anchor points of the FAB which attache to the bottom anchor point of the panel, and that causes the FAB to be centred vertically on this point. Of course we can apply a bias as well if we want to offset it, but we actually want it centred, so no bias is needed:
So this is already a much cleaner, more maintainable solution but it also resolves another issue – we can actually set the panel height to wrap_content to dynamically size to the height of its children. In the first, hacky example this simply wouldn’t work and we’d need to switch to Java to either create a custom layout or, at the very least, position the FAB programmatically after the panel height had been measured. In the ConstraintLayout solution we actually get that already without having to change a thing!
Hopefully a couple of simple examples already show the power and flexibility that ConstraintLayout offers.
In the final article in this series we’ll take a look at a couple of other features of the visual editor, and speculate upon where future developments of ConstraintLayout may be headed.
© 2016, Mark Allison. All rights reserved.
Copyright © 2016 Styling Android. All Rights Reserved.
Information about how to reuse or republish this work may be available at http://blog.stylingandroid.com/license-information.

Would you be kind enough to show what would become the weighted linearlayout with a constraint layout?
There are some examples later in the series