In API 26 (Oreo) a new TextClassification system was introduced. This has been further refined in API 28 (Pie). In this short series we’ll take a look at what this is, how to use it, and how we can add custom behaviours to it.
 Previously we began work on a custom TextClassifier implementation and looked at how we can implement our own selection suggestion implementation. In this final article in this series, we’ll implement the corresponding
 classifyText() and hook up our custom TextClassifier implementation.
The classifyText() implementation is actually pretty straightforward. We much check that the selection matches the selection in the request, and if so we return a TextClassification instance which we’ll look at in a moment. If the selection does not match our regex, then we defer to the fallback (which is the default implementation of TextClassifier):
override fun classifyText(request: TextClassification.Request): TextClassification {
    return if (regex.matches(request.subSequence())) {
        factory.buildTextClassification(
                request.subSequence().toString(),
                listOf(TextClassifier.TYPE_URL to 1.0f),
                listOf(factory.buildRemoteAction(
                        context,
                        R.drawable.ic_stylingandroid,
                        stylingAndroid,
                        contentDescription,
                        stylingAndroidUri
                ))
        )
    } else {
        fallback.classifyText(request)
    }
}

private fun TextClassification.Request.subSequence() =
        text.subSequence(startIndex, endIndex)
There’s an extension function to TextClassification.Request which will return the subSequence of the text that has been selected, and we use this to match against the regex (line 36). We then build a TextClassification instance which requires the matches string (line 38), a list of classification types and their respective confidence scores (line 39), and a list of RemoteAction instances each of which corresponds to one of classification type entries (lines 39-45).
The buildRemoteAction() method constructs each RemoteAction instance:
override fun buildRemoteAction(
        context: Context,
        drawableId: Int,
        title: String,
        contentDescription: String,
        uri: String
): RemoteAction {
    return RemoteAction(
            Icon.createWithResource(context, drawableId),
            title,
            contentDescription,
            PendingIntent.getActivity(
                    context,
                    0,
                    Intent(Intent.ACTION_VIEW, Uri.parse(uri)),
                    0
            )
    )
}
The RemoteAction constructor takes four arguments: An Icon which will be displayed as part of the button which provides the action; The text to be displayed; a content description for accessibility purposes, and finally a PendingIntent which represents the action that will be performed if the user taps on the action button. In our example code we use a drawable of the Styling Android logo for the icon, the text “Styling Android” for the title, and simple content description, and a PendingIntent which will launch a browser with the URL “https://blog.stylingandroid.com”.
The buildTextClassification() function uses a TextClassification.Builder instance to create the TextClassification instance:
override fun buildTextClassification(
        text: String,
        entityTypes: List<Pair<String, Float>>,
        actions: List<RemoteAction>
): TextClassification {
    return TextClassification.Builder()
            .run {
                setText(text)
                entityTypes.forEach { setEntityType(it.first, it.second) }
                actions.forEach { addAction(it) }
                build()
            }
}
This takes three arguments: The text that was matched, a list of types and their confidence scopes as Pairs, and the list of RemoteActions corresponding to each type / confidence Pair. In the example these will be the selected substring, a list containing one Pair of TextClassifier.TYPE_URL with a confidence score of 1.0f, and a singleton list containing the RemoteAction that we just looked at.
Thats the custom TextClassifier completed, and all that remains is to hook it up to our TextView:
class MainActivity : AppCompatActivity() {

    private val emailText = "[email protected]"
    private val urlText = "https://blog.stylingandroid.com"
    private val hybridText = "Email: $emailText"

    private lateinit var textClassificationManager: TextClassificationManager

    override fun onCreate(savedInstanceState: Bundle?) {
        super.onCreate(savedInstanceState)
        setContentView(R.layout.activity_main)

        textClassificationManager = getSystemService(Context.TEXT_CLASSIFICATION_SERVICE) as TextClassificationManager

        classifier()

        text1.textClassifier = StylingAndroidTextClassifier(this, textClassificationManager.textClassifier)
    }

    private fun classifier() = async(CommonPool) {
        val textClassifier = textClassificationManager.textClassifier
        val emailClassification = textClassifier.classifyText(emailText, 0, emailText.length, LocaleList.getDefault())
        println(emailClassification)
        val urlClassification = textClassifier.classifyText(urlText, 0, urlText.length, LocaleList.getDefault())
        println(urlClassification)
        val suggestions = textClassifier.suggestSelection(hybridText, 10, 11, LocaleList.getDefault())
        println(suggestions)
    }
}
A single line of code does everything we need. We create an instance of our custom TextClassifier and pass it an instance of the default TextClassifier as a constructor argument, and set the textClassifier of the TextView to our custom instance.
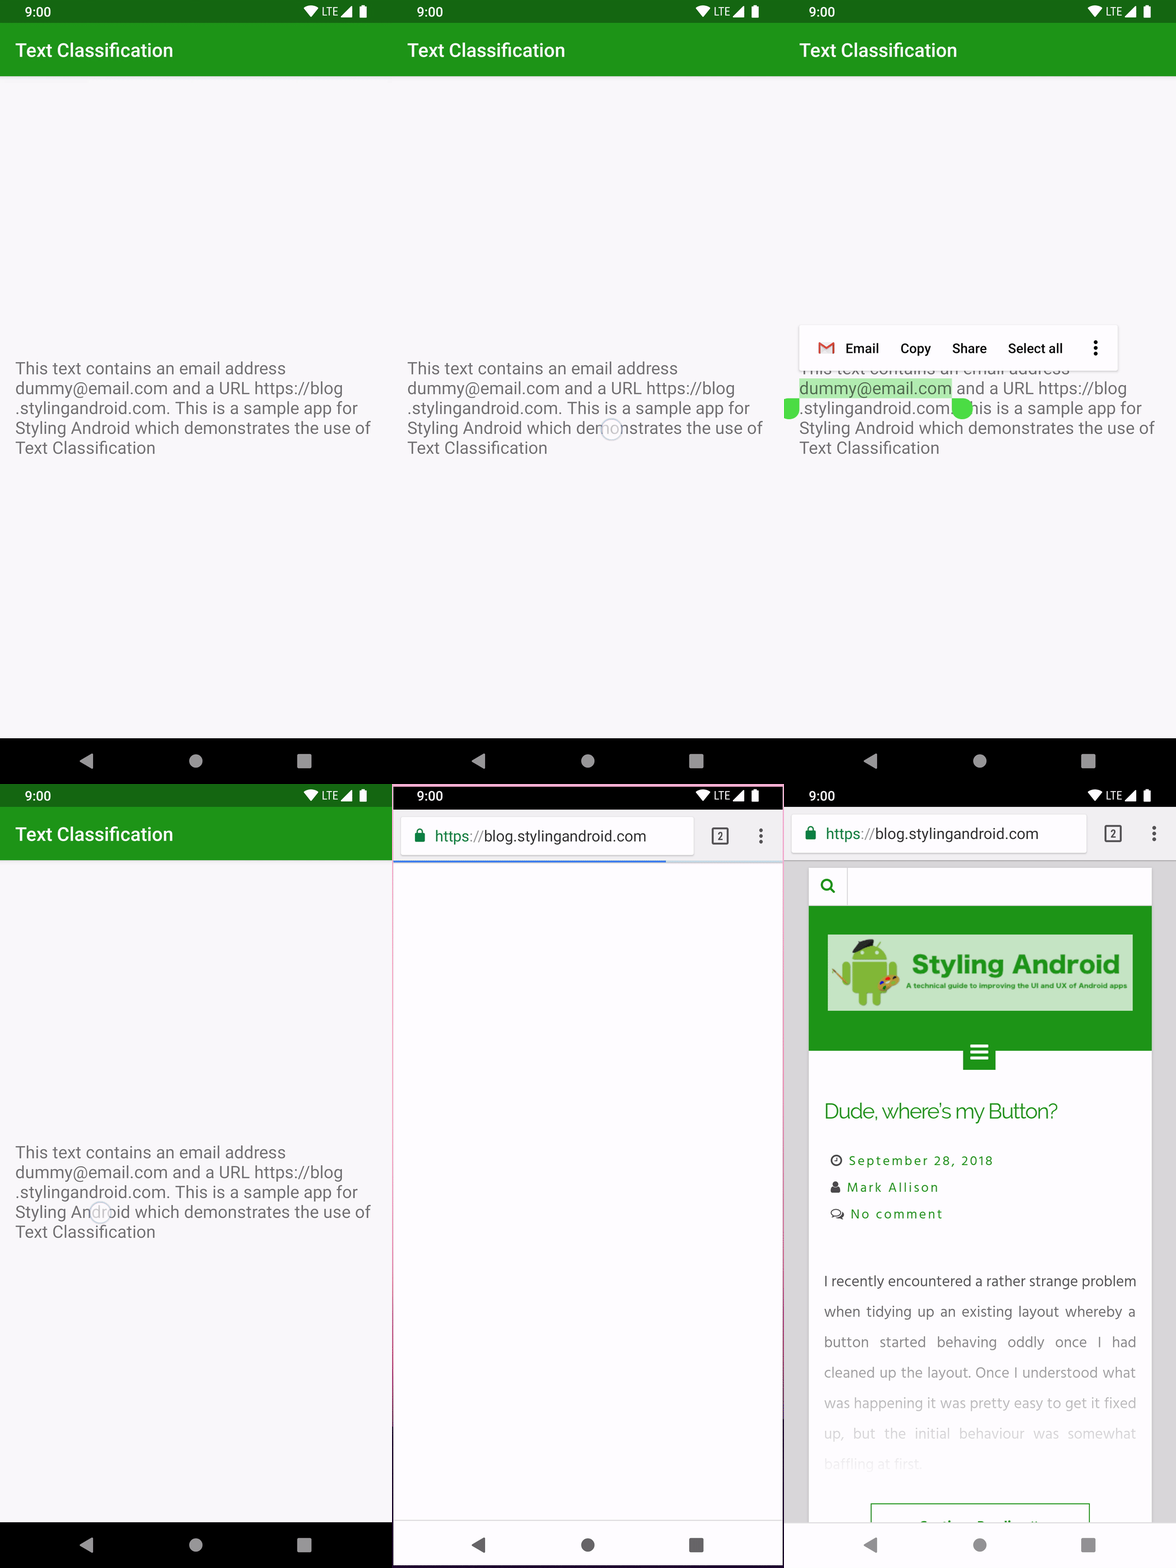
The behaviour that we now get is that if the user long presses on unrecognised types there will be simple copy, paste, and select all options; if they long press within any of the types supported by default TextClassifier then they get all of the same behaviours and actions as we saw in the first article; but if they long press on the string “Styling Android” (or variants matching the regex) then we get the custom, branded action which will launch the browser and load https://blog.stylingandroid.com:
There is also a mechanism in TextClassifier to identify concrete types, and then generate links within the text, but we’ll skip that as part of this series as the main functionality built in to TextView and WebView is covered by the techniques that we’ve looked at here. If anyone is interested in this, then please let me know and I’ll write a separate article detailing it.
The source code for this article is available here.
© 2018, Mark Allison. All rights reserved.
Copyright © 2018 Styling Android. All Rights Reserved.
Information about how to reuse or republish this work may be available at http://blog.stylingandroid.com/license-information.


I can’t understand kotlin, maybe you have a version of source code in java?
Thanks for your article. Your blog is very useful for a new framework engineer.
Sorry, it Kotlin-only, I’m afraid. Kotlin is pretty much a requirement for many Android jobs these days so I would strongly urge you to learn it.