A common use-case when we’re designing a layout containing a RecyclerView (or, if you’re a glutton for punishment: ListView) is that we may have to display data that is either generated or obtained at runtime. For example, we retrieve the data for the list items from a cloud API. This can make it difficult to properly visualise the data during development so often we’ll find ourselves having to fire up the app to obtain real data each time we make a minor tweak to the item layout. There are actually some neat helpers build in to the tools: namespace which can help us quite considerably. In this short series we’ll take a look at these tools and see how they can speed up our layout development.
 Previously we saw how we can use sample data to enable us to much better visualise how out RecyclerView layouts will look, which should help us to speed up out layout development quite considerably, but things do not end there. There will often be times when the standard sample data does not fit what we require. Moreover there may also be edge-cases that we need to visualise to understand thing such as how our layout will behave if the name of a person in out list item exceeds the length of a single line. There is also a mechanism to create custom sample data, and that it what we’ll look at in this concluding article.
Let’s begin by tacking the issue of long names. If the existing set of names do not provide the precise data we require, then we can create our own. First we need to create a sample data directory which we can do in Android Studio:
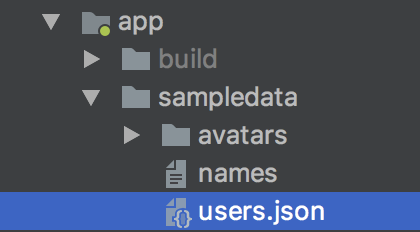
All this actually does is create the correctly named folder (sampledata) in the correct location which is a direct child of the module directory, in this case the app directory:
Next we create a text file named “names” and add a different name on each line:
Mark Allison
Sir Reginald Fortescue Crumplington-Smythe
Pablo Diego José Francisco de Paula Juan Nepomuceno María de los Remedios Cipriano de la Santísima Trinidad Ruiz y Picasso
Millicent Marbles
On the third line I have included Pablo Picasso’s full name as the requirement here is to see how a really long name would affect our layout.
Next we can use this file instead of the sample data provided by Android Studio by replacing the tools:text="@tools:sample/full_names" attribute on the TextView which displays the person’s name in the item layout:
  <TextView
    android:id="@+id/name"
    android:layout_width="0dp"
    android:layout_height="wrap_content"
    android:layout_margin="8dp"
    app:layout_constraintBottom_toTopOf="@+id/city"
    app:layout_constraintEnd_toEndOf="parent"
    app:layout_constraintHorizontal_weight="5"
    app:layout_constraintStart_toEndOf="@id/avatar"
    app:layout_constraintTop_toTopOf="parent"
    app:layout_constraintVertical_chainStyle="packed"
    tools:text="@sample/names"/>
It is important to remove the tools namespace from the resource ID of our sample data. This is now part of our app namespace rather than the tools namespace. If we now look at the preview we can see that our custom names name now been used:
The third item shows how a long name is rendered in the layout and we are now in a far better position to determine if we need to tweak the layout to handle long names.
The next thing we can look at is providing custom avatar images. Once again we need to add these to the sampledata directory and we’ll create them in a subfolder named avatars:
The folder name is arbitrary – it can be anything we like. We can now reference this folder in exactly the same way as we did with our custom names:
  <ImageView
    android:id="@+id/avatar"
    android:layout_width="0dp"
    android:layout_height="0dp"
    android:layout_marginStart="8dp"
    android:layout_marginEnd="8dp"
    android:contentDescription="@null"
    app:layout_constraintDimensionRatio="h,1:1"
    app:layout_constraintEnd_toStartOf="@id/name"
    app:layout_constraintHorizontal_chainStyle="packed"
    app:layout_constraintHorizontal_weight="1"
    app:layout_constraintStart_toStartOf="parent"
    app:layout_constraintTop_toTopOf="@id/name"
    tools:src="@sample/avatars" />
This is where there appears to be something weird going on (in Android Studio 3.1 Canary 9, that is). Although I added four distinct avatar VectorDrawables (all of which we imported from the material icon set in Asset Studio), only two of them are actually displayed:
The first and third images are picked up but the second and fourth are not. The bug appears to be that the assets at odd numbered positions in the directory list are included, but those at even positions are not. The fix is to duplicate each image so that 1 & 2 are both the first asset, 3 & 4 are both the second asset, 5 & 6 are both the third asset, and 7 & 8 are both the fourth asset:
Now we can see that we are getting all of the avatar assets used in the preview:
While we can easily create separate string lists as we did for the names, we can also aggregate data in to a JSON file which we can then address as sample data. To do this we create a JSON file in the sampledata folder:
Next we populate this with some JSON. The structure of this needs to be an enclosing JSON object, containing one or more named lists of items – in this case we have a single list named “data”:
{
  "data": [
    {
      "city": "Hemel Hempstead, Hertfordshire, UK",
      "avatar": "@sample/avatars"
    },
    {
      "city": "Brokenwind, Aberdeenshire, UK",
      "avatar": "@sample/avatars"
    },
    {
      "city": "Málaga, España",
      "avatar": "@sample/avatars"
    },
    {
      "city": "Batchelors Bump, Essex, UK",
      "avatar": "@sample/avatars"
    }
  ]
}
Note how we can reference our avatars sample data from within this JSON.
As a quick side note: Those are all real place names – I haven’t made them up, honest! Us Brits are particularly good at giving places stupid names, and there are many more rather more, erm…shall we say: indelicate, names I could have chosen. But yes, I really do live in a place named “Hemel Hempstead”.
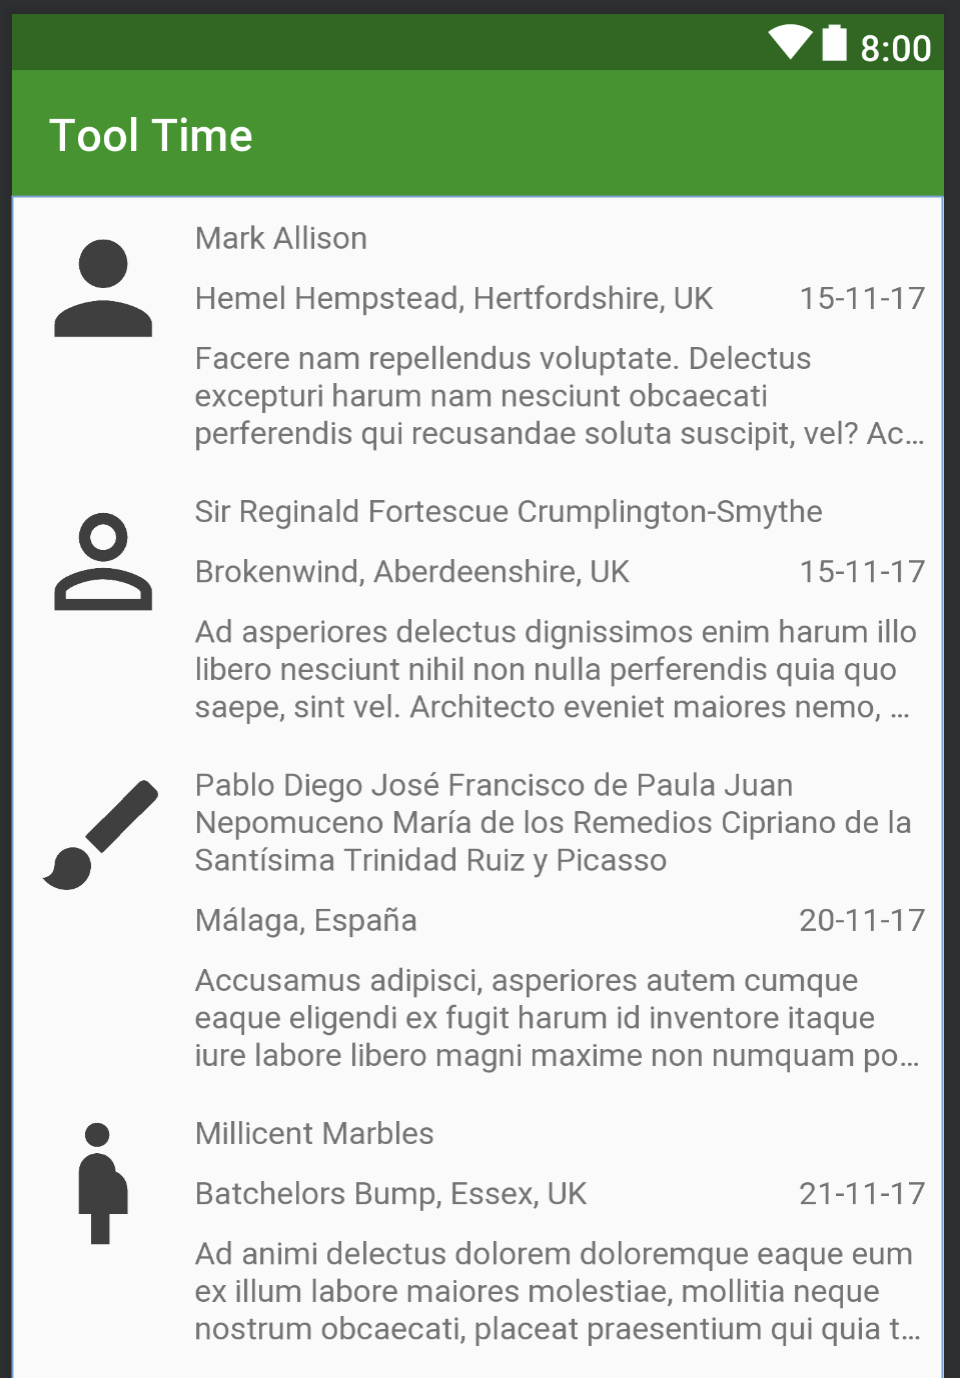
We can now apply this to our item layout. Note how we can mix and match data provided by Android Studio, our custom names, and data from the JSON file:
<?xml version="1.0" encoding="utf-8"?>
<android.support.constraint.ConstraintLayout xmlns:android="http://schemas.android.com/apk/res/android"
  xmlns:app="http://schemas.android.com/apk/res-auto"
  xmlns:tools="http://schemas.android.com/tools"
  android:layout_width="match_parent"
  android:layout_height="wrap_content">

  <ImageView
    android:id="@+id/avatar"
    android:layout_width="0dp"
    android:layout_height="0dp"
    android:layout_marginStart="8dp"
    android:layout_marginEnd="8dp"
    android:contentDescription="@null"
    app:layout_constraintDimensionRatio="h,1:1"
    app:layout_constraintEnd_toStartOf="@id/name"
    app:layout_constraintHorizontal_chainStyle="packed"
    app:layout_constraintHorizontal_weight="1"
    app:layout_constraintStart_toStartOf="parent"
    app:layout_constraintTop_toTopOf="@id/name"
    tools:src="@sample/users.json/data/avatar" />

  <TextView
    android:id="@+id/name"
    android:layout_width="0dp"
    android:layout_height="wrap_content"
    android:layout_margin="8dp"
    app:layout_constraintBottom_toTopOf="@+id/city"
    app:layout_constraintEnd_toEndOf="parent"
    app:layout_constraintHorizontal_weight="5"
    app:layout_constraintStart_toEndOf="@id/avatar"
    app:layout_constraintTop_toTopOf="parent"
    app:layout_constraintVertical_chainStyle="packed"
    tools:text="@sample/names" />

  <TextView
    android:id="@+id/city"
    android:layout_width="wrap_content"
    android:layout_height="wrap_content"
    android:layout_margin="8dp"
    app:layout_constraintBottom_toTopOf="@id/description"
    app:layout_constraintEnd_toStartOf="@id/date"
    app:layout_constraintHorizontal_chainStyle="spread_inside"
    app:layout_constraintStart_toEndOf="@id/avatar"
    app:layout_constraintTop_toBottomOf="@+id/name"
    tools:text="@sample/users.json/data/city" />

  <TextView
    android:id="@+id/date"
    android:layout_width="wrap_content"
    android:layout_height="wrap_content"
    android:layout_margin="8dp"
    android:gravity="end"
    app:layout_constraintBaseline_toBaselineOf="@id/city"
    app:layout_constraintEnd_toEndOf="parent"
    app:layout_constraintStart_toEndOf="@id/city"
    tools:text="@tools:sample/date/ddmmyy" />

  <TextView
    android:id="@+id/description"
    android:layout_width="0dp"
    android:layout_height="wrap_content"
    android:layout_margin="8dp"
    android:ellipsize="end"
    android:maxLines="3"
    app:layout_constraintBottom_toBottomOf="parent"
    app:layout_constraintEnd_toEndOf="parent"
    app:layout_constraintStart_toEndOf="@id/avatar"
    app:layout_constraintTop_toBottomOf="@+id/city"
    tools:text="@tools:sample/lorem/random" />

</android.support.constraint.ConstraintLayout>
If we now look at the preview we can see all of our data being used, once again without a working Adapter implementation:
Despite the oddities with getting working image asserts, being able to quickly and easily define custom data sets can really help to speed up our layout creation for list items.
The source code for this article is available here.
© 2018, Mark Allison. All rights reserved.
Copyright © 2018 Styling Android. All Rights Reserved.
Information about how to reuse or republish this work may be available at http://blog.stylingandroid.com/license-information.


Thank you for the article.
With regards to the avatar misbehavior: Did you try to name your avatar files starting with avatar_0.xml? Did you file an issue for the behavior? If so please share the link here.
I had to clean my project after creating the json file. Otherwise I had my “@sample/…” underlined in red
Would it be possible to use a multi-line string on a sampledata file?
They should work exactly the same as any string resource, and embedding newlines should do the trick.