In the previous article we got a basic action implemented usign ActionBar. In this article we’ll have a look at allowing the user to navigate though our app using the ActionBar.
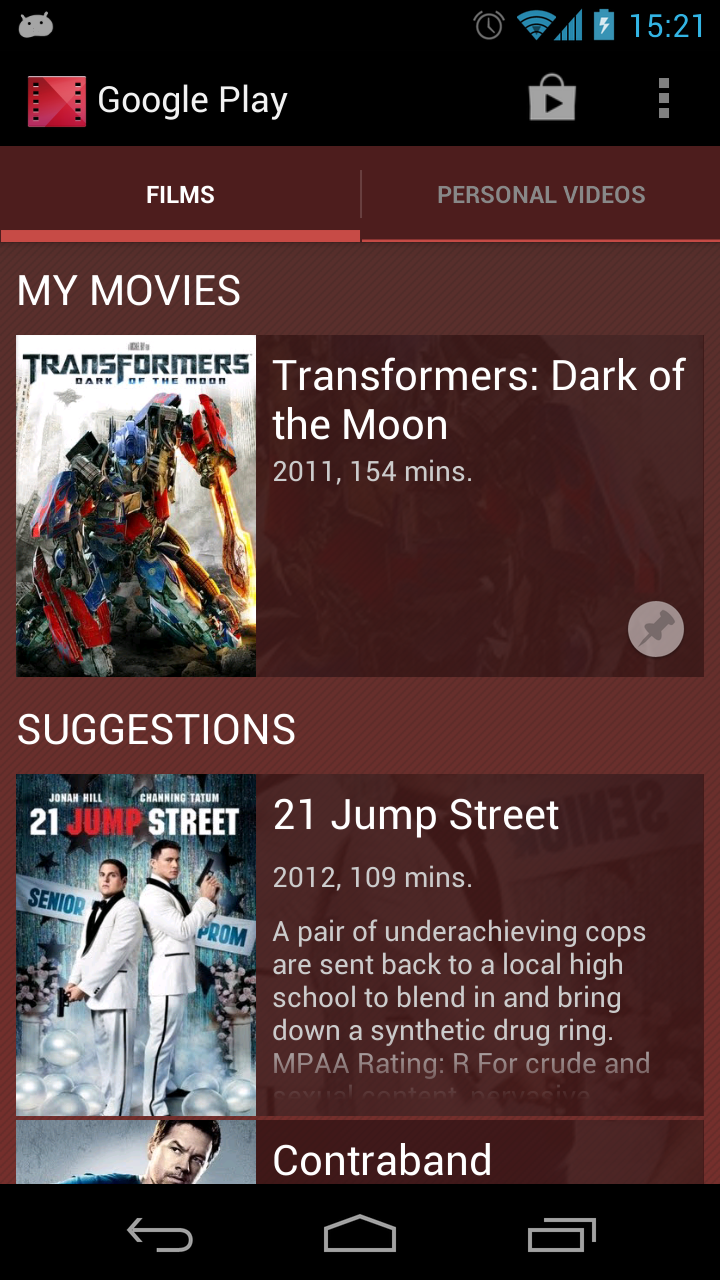
Actionbar supports a couple of basic types of navigation, Tab-based and Dropdown-based. An example of tab-based navigation can be found in the Play Movies app:

Here tabs are used to select between Films and Personal Videos. Implementing tab navigation requires us to create some Fragment implementations which will be used for the content panel for each of the tabs. Each of these consists of a simple layout res/layout/frag1.xml:
[xml]
[/xml]
And a simple class which inflates this layout here’s Fragment1.java:
[java] public class Fragment1 extends Fragment{
@Override
public View onCreateView( LayoutInflater inflater,
ViewGroup container,
Bundle savedInstanceState )
{
return inflater.inflate( R.layout.frag1,
container, false );
}
}
[/java]
The other class and layout are almost identical except the layout uses a different string resource for the text, and the class inflates the frag2 layout in stead of frag1. For a real app, these would obviously be more complex, but I am deliberately keeping the fragments simple so that we can focus on the navigation.
Next we have to create a android.app.ActionBar.TabListener instance as an inner class within MainActivity:
implements ActionBar.TabListener
{
private Fragment mFragment;
private final Activity mActivity;
private final String mFragName;
public MyTabListener( Activity activity,
String fragName )
{
mActivity = activity;
mFragName = fragName;
}
@Override
public void onTabReselected( Tab tab,
FragmentTransaction ft )
{
// TODO Auto-generated method stub
}
@Override
public void onTabSelected( Tab tab,
FragmentTransaction ft )
{
mFragment = Fragment.instantiate( mActivity,
mFragName );
ft.add( android.R.id.content, mFragment );
}
@Override
public void onTabUnselected( Tab tab,
FragmentTransaction ft )
{
ft.remove( mFragment );
mFragment = null;
}
}
[/java]
This is responsible for creating a fragment and adding it to android.R.id.content which is the main content area.
Finally, we need to implement this within the onCreate method of MainActivity:
public void onCreate( Bundle savedInstanceState )
{
super.onCreate( savedInstanceState );
ActionBar ab = getActionBar();
ab.setNavigationMode( ActionBar.NAVIGATION_MODE_TABS );
Tab tab = ab.newTab()
.setText( R.string.frag1 )
.setTabListener(
new MyTabListener( this,
Fragment1.class.getName() ) );
ab.addTab( tab );
tab = ab.newTab()
.setText( R.string.frag2 )
.setTabListener(
new MyTabListener( this,
Fragment2.class.getName() ) );
ab.addTab( tab );
}
[/java]
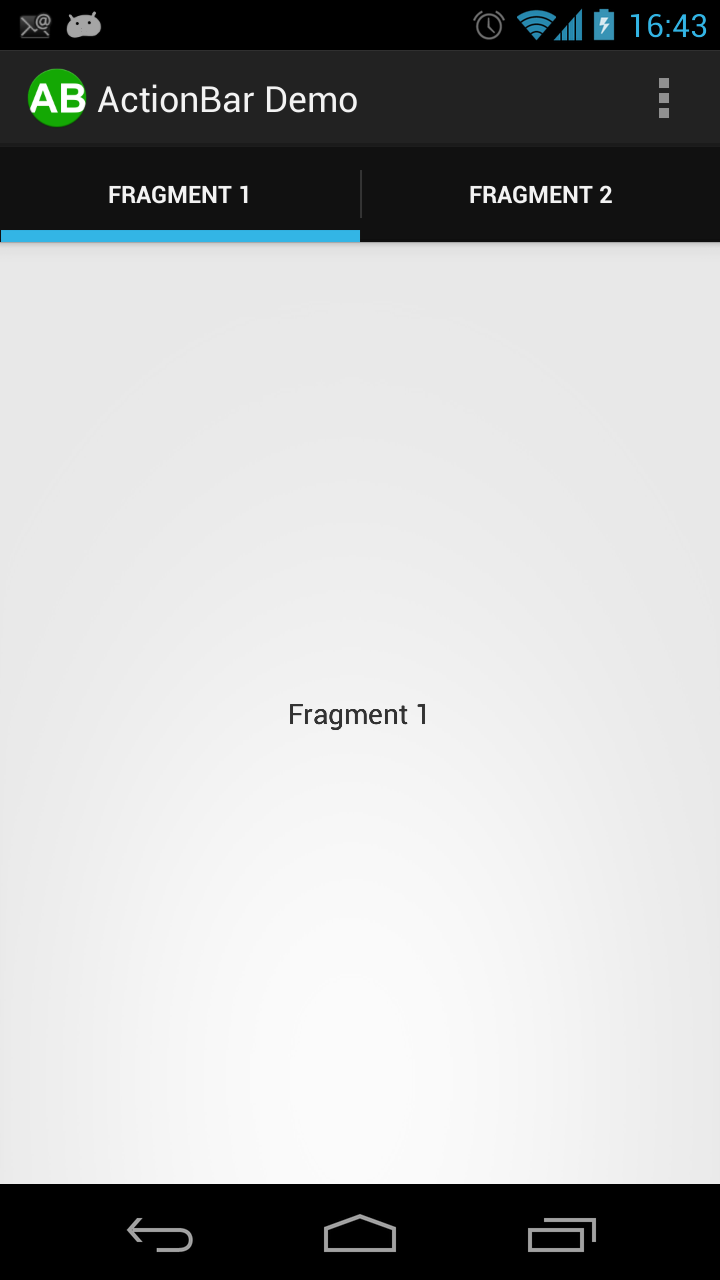
This sets the required navigation mode, then creates and adds the two tabs with the string to display, and the classname of the relevant fragment. One thing to note: we do not call setContentView() as we normally would in onCreate(). This is because we are adding our Fragments directly to the content area by using android.R.id.content in our TabListener. If we want to do something a bit more complex, we can call setContentView() to add a custom layout, but we must change our TabListener to add the fragments to an emprty container within this custom layout instead. If we run this we get our tabs which switch between the two fragments that we created:

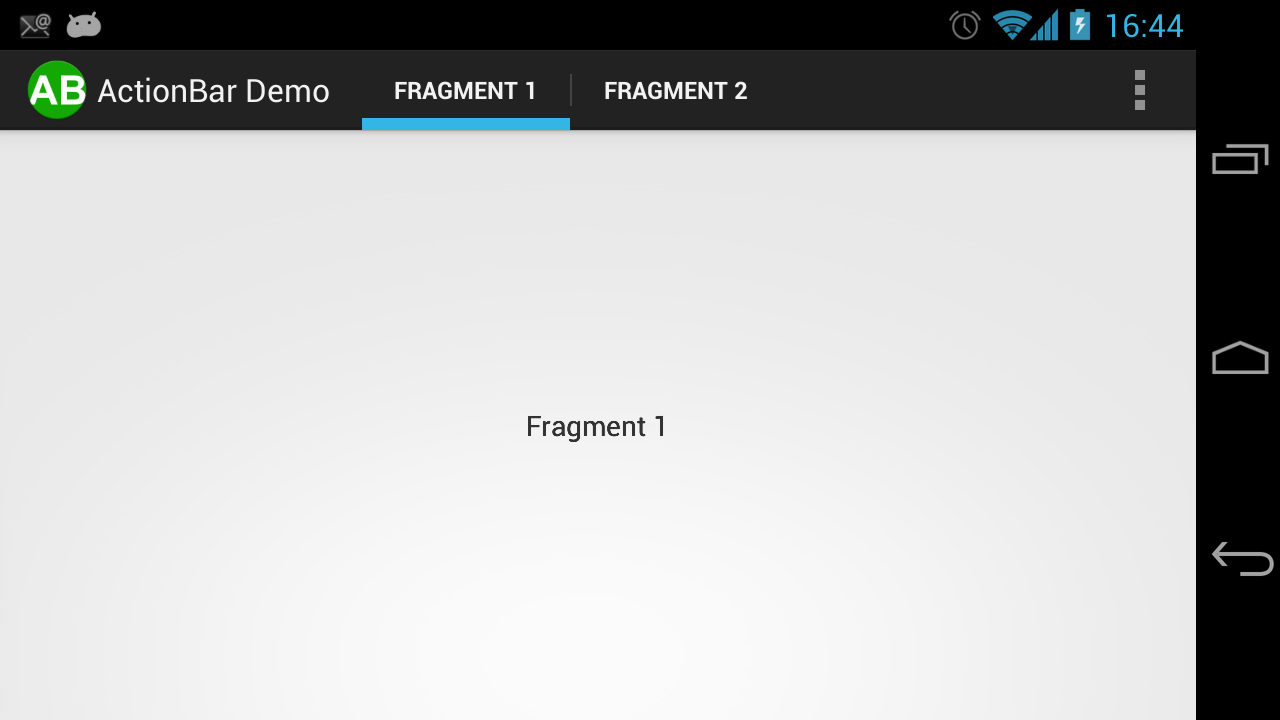
One thing to note is that, because there wasn’t much space, the tab controls were split on to a second line. On a larger device, or if we switch to lanscape mode, there will be more space, and the ActionBar will make use of this by combining everything on to a single line:

On ICS (Android 4.0) and later, it is possible to control this using the uiOptions="splitActionBarWhenNarrow" attribute on this
In the next article we’ll have a look at drop-down based navigation. The source code for this article can be found here.
© 2012, Mark Allison. All rights reserved.
Copyright © 2012 Styling Android. All Rights Reserved.
Information about how to reuse or republish this work may be available at http://blog.stylingandroid.com/license-information.


Note, the splitActionBarWhenNarrow option controls placement of action items, not the tab bar. The two-line version of action bar tabs is referred to as stacked not split. This aligns with the theme attributes and APIs for setting the respective backgrounds: background, backgroundStacked, and backgroundSplit.
Hello, I am relatively new to android development. I figured out the ActionBarSherlock library only recently.
Even then, I was able to implement your tutorial using the ActionBarSherlock on android 2.x. Great simple tutorial 🙂
I have one simple problem with this though. Is there a way to return back to the state in which you left your tab. Like suppose, I have a list in tab 1 and I scroll down, I want to return to the same position I left my list in when I switched to tab2 and then back to tab 1.
I know I could have hidden containers which have the fragment active in them and just bring them forward rather than replacing the fragments, but I see this as a very ineffective solution. I am hoping someone can do this in a more elegant way, more or less like the addToBackStack() method does for navigating between fragments.
The easiest way of doing this is by using the Instance State mechanism build in to Android Activity & Fragment life cycles. In onSaveInstanceState() perisist the current ListView selection or scroll position in the bundle, then you can read it back from the Bundle that is passed to onCreate next time your Fragment or Activity is created.
Thanks. Sounds like it will work. Will look into that as soon as I finish going through the next tutorial.
Thanks for publishing these tutorials. The Android docs in this area are a little sparse but this is a really important topic for anybody writing modern Android apps.
In example code, in MyTabListener class, it shows:
@Override
public void onTabReselected
It should be:
public void onTabReselected
without @Override
The same thing for other methods.
Only if you are compiling using Java 1.5. The example code is correct for Java 1.6+ which most people will be using.
I was wrong.
I am using 1.6, but I find the mistake in eclipse settings in annotation section.
Thanks.
Why is the TextViews displayed overlapped on each other when I switch back and forth between landscape and portrait and changed the selected tab in between.
The problem with the overlapping can be solved by changing ft.add() to ft.replace() in onTabSelected function.
HI,
Thanks for these tutorials. As others have pointed out, there is scant little information dealing with the action bar.
Reading this tutorial, and viewing the associated source code, the obvious question that jumps out at me is, “How and when is the main layout resource being inflated?”. A reference to R.layout.main is nowhere to be found in your code.
The reason I bring this up is because I’m having trouble getting any type of styling incorporated into my action bar (as shown in your subsequent tutorials, and I am wondering if the way I’m inflating my layout and instantiating my fragments is the reason.
For what it’s worth, my main.xml is a relative layout containing a banner ad view aligned at the bottom of the parent, and a linear layout above it that functions as the container for the fragment. (your example shows the container as a frame). In my main activity, I set the content view to main. Create the action bar and fragments. In my onTabSelected method, I perform an ft.add(R.id.fragment_container, mFragment, null).
Like I said, the tabs and navigation all work great, but I can’t get styling elements to appear. I’m not giving up yet, but I’m curious as to whether the way I’m placing my fragments in my main activity is the cause of the missing style.
Dear Mark,
I want to talk one question with u,
how does set position ActionBar.NAVIGATION_MODE_TABS in the bottom?
sorry my english is poor…
thanks..
You can accomplish this using a split action bar: http://developer.android.com/guide/topics/ui/actionbar.html#SplitBar.
The action goes at the bottom, but is it possible to put the tabs at the bottom?