
JUnit 5 was formally released in July 2016 and is quite a major evolution to JUnit 4 which has been the standard unit testing framework since Android first appeared on the scene. There are some quite significant changes and getting things set up, and then getting the best out of JUnit 5 can require a little effort, but the results are well worth it. In this loosely-coupled series we’ll explore a few distinct aspects of JUnit 5 and look at how we can get the best out of it. In this article we’ll look at some of the fundamentals, and how to get JUnit 5 working for an Android project.
![]() One of the first major differences with JUnit 5 is that it consists of a number of discrete components. JUnit Platform is a foundation layer which enables different testing frameworks to be launched on the JVM. Junit Jupiter is a TestEngine implementation which encapsulates the programming and extension models which define JUnit 5 tests – in other words it is the JUnit 5 test framework which is launched by JUnit Platform. Finally there is JUnit Vintage which is a legacy TestEngine which runs older tests – it’s a test framework which will run all of your existing JUnit 4 tests. It is the combination of these three components which comprise JUnit 5 – and it should be obvious that although there are some major architectural changes from JUnit 4 there is full legacy support built in.
One of the first major differences with JUnit 5 is that it consists of a number of discrete components. JUnit Platform is a foundation layer which enables different testing frameworks to be launched on the JVM. Junit Jupiter is a TestEngine implementation which encapsulates the programming and extension models which define JUnit 5 tests – in other words it is the JUnit 5 test framework which is launched by JUnit Platform. Finally there is JUnit Vintage which is a legacy TestEngine which runs older tests – it’s a test framework which will run all of your existing JUnit 4 tests. It is the combination of these three components which comprise JUnit 5 – and it should be obvious that although there are some major architectural changes from JUnit 4 there is full legacy support built in.
The obvious place to start is by reading the official documentation and section 4.2.1 contains details of how to configure a Gradle build for JUnit 5. However, if we follow the instructions and add the JUnit 5 Gradle plugin to our build it fails:
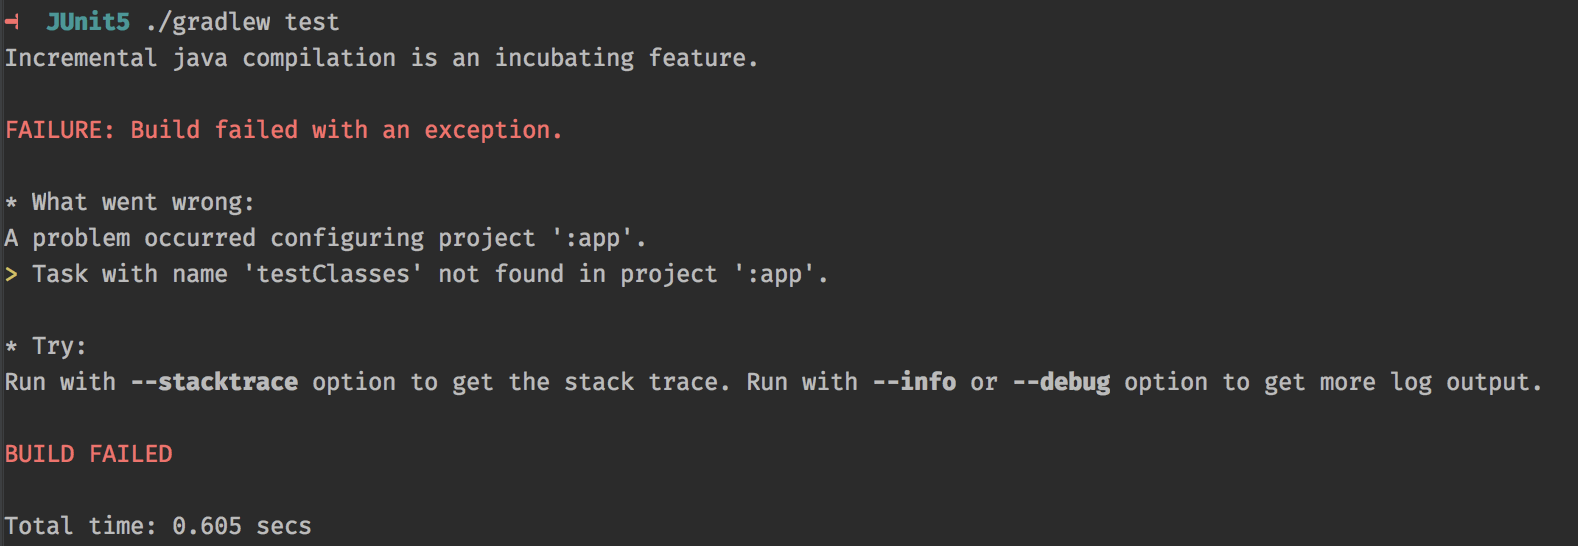
The reason for this is that the JUnit 5 Gradle plugin is designed to work with the standard Java Gradle plugin which defines a different hierarchy of Gradle tasks to the Android Gradle plugin. If we had a pure Java module within our project then this would work perfectly well, but if we want to run unit tests in an Android project it poses a problem. In this case it is trying to attach its own tasks to the testClasses test of the Java Gradle Plugin, but the Android Gradle plugin does not have this task hence the failure. So what we actually need is a different JUnit 5 Gradle plugin which will attach to the Android Gradle plugin tasks instead. Fortunately Marcel Schnelle has done precisely that.
To use Marcel’s plugin we must first remove the stuff that we just added and add the android-junit5 plugin as a buildscript dependency:
// Top-level build file where you can add configuration options common to all sub-projects/modules.

buildscript {
    repositories {
        jcenter()
    }
    dependencies {
        classpath 'com.android.tools.build:gradle:2.2.3'
        classpath 'de.mannodermaus.gradle.plugins:android-junit5:1.0.0-M2'

        // NOTE: Do not place your application dependencies here; they belong
        // in the individual module build.gradle files
    }
}

allprojects {
    repositories {
        jcenter()
    }
}

task clean(type: Delete) {
    delete rootProject.buildDir
}
Next we need to run the plugin as part of the build and add the necessary configuration and dependencies to our app build.gradle:
apply plugin: 'com.android.application'
apply plugin: 'de.mannodermaus.android-junit5'

android {
    compileSdkVersion 25
    buildToolsVersion "25.0.2"
    defaultConfig {
        applicationId "com.stylingandroid.junit5"
        minSdkVersion 23
        targetSdkVersion 25
        versionCode 1
        versionName "1.0"
        testInstrumentationRunner "android.support.test.runner.AndroidJUnitRunner"
    }
    buildTypes {
        release {
            minifyEnabled false
            proguardFiles getDefaultProguardFile('proguard-android.txt'), 'proguard-rules.pro'
        }
    }
}

junitPlatform {
    jupiterVersion '5.0.0-M3'
    platformVersion '1.0.0-M3'
}

dependencies {
    compile 'com.android.support:appcompat-v7:25.1.1'
    testCompile 'junit:junit:4.12'
    testCompile junitJupiter()
    testCompile 'org.assertj:assertj-core:3.6.2'
}
The junitPlatform extension allows us to specify which versions of JUnit Platform and Jupiter we wish to use. There is one small problem here, though. At the time of writing the latest version of JUnit 5 consists of Platform version “1.0.0-M3”, Jupiter “5.0.0-M3” snd Vintage “4.12.0-M3”, yet we are using the M2 variants here, instead. This is because there are some changes in M3 which are not yet supported by Marcel’s plugin as discussed here). That said M2 is more than adequate for our needs, and Marcel is working on an update. The plugin now fully supports the M3 variants, so the code has been updated accordingly.
The other thing worth noting is that we still include a dependency on JUnit 4.12. This is because the test runner in Android Studio will fail without it because it lacks some dependencies. This is a somewhat hacky fix as will be revealed shortly – when we’ll introduce a much better fix.
I also added a dependency on AssertJ because I happen to rather like it.
So let’s add a very simple JUnit 5 unit test. The code that we’re going to test is some logic within a really simple calculator app. This has been written purely as a really lightweight vehicle to carry some easily unit testable code. The UX is both clunky and fugly – don’t hate me for it!
Let’s start with the “hello world” equivalent of a unit test: testing that true is, if fact, true:
package com.stylingandroid.junit5;

import org.junit.jupiter.api.Test;

import static org.assertj.core.api.Java6Assertions.assertThat;

public class CalculatorJUnit5Test {

    @Test
    public void test() {
        assertThat(true).isTrue();
    }
}
The test itself is pretty straightforward and looks pretty much identical to a JUnit 4 test, but there is a subtle difference – the highlighted line. The import that we use for the @Test annotation needs to be the one from the Jupiter API and that is essentially what defines this as a JUnit 5 test which will be executed within the Jupiter test runner.
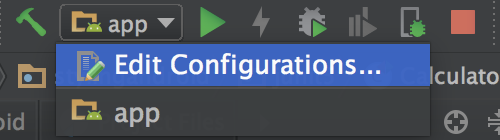
Now we can set up our unit test runner in Android Studio. We select Edit configurations from the dropdown in the build toolbar:
Then we create a new Android JUnit configuration:

If we run this we can see our test runs and passes:

So what if we have legacy tests? Let’s add a JUnit 4 test (Note the different import for the @Test annotation):
package com.stylingandroid.junit5;

import org.junit.Test;

import static org.assertj.core.api.Java6Assertions.assertThat;

public class CalculatorJUnit4Test {

    @Test
    public void test() {
        assertThat(true).isTrue();
    }
}
If we run this we can see it is run by the Vintage test runner instead:

The only problem arises if we now run this from a Gradle command line:
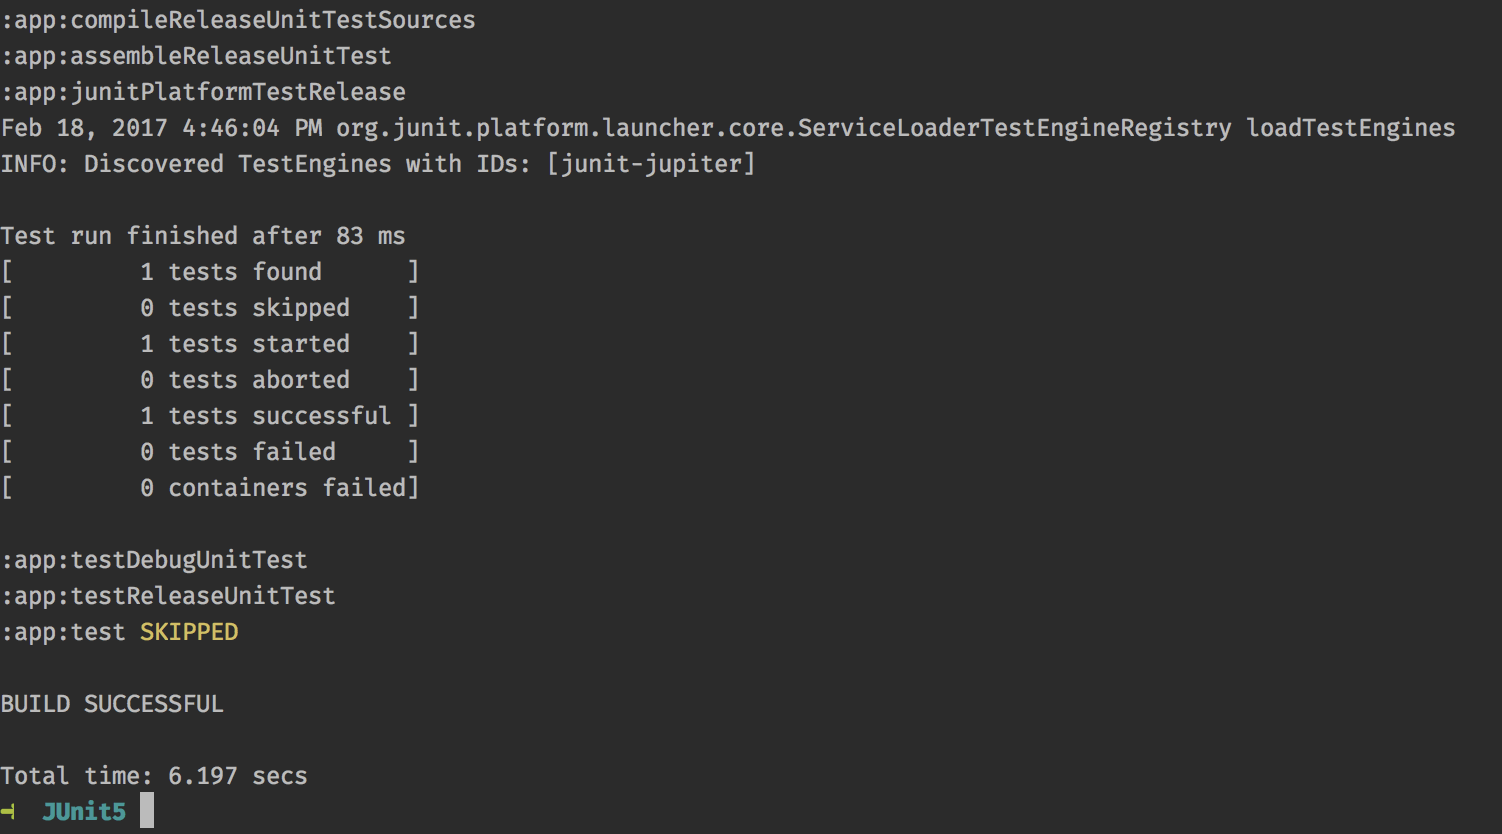
The test report shows that only one test was run, but we have two. The clue to the cause is that only the junit-jupiter test engine was discovered. Android Studio (or, more correctly IntelliJ IDEA upon which Android Studio is based) automatically included the junit-vintage test runner, but and the android-junit5 Gradle plugin does not automatically add it to the dependencies. However it is simple enough to add, and we can now remove that hacky junit 4.12 dependency as well:
.
.
.
dependencies {
    compile 'com.android.support:appcompat-v7:25.1.1'
    testCompile junitJupiter()
    testProvided "org.junit.vintage:junit-vintage-engine:4.12.0-M3"
    testCompile 'org.assertj:assertj-core:3.6.2'
}
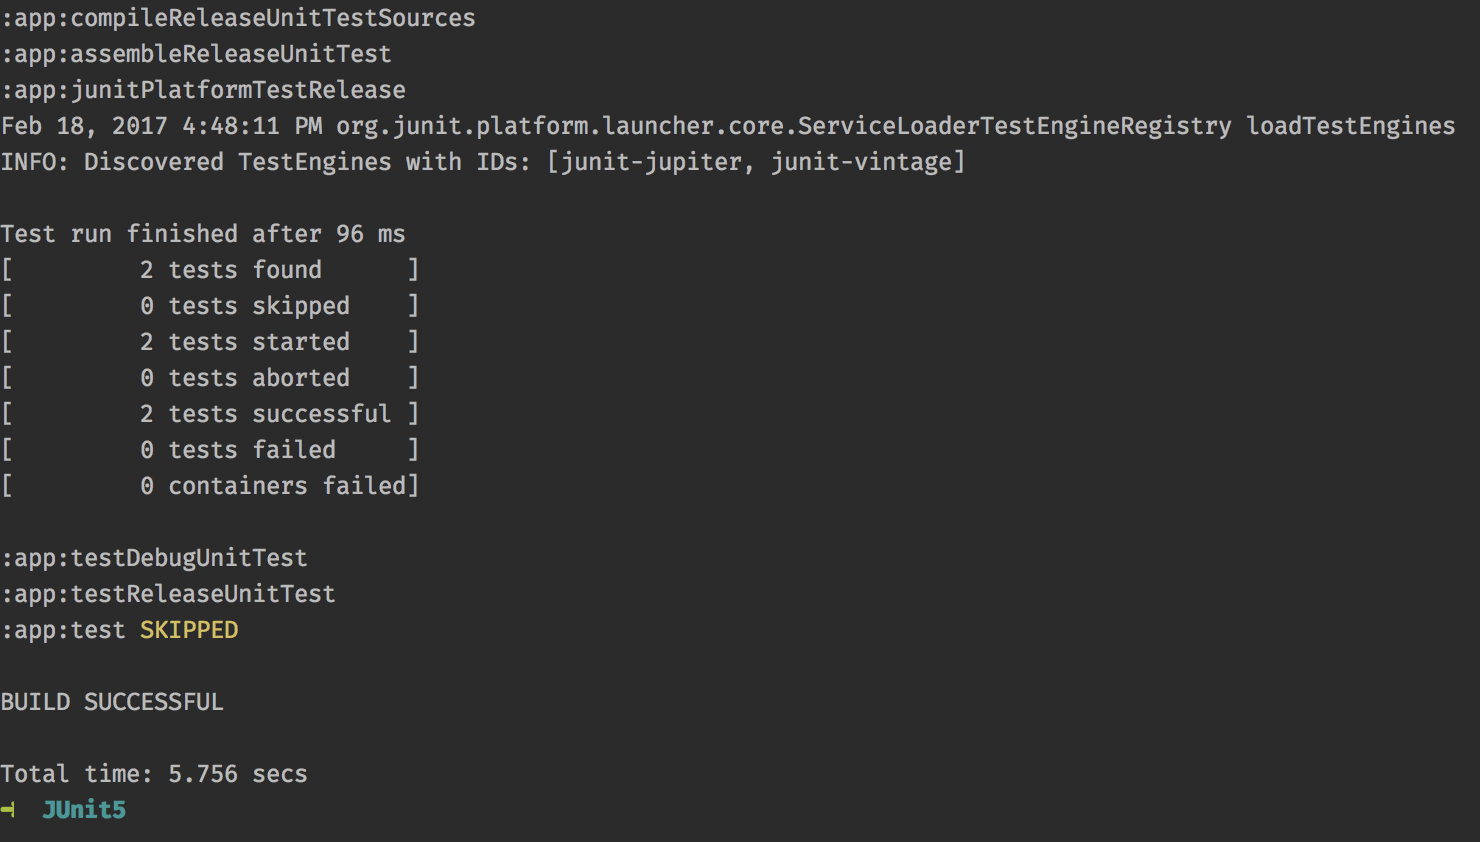
This still works as before when running it within Android Studio, and when we run it from the command line we can see that junit-vintage is now found and both tests are run:
So that’s the basics of the differences in running tests in JUnit 5 and integrating it with our Android builds. In the next article in this series we’ll turn our attention to some of the new feature that JUnit 5 offers us.
The source code for this article can be found here.
© 2017, Mark Allison. All rights reserved.
Copyright © 2017 Styling Android. All Rights Reserved.
Information about how to reuse or republish this work may be available at http://blog.stylingandroid.com/license-information.

The Android Gradle plugin has been updated to M3. To get it to work I needed to add “testCompile ‘org.junit.platform:junit-platform-launcher:1.0.0-M3′” to the dependencies because Android Studio includes the M2 platform launcher.
Yup, tests were not found till I added this dependency. Also the buildscript classpath needs to be udpated from M2 -> M3.
I see your point on using Junit 5 to replace Junit 4. However, this will break instrumented Espresso tests in Android Studio. Junit 5 is not ready for Espresso.