The Material Design Components library is a really nice thing. It has some widgets which make implementing Material Design really easy. Back in February 2020 version 1.2.0-alpha05 introduced Material Transitions and Motion. In this series we’ll look at the different transitions, and explore how and, perhaps more importantly, when to use them.
Overview

Shared Axis transitions are transitions between distinct layouts of Fragments with a directional components. The animation is a fade combined with a translation in a given direction. The translation axis can vary depending on the context – we’ll look at this shortly.
The first 100ms of the transition is the fade out of the outgoing layout. The incoming layout then fades in over 200ms. Both layouts are translated by 30dp over 300ms in parallel with this. The outgoing layout is translated from its normal position; and the incoming layout is translated to its normal position.
Usage
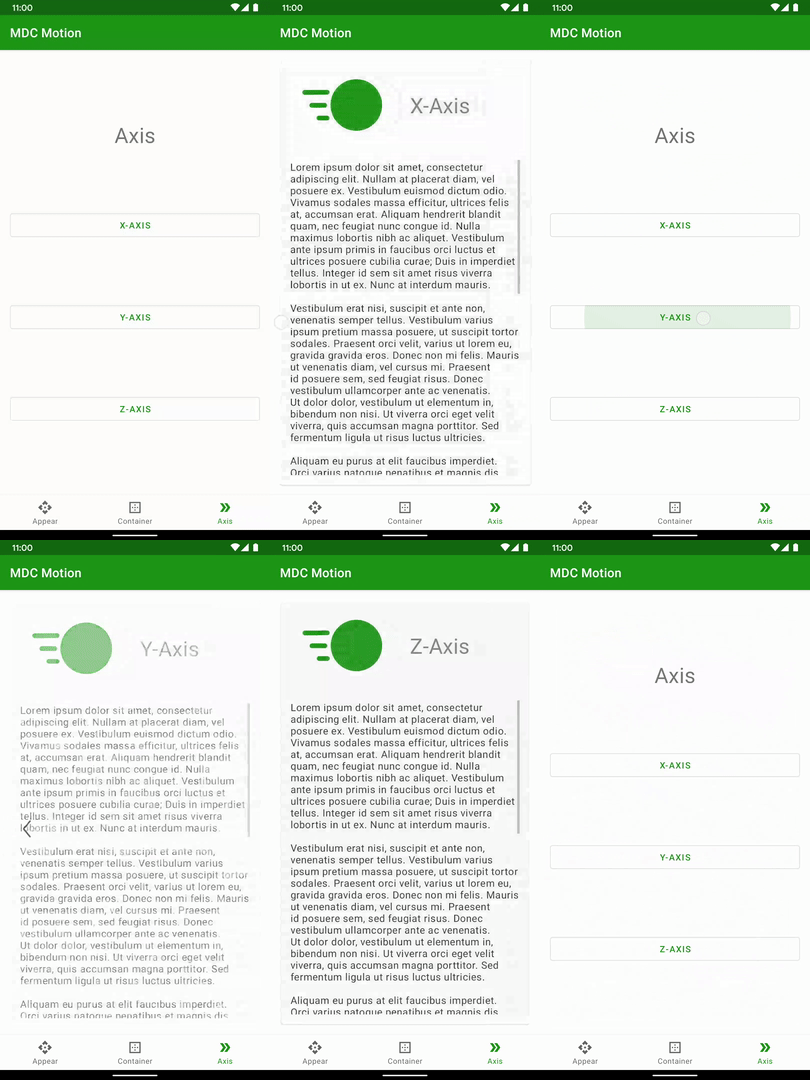
These translations suit layouts which have a directional relationship. If there is a horizontal navigation control then an X-axis transition will tie in with this. Similarly a Y-axis transition will reinforce vertical navigation. We can use a Z-axis transition to give the impression of the content moving toward or away from the user.
Clearly the axis that we need to transition will depend on the overall UI. The official documentation has some excellent examples.
Sample Code
These transitions are very easy to implement, and allow us to specify the axis. Here we have a layout containing three buttons, and we’ll wire each one up using a different axis:
@AndroidEntryPoint
class AxisFragment : Fragment() {

    private lateinit var binding: FragmentAxisBinding

    override fun onCreate(savedInstanceState: Bundle?) {
        super.onCreate(savedInstanceState)

        enterTransition = MaterialFadeThrough()
        exitTransition = MaterialFadeThrough()
    }

    override fun onCreateView(
        inflater: LayoutInflater,
        container: ViewGroup?,
        savedInstanceState: Bundle?
    ): View? {
        binding = FragmentAxisBinding.inflate(inflater, container, false)
        binding.xAxisButtonButton.setOnClickListener {
            setupTransitions(MaterialSharedAxis.X)
            navigate(binding.xAxisButtonButton.text.toString(), MaterialSharedAxis.X)
        }
        binding.yAxisButtonButton.setOnClickListener {
            setupTransitions(MaterialSharedAxis.Y)
            navigate(binding.yAxisButtonButton.text.toString(), MaterialSharedAxis.Y)
        }
        binding.zAxisButtonButton.setOnClickListener {
            setupTransitions(MaterialSharedAxis.Z)
            navigate(binding.zAxisButtonButton.text.toString(), MaterialSharedAxis.Z)
        }
        return binding.root
    }

    private fun setupTransitions(axis: Int) {
        exitTransition = MaterialSharedAxis(axis, true)
        reenterTransition = MaterialSharedAxis(axis, false)
    }

    private fun navigate(text: String, axis: Int) {
        findNavController().navigate(
            AxisFragmentDirections.actionAxisFragmentToAxisDestinationFragment(
                text,
                axis
            )
        )
    }
}
The setupTransitions() method does the work. It sets the exitTransition and reenterTransition to a MaterialSharedAxis transition. The first argument of this specifies the axis of the transition. The second argument is a boolean which controls whether the transition is performed forwards or backwards. The exitTransition is played forwards, and the reenterTransition is played backwards. This gives a nice symmetrical flow when leaving and then returning to this Fragment.
There is a slight complication because I have chosen to use the same destination Fragment for each of the transitions. Normally we can just use the same Axis in both Fragments. However, this can make the code more difficult to maintain. This is because we must remember to change both if we need to alter the axis. For the requirements here, the axis differs for each button so we need to pass the axis to the destination Fragment.
I have chosen to use the SafeArgs library to pas the axis through the navigation action.
@AndroidEntryPoint
class AxisDestinationFragment : Fragment() {

    private lateinit var binding: FragmentContentBinding
    private val args: AxisDestinationFragmentArgs by navArgs()

    override fun onCreate(savedInstanceState: Bundle?) {
        super.onCreate(savedInstanceState)

        enterTransition = MaterialSharedAxis(args.axis, true)
        returnTransition = MaterialSharedAxis(args.axis, false)
    }

    override fun onCreateView(
        inflater: LayoutInflater,
        container: ViewGroup?,
        savedInstanceState: Bundle?
    ): View? {
        binding = FragmentContentBinding.inflate(inflater, container, false)
        binding.textView.text = args.title
        return binding.root
    }
}
We get our arguments from navArgs(). Then we use the axis from this to set the enterTransition and returnTransition. As before we use different directions for these so that the transition reverses when we return to the original Fragment.
Using the Jetpack Navigation library really simplifies the passing of the axis here!
If we run this we can see the three distinct transitions for the separate axes:

Conclusion
As with other Material transitions these are fairly subtle. However they give a sense of fluidity which, when they match navigational or spatial aspects of the layout. That said, they are pretty easy to implement so it is well worth using them where appropriate.
The source code for this article is available here.
© 2020, Mark Allison. All rights reserved.
Copyright © 2020 Styling Android. All Rights Reserved.
Information about how to reuse or republish this work may be available at http://blog.stylingandroid.com/license-information.
